Slow Cooker Chicken Pot Pie with Flaky Biscuits
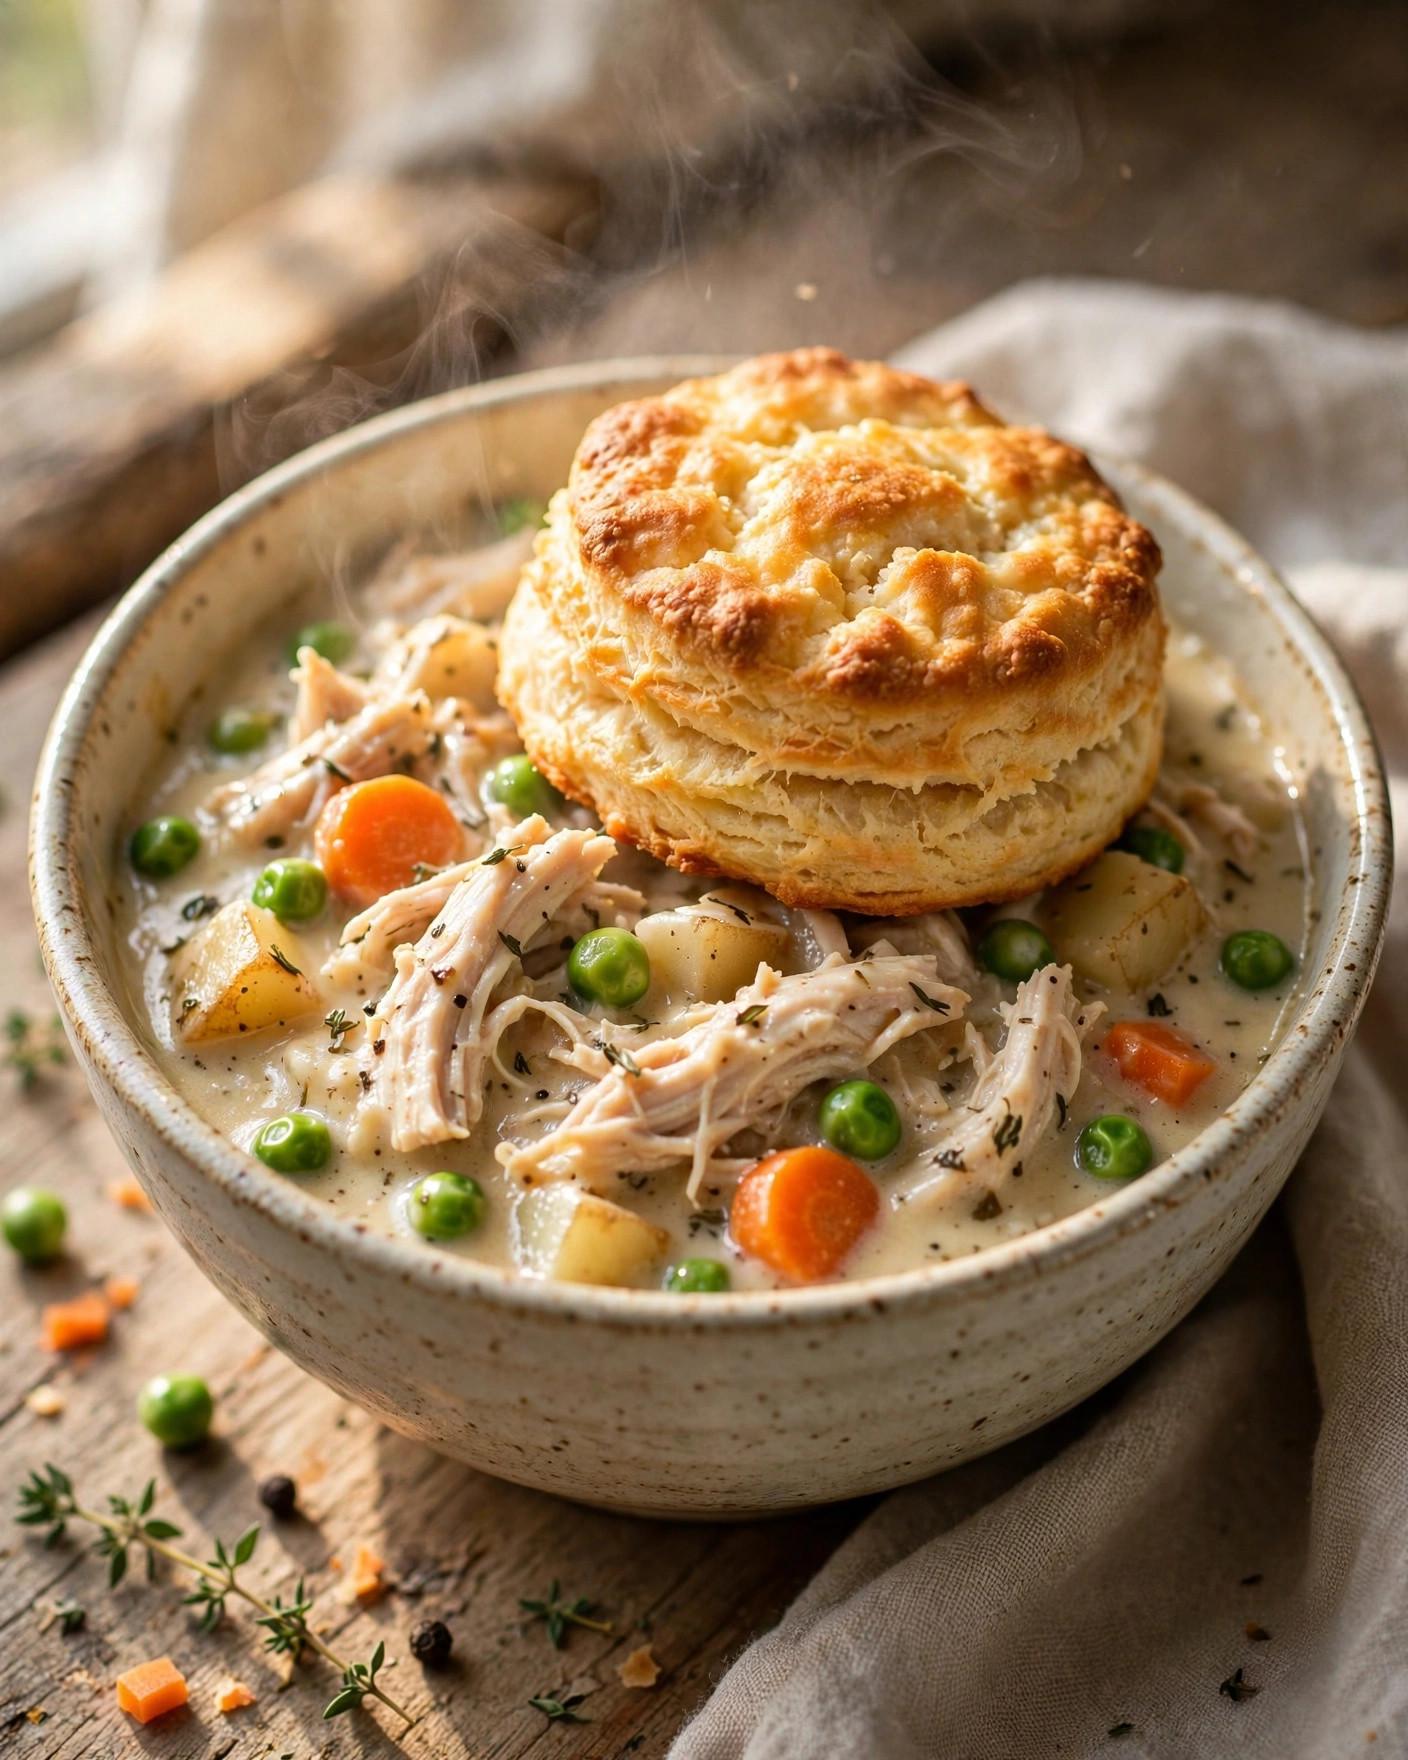
There are dinners that warm the whole house before anyone even sits down, and Slow Cooker Chicken Pot Pie is right at the top of that list. Tender chicken, sweet carrots, earthy potatoes, celery, and peas all simmer slowly together until the broth turns silky and the vegetables are soft enough to cut with a spoon. Then comes the best part: a golden, flaky biscuit, baked until crisp on top and tender inside, set right over each bowl of steaming filling so you can break it open and let it soak up the creamy sauce. It is the comfort of a classic pot pie, without standing over the stove or wrestling with a pie crust on a busy day.
What makes this version so weeknight-friendly is how the work divides itself. The slow cooker does the long, gentle cooking while you get on with your day, and the biscuits bake separately in the oven at the end. Baking the biscuits on their own is a deliberate choice, not a shortcut. Biscuits cooked on top of a slow cooker filling often stay pale and gummy underneath, because the cooker traps steam. Baked in a hot oven, they rise tall, turn properly golden, and keep their flaky layers — and because they are served on top, every bowl still gets that beloved pot pie moment of biscuit meeting creamy filling.
The filling itself is everything you want from pot pie: savory and herby, rich but not heavy, with thyme, a bay leaf, and poultry seasoning giving it that familiar, nostalgic flavor. Heavy cream stirred in at the end makes the sauce glossy, frozen peas add sweetness and color, and a cornstarch slurry gives the filling body so it clings to the chicken instead of pooling in the bowl. Nothing here is fussy, and almost everything is a pantry staple.
If you are new to slow cooking, this is a reassuring recipe to start with. The vegetables go in first so they cook evenly, the chicken rests on top so it stays moist, and the finish — shredding, stirring, and baking biscuits — takes about half an hour of easy, active time. By suppertime you have a complete, cozy meal in a bowl, with very little washing up.
Why You'll Love This Recipe
- The slow cooker does the hard work. After about 20 minutes of chopping and loading, the cooker quietly turns chicken and sturdy vegetables into a rich, tender filling while you are free to do everything else.
- Properly golden, flaky biscuits. Because the biscuits are baked separately in the oven and served on top, they are crisp and golden outside with soft, layered centers — never soggy or undercooked underneath.
- Classic pot pie flavor, no pie crust to roll. You get all the creamy, herby comfort of a traditional chicken pot pie without chilling, rolling, or crimping pastry, which makes this version far more approachable on a weeknight.
- A complete meal in one bowl. Chicken, potatoes, carrots, celery, peas, and biscuit cover protein, vegetables, and something hearty to soak up the sauce — no parade of side dishes needed.
- Gentle, reliable timing. The filling holds on warm once finished, the chicken cooks to a clear 165°F (74°C), and the biscuits bake in about 15 minutes, so dinner comes together calmly.
- Wonderful leftovers. The filling reheats smoothly, the flavors deepen overnight, and biscuits on top make the second serving taste brand-new.

Ingredients
For the slow cooker filling
- 2 pounds (900 g) boneless, skinless chicken breasts, or a mix of breasts and boneless, skinless thighs
- 1 teaspoon fine sea salt, plus more to taste
- 1/2 teaspoon black pepper, freshly ground if possible, plus more to taste
- 1 teaspoon garlic powder
- 1 teaspoon dried thyme, or 1 tablespoon fresh thyme leaves
- 1 teaspoon poultry seasoning
- 1/2 teaspoon sweet paprika
- 2 tablespoons unsalted butter, cut into small pieces, or 2 tablespoons olive oil
- 1 medium yellow onion (about 1 1/2 cups / 225 g), diced
- 3 medium carrots (about 1 1/2 cups / 195 g), peeled and sliced into 1/2-inch (1.25 cm) rounds
- 3 celery stalks (about 1 1/4 cups / 150 g), sliced 1/2 inch (1.25 cm) thick
- 1 pound (450 g) Yukon Gold potatoes, scrubbed and cut into 3/4-inch (2 cm) cubes
- 4 cloves garlic, minced (about 1 1/2 tablespoons)
- 1 bay leaf
- 2 1/2 cups (600 ml) low-sodium chicken broth
- 3 tablespoons cornstarch
- 3 tablespoons cold water
- 3/4 cup (180 ml) heavy cream, plus more if needed
- 1 1/2 cups (210 g) frozen peas, no need to thaw
- 1 cup (140 g) frozen corn kernels, optional
- 2 tablespoons fresh parsley, chopped, plus more for serving
For the biscuit topping
- 2 cups (250 g) all-purpose flour, plus more for dusting
- 1 tablespoon baking powder
- 1 teaspoon granulated sugar
- 1 teaspoon fine sea salt
- 6 tablespoons (85 g) cold unsalted butter, cut into small cubes
- 3/4 cup (180 ml) cold milk or buttermilk, plus 1 tablespoon more for brushing
- 1/2 teaspoon garlic powder, optional
- Flaky sea salt, optional, for the tops
Why these ingredients matter
Chicken breasts or thighs. Boneless, skinless chicken is the heart of this pot pie, and both cuts work beautifully in the slow cooker. Breasts shred into long, neat strands and keep the filling classic and lean, while thighs stay especially moist and add a slightly richer flavor. What matters most is total weight — about 2 pounds (900 g) — and cooking until the chicken shreds easily and reads 165°F (74°C) in the thickest part.
Salt, pepper, garlic powder, thyme, poultry seasoning, and paprika. This blend seasons the chicken directly and perfumes the whole cooker as it warms. Thyme is the signature pot pie herb, poultry seasoning brings familiar sage-and-marjoram warmth, garlic powder clings to the chicken and deepens as it cooks, and paprika adds gentle color and sweetness rather than heat. Season at the start, then taste and adjust at the end, so the filling tastes seasoned all the way through.
Butter. A little butter dotted over the vegetables adds richness from the start and rounds out the broth as the filling cooks. Two tablespoons across six servings will not make the dish greasy, but it gives the sauce a homemade depth broth alone cannot reach. Olive oil works in its place if you prefer.
Onion, carrots, and celery. This classic trio is the flavor foundation of pot pie. Onion softens and sweetens over the long cook, carrots bring earthy sweetness and color, and celery adds a savory backbone that keeps the filling from tasting flat. Cut them in generous pieces, as listed, so they hold their shape instead of dissolving into the sauce.
Yukon Gold potatoes. Potatoes make the filling hearty enough to stand as a full meal, and Yukon Golds hold their cubes while turning creamy at the edges, which also helps the sauce feel naturally thicker. Russets can be used, but they break down more and give a looser, stew-like filling. Keep the cubes around 3/4 inch (2 cm) so they cook through with the carrots.
Garlic and bay leaf. Fresh garlic mellows during the slow cook into a sweet, savory background note. The bay leaf adds a subtle depth that makes the broth taste like it simmered on the stove all afternoon. Remember to fish it out before serving — it has done its job by then.
Low-sodium chicken broth. Broth is the cooking liquid and the base of the sauce, so its flavor matters. A good low-sodium broth lets the chicken, herbs, and vegetables lead, and leaves you in control of the final salt level. The amount is deliberate: enough to cook the vegetables and poach the chicken, but not so much that the filling turns into soup.
Cornstarch and cold water. This simple slurry transforms brothy cooking liquid into a proper pot pie sauce. It is stirred in near the end, once the chicken comes out, and thickens as the filling returns to a simmer on high. Making it with cold water is essential — cornstarch stirred straight into hot liquid clumps — and thickening at the end lets you judge the consistency before serving.
Heavy cream. Cream is added in the final stretch so it stays fresh-tasting and silky rather than cooking for hours. It gives the sauce its pale, glossy finish, softens the herbs, and makes the filling feel like true comfort food. Add it with the slurry, stir gently, and keep the cooker on high just long enough for everything to come together.
Frozen peas and corn. Peas are stirred in at the end for good reason: added at the start, they would turn dull and mushy over hours of cooking. Added late, they stay bright, sweet, and pleasantly firm, and warm through within minutes. Corn is optional but welcome, bringing bursts of sweetness that suit the creamy sauce. Both go in straight from frozen.
Flour, baking powder, and cold butter for the biscuits. These three are the structure of a good biscuit. Flour gives body, a full tablespoon of baking powder gives lift, and very cold butter — cut in until the mixture looks like coarse crumbs — creates the flaky layers in the hot oven. The small amount of sugar does not make the biscuits sweet; it simply encourages golden tops.
Milk or buttermilk. Cold milk brings the biscuit dough together into something soft and slightly sticky that is easy to scoop or cut. Buttermilk adds a gentle tang and an even more tender crumb. Either works, so use what you have — you want a shaggy dough that just holds together, not a wet batter.
Instructions
- Prepare the vegetables and season the chicken. Scrub and cube the potatoes, peel and slice the carrots, slice the celery, dice the onion, and mince the garlic, keeping the pieces close to the sizes listed so everything cooks evenly. Pat the chicken dry on all sides with paper towels. In a small bowl, stir together the salt, black pepper, garlic powder, dried thyme, poultry seasoning, and paprika, then sprinkle the blend evenly over both sides of the chicken, pressing it lightly so it adheres. Set the chicken aside while you load the cooker.
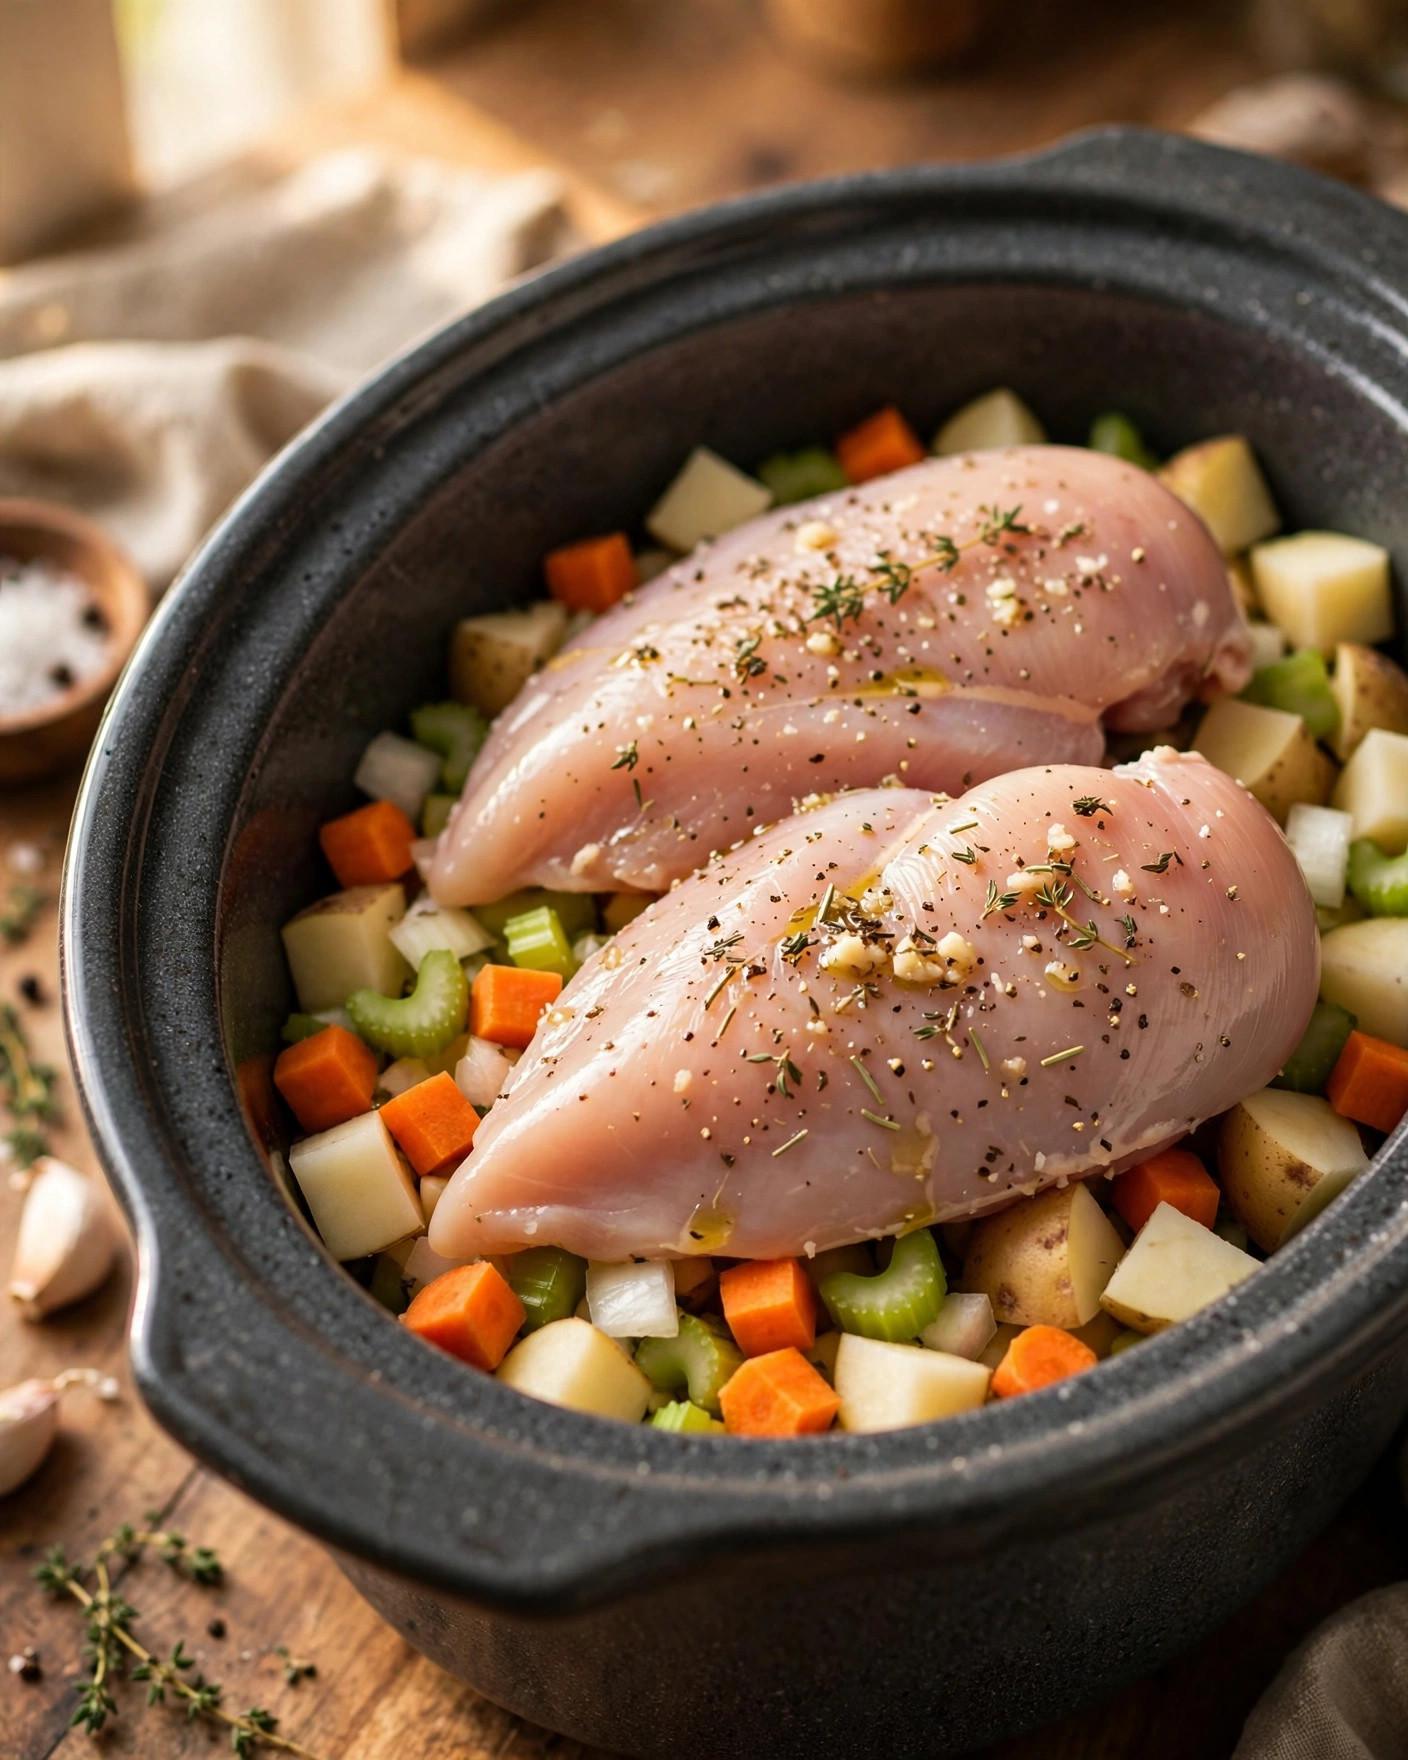
- Load the slow cooker with the vegetables first. Place the onion, carrots, celery, potatoes, and garlic in the bottom of a 6-quart (5.7 L) slow cooker and spread them into an even layer. Vegetables go in first on purpose: they sit in the broth, cook through gently, and benefit most from the long, moist heat at the bottom of the cooker. Dot the butter pieces over the vegetables, tuck in the bay leaf, and pour the chicken broth evenly over everything.
- Rest the chicken on top and cover. Lay the seasoned chicken in a single layer over the vegetables. It is fine if the pieces touch, but try not to stack them, so they cook at the same pace. Much of the chicken will sit above the broth rather than submerged, and that is exactly right — it will poach gently in the steam and its juices will drip down into the vegetables. Put the lid on securely and do not lift it during cooking, as each peek lets out heat and adds time.
- Cook until the chicken is tender and the vegetables are soft. Cook on LOW for 5 to 6 hours or on HIGH for 2 1/2 to 3 hours, until the potatoes and carrots are tender when pierced with a fork and the chicken is very tender. Check the chicken with an instant-read thermometer in the thickest part of the largest piece: it should read at least 165°F (74°C). If your cooker runs hot, begin checking toward the earlier end of the range; if it runs cool or your chicken pieces are very thick, use the longer end.
- Transfer the chicken and shred it. Using tongs, lift the chicken out onto a cutting board or into a wide, shallow bowl, leaving the vegetables and broth in the cooker. Fish out and discard the bay leaf. Let the chicken rest for about 5 minutes so it is comfortable to handle, then shred it with two forks into bite-size pieces — not too fine, as generous shreds give the filling its best texture. If any piece shows resistance, it simply needs a little more time; you can return it to the cooker for 20 to 30 minutes before shredding.
- Thicken the filling. In a small bowl, whisk the cornstarch and cold water together until completely smooth with no dry pockets. Switch the slow cooker to HIGH if it is not already there. Stir the slurry into the hot broth and vegetables, then stir in the heavy cream. Cover and cook for 20 to 30 minutes, stirring once halfway through, until the sauce has thickened enough to coat the back of a spoon and hold a brief line when you run a finger through it. It should look like a loose gravy at this stage — it will thicken a little more once the chicken returns and it stands.
- Return the chicken and stir in the peas. Add the shredded chicken, along with any juices from the board or bowl, back into the cooker. Stir in the frozen peas and the corn, if using, and the chopped parsley. Cover and cook on HIGH for 10 to 15 minutes more, just until the peas are bright green and warmed through and the filling is steaming hot and bubbling gently at the edges. Taste carefully and adjust the salt and black pepper. Switch the cooker to WARM while you bake the biscuits, so the filling stays hot without overcooking.
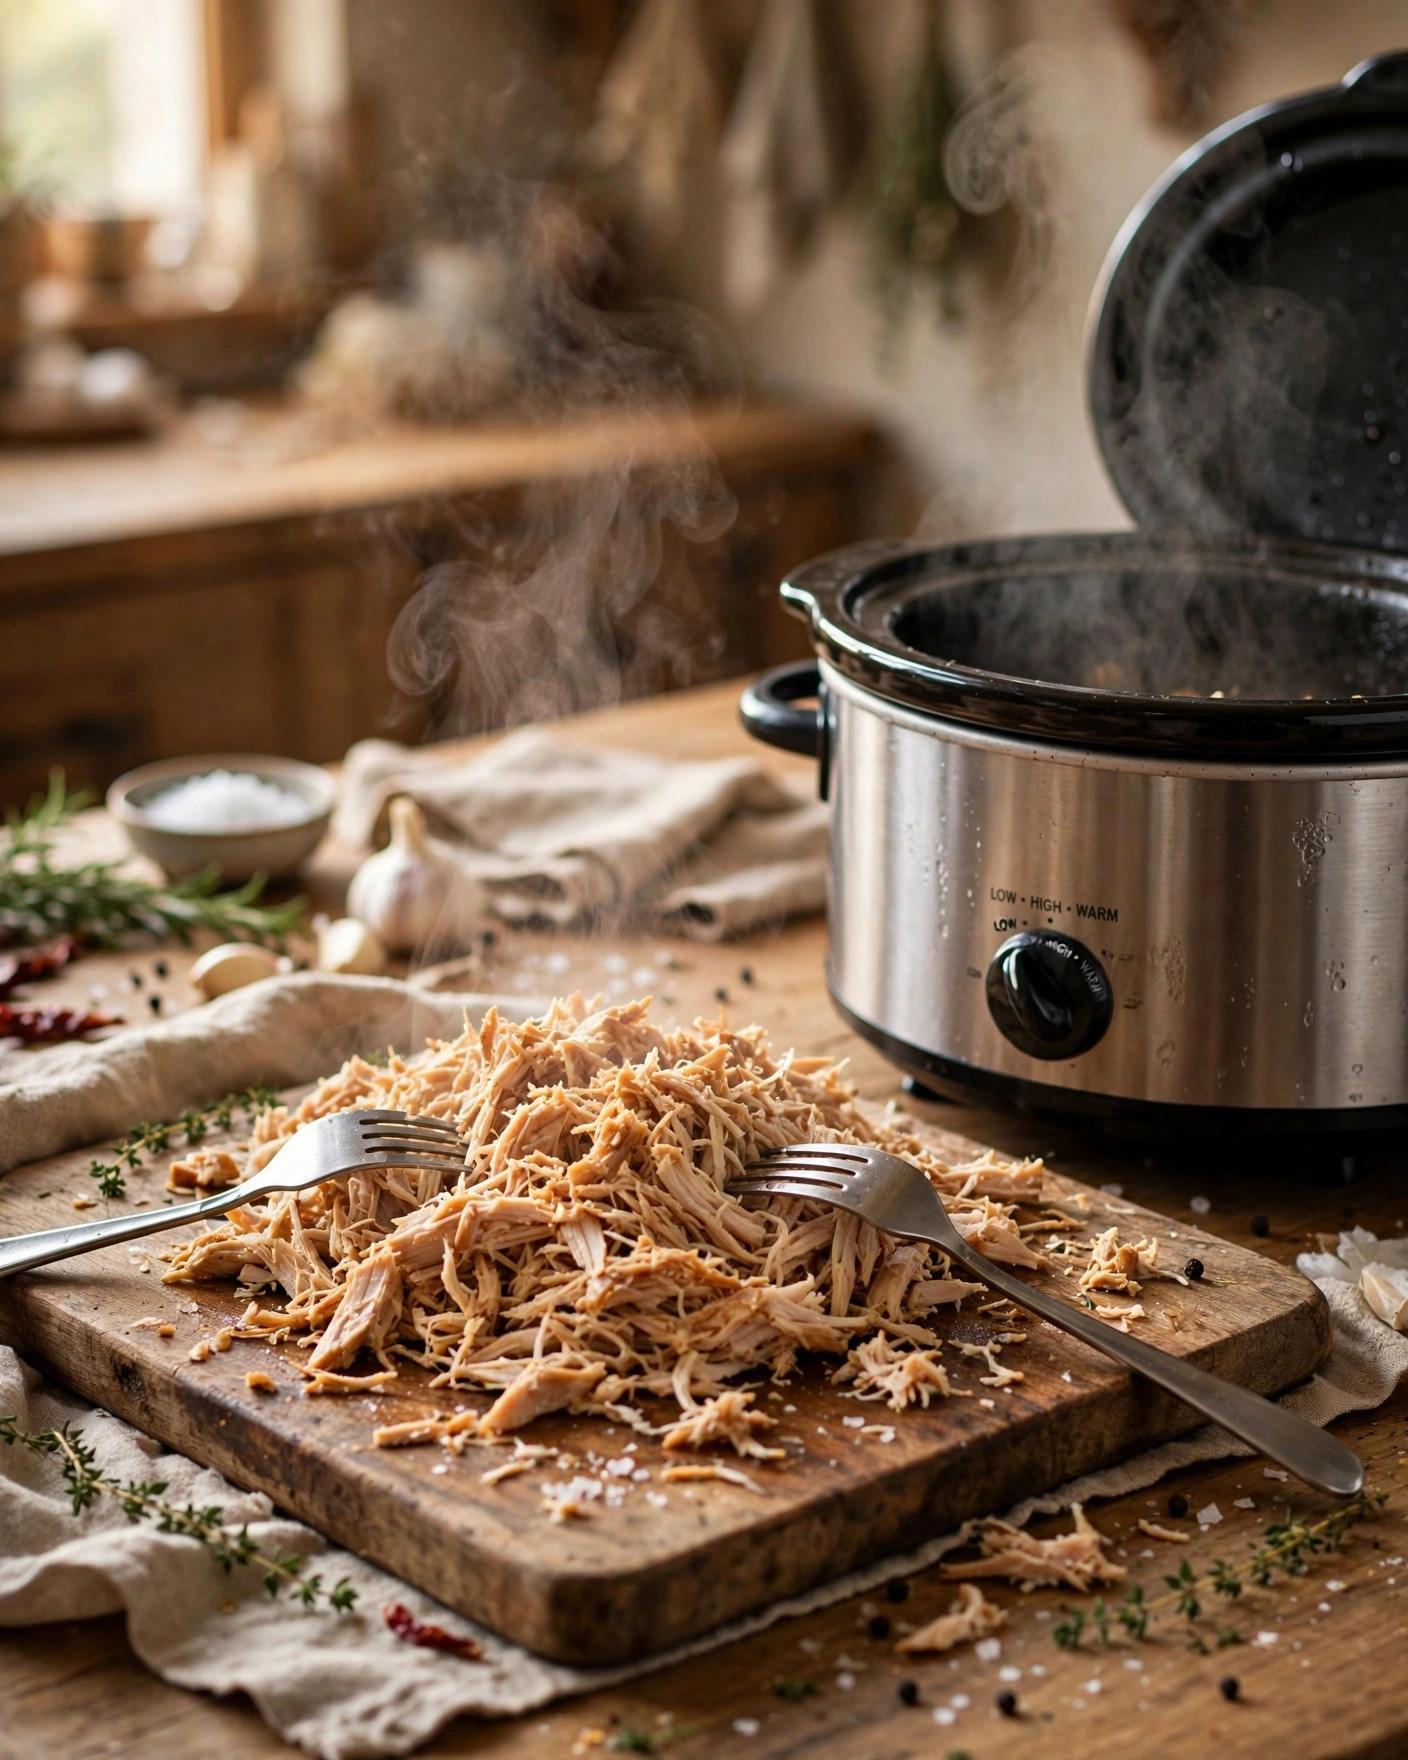
- Make the biscuit dough while the filling finishes. Heat the oven to 425°F (220°C) and line a baking sheet with parchment. In a large bowl, whisk together the flour, baking powder, sugar, salt, and garlic powder, if using. Cut in the cold butter with a pastry cutter or your fingertips until the mixture resembles coarse crumbs with some pea-size pieces still visible — those pieces create the flaky layers. Stir in the cold milk or buttermilk with a fork just until a shaggy dough forms. Do not overmix; a few rough edges are a good sign.
- Shape the biscuits. Turn the dough onto a lightly floured surface and pat it gently into a round about 1 inch (2.5 cm) thick, handling it as little as possible. Cut out 6 biscuits with a 3-inch (7.5 cm) cutter, pressing straight down without twisting so they rise evenly, and re-pat the scraps once if needed. Or skip the cutter and drop 6 generous mounds of dough onto the sheet with a large spoon — drop biscuits are just as delicious. Brush the tops lightly with the extra tablespoon of milk and sprinkle with flaky sea salt, if you like.
- Bake the biscuits until golden. Bake for 13 to 16 minutes, until the biscuits are tall, deeply golden on top, and firm at the sides, with no wet dough showing in the center split. If your oven browns unevenly, rotate the pan once halfway through. While the biscuits bake, give the filling a final stir and check that it is steaming hot throughout; the chicken should still read 165°F (74°C) when the filling is served. Let the biscuits rest on the pan for 2 to 3 minutes — they are at their flakiest warm, not scorching.
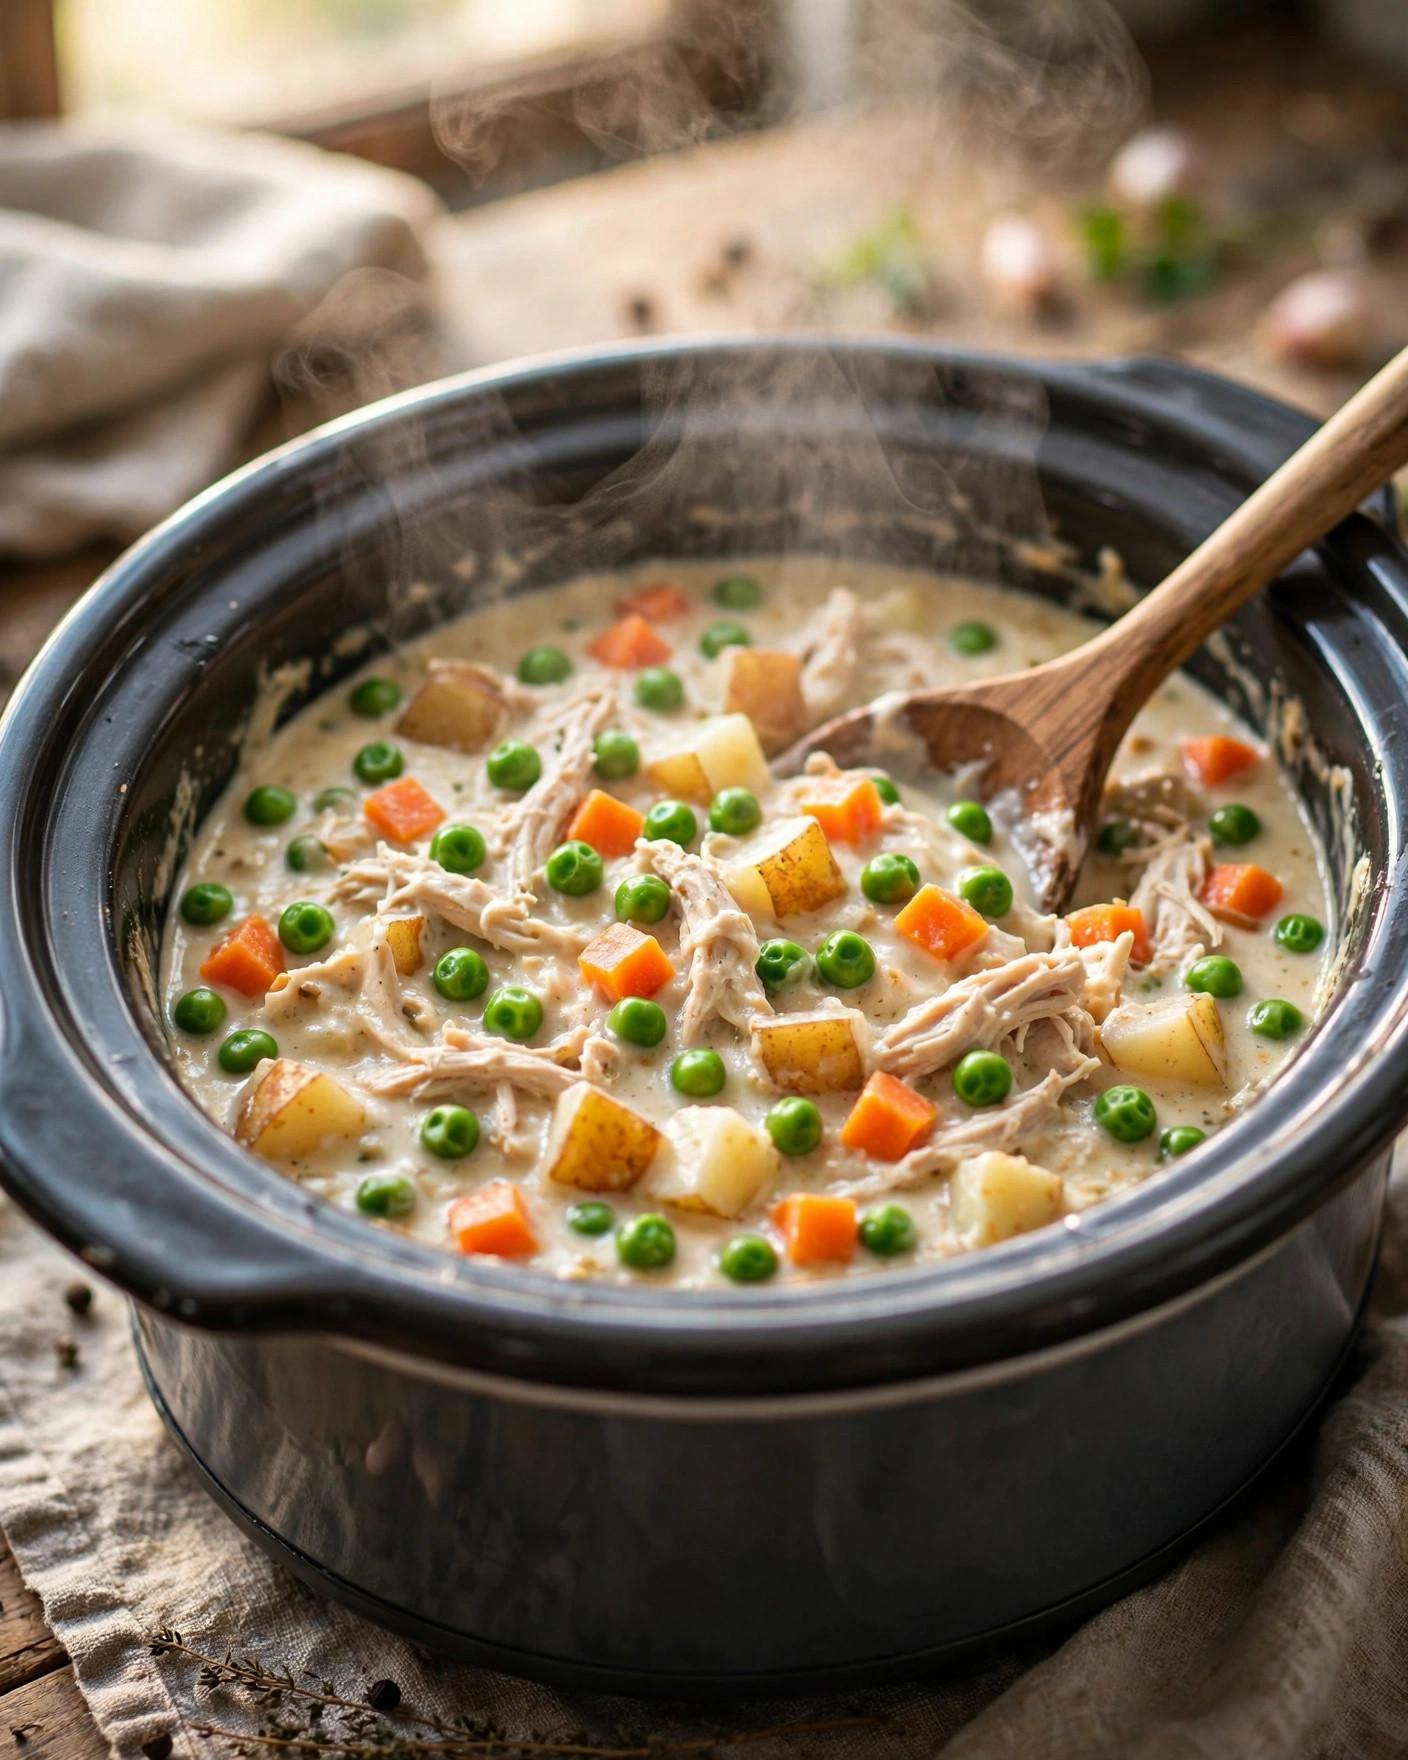
- Serve with a biscuit on every bowl. Ladle the hot filling generously into warm, shallow bowls, making sure each serving gets plenty of chicken, vegetables, and sauce. Split a warm biscuit if you like, or leave it whole, and set one biscuit on top of each bowl so it rests in the sauce. Scatter a little extra fresh parsley over the top for color and serve right away, with the remaining biscuits in a basket for anyone who wants to soak up every last spoonful of sauce.
Tips for Success
- Keep the vegetable pieces sturdy. Carrots sliced 1/2 inch (1.25 cm) thick and potatoes in 3/4-inch (2 cm) cubes survive the long cook with their shape intact. Dice everything too small and the filling loses its texture, turning soft and uniform instead of chunky and satisfying.
- Do not lift the lid while the filling cooks. Slow cookers lose a surprising amount of heat each time the lid comes off, and that lost heat can add 15 to 20 minutes to the cooking time. Trust the listed times, and do your checking near the end of the range rather than throughout.
- Thicken at the end, and judge the sauce warm. The cornstarch slurry only reaches its full thickening power once the filling simmers on high, and the sauce will set up slightly more as it stands in the bowl. Aim for a loose gravy in the cooker; if it ever looks thin, give it another 10 minutes on high with the lid on before adding more slurry.
- Keep the biscuit butter truly cold. Cold butter is the difference between a tall, layered biscuit and a flat, dense one. If your kitchen is warm, pop the cubed butter in the freezer for 10 minutes before you start, stir the dough together quickly, and get the pan into the hot oven without delay.
- Use the thermometer, not just tenderness. Shreddable chicken is a good sign, but temperature is the reliable test. Check the thickest piece before shredding and confirm the finished filling is steaming hot at serving, with the chicken at 165°F (74°C), especially if the filling waited on warm for a while.
- Hold the filling, bake the biscuits last. The finished filling keeps happily on warm for up to an hour, so you can time the biscuits to come out of the oven just as everyone sits down. Fresh, hot biscuits over hot filling is the whole experience.
Variations
- Shortcut refrigerated biscuits. On the busiest nights, skip the homemade dough and bake a tube of refrigerated flaky biscuits according to the package directions while the filling finishes. Serve them on top exactly as written. Choose plain or buttermilk biscuits rather than sweet or flavored ones, so they suit the savory filling.
- Cheddar and herb biscuits. Fold 3/4 cup (85 g) of shredded sharp cheddar and 2 tablespoons of chopped fresh chives or parsley into the biscuit dough just before adding the milk. The cheese melts into golden, lacy edges and the herbs echo the thyme in the filling. These biscuits are also excellent split and toasted for leftovers the next day.
- Turkey pot pie filling. Use 2 pounds (900 g) of boneless, skinless turkey breast or thigh in place of the chicken, cooked the same way until tender and at 165°F (74°C). This is also a wonderful home for holiday leftovers: skip the raw turkey entirely, add about 4 cups (560 g) of already-cooked shredded turkey in step 7 with the peas, and simply heat it through in the thickened sauce.
- Lighter, broth-forward filling. Replace the heavy cream with 3/4 cup (180 ml) of half-and-half stirred in off the long cook, and reduce the butter in the filling to 1 tablespoon. The sauce will be a little less rich and a touch thinner, so let the slurry work a few extra minutes. The flavor stays classic, and the dish feels a bit lighter for more frequent weeknight rotation.
- Extra vegetables. Stir 8 ounces (225 g) of sliced mushrooms, sautéed until golden, into the finished filling with the peas, or add 1 cup (130 g) of cut green beans (1-inch / 2.5 cm pieces) with the other vegetables at the start. Pearl onions, about 1 cup (150 g), are a traditional addition and can replace half the diced onion.
- Herb and lemon finish. For a brighter bowl, stir the zest of 1 lemon and an extra tablespoon of fresh parsley into the filling just before serving, and swap the thyme for fresh rosemary (1 teaspoon, finely chopped) if your household loves it. The lemon does not make the filling taste citrusy — it simply lifts the cream and herbs so each bite tastes fresh.
Storage
Let leftover filling cool until it is no longer steaming, then transfer it to an airtight container and refrigerate promptly. Store the biscuits separately, at room temperature for the first day and in the refrigerator after that; biscuits stored in the filling turn soft and lose everything that makes them good. The filling keeps for up to 3 to 4 days, and its flavor deepens by the second day as the herbs settle into the sauce.
To reheat the filling, spoon it into a saucepan with a splash of broth or milk — about 1 to 2 tablespoons per serving — and warm it over medium-low heat, stirring often, until it is steaming hot throughout and the chicken reads 165°F (74°C). A microwave also works for single bowls: heat at medium power in short intervals, stirring between each, and add that same splash of liquid if the sauce looks tight. Refresh the biscuits in a 350°F (175°C) oven for 5 to 8 minutes, or in a toaster oven, until the tops are crisp again, then serve them on top of the hot filling as before.
The filling freezes very well, which makes this a smart recipe to double. Cool it completely, pack it into freezer-safe containers leaving a little headspace, and freeze for up to 3 months. Thaw overnight in the refrigerator, then reheat gently as above. Freeze the filling without biscuits and bake a fresh batch when you serve it — biscuits are best straight from the oven, and a fresh batch takes only about 15 minutes.
FAQ
Can I use chicken thighs or frozen chicken in Slow Cooker Chicken Pot Pie? Yes to thighs — boneless, skinless thighs are excellent here, stay very moist, and can replace some or all of the breasts at the same weight and timing. For frozen chicken, it is safest to thaw it first in the refrigerator overnight. Frozen chicken spends too long in the temperature range where bacteria grow as a slow cooker warms up, so always start with thawed chicken, cook it until tender, and confirm 165°F (74°C) in the thickest piece before shredding.
Why are the biscuits baked separately instead of on top of the filling in the slow cooker? In this recipe the biscuits are baked separately on purpose, then served on top of each bowl. A slow cooker traps steam under its lid, so dough placed on the filling tends to stay pale, dense, and gummy on the underside even when it looks done. A hot oven gives the biscuits a proper rise, golden tops, and flaky layers, and serving them over the hot filling still gives you the classic pot pie experience of biscuit soaking up creamy sauce.
What can I do if my pot pie filling is too thin? Give it time first: the filling must come back to a simmer on HIGH after the slurry goes in, and it will also thicken slightly as it stands. If it is still thinner than you like after 30 minutes, whisk 1 more tablespoon of cornstarch with 1 tablespoon of cold water, stir it in, cover, and cook on HIGH for another 10 to 15 minutes. Add slurry gradually — a pot pie sauce should coat a spoon like a loose gravy, not sit stiff.
Can I make Slow Cooker Chicken Pot Pie ahead of time? Yes, and it is a good make-ahead dinner. You can chop the onion, carrots, celery, and potatoes a day ahead and refrigerate them (keep the potato cubes in cold water so they do not brown, then drain well). You can also cook the filling completely, refrigerate it for up to 3 to 4 days, and reheat it gently while you bake a fresh batch of biscuits. For the best texture, always bake the biscuits the day you serve.

Recipe Card
Slow Cooker Chicken Pot Pie with Flaky Biscuits
- Prep Time: 20 minutes (PT20M)
- Cook Time: 5 hours 15 minutes (PT5H15M)
- Total Time: 5 hours 35 minutes (PT5H35M)
- Servings: 6 servings
- Calories: 580 kcal per serving (estimated)
Tender shredded chicken, carrots, celery, potatoes, and peas in a creamy, herby sauce, ladled into bowls and topped with golden, flaky biscuits baked separately for the crispest finish. Cook time includes the slow cooker time on LOW plus baking the biscuits; on HIGH the filling cooks in 2 1/2 to 3 hours.
Nutrition (estimated): 580 kcal per serving (estimated, for filling with one biscuit), 48 g carbohydrates, 38 g protein, 25 g fat, 5 g fiber, 8 g sugar, 820 mg sodium. Nutrition is estimated and will vary with the exact cut of chicken, the size of the biscuits, the brand of broth, and any variations or substitutions.
Can I use chicken thighs or frozen chicken in Slow Cooker Chicken Pot Pie?
Yes to thighs — boneless, skinless thighs are excellent here, stay very moist, and can replace some or all of the breasts at the same weight and timing. For frozen chicken, it is safest to thaw it first in the refrigerator overnight. Frozen chicken spends too long in the temperature range where bacteria grow as a slow cooker warms up, so always start with thawed chicken, cook it until tender, and confirm 165°F (74°C) in the thickest piece before shredding.
Why are the biscuits baked separately instead of on top of the filling in the slow cooker?
In this recipe the biscuits are baked separately on purpose, then served on top of each bowl. A slow cooker traps steam under its lid, so dough placed on the filling tends to stay pale, dense, and gummy on the underside even when it looks done. A hot oven gives the biscuits a proper rise, golden tops, and flaky layers, and serving them over the hot filling still gives you the classic pot pie experience of biscuit soaking up creamy sauce.
What can I do if my pot pie filling is too thin?
Give it time first: the filling must come back to a simmer on HIGH after the slurry goes in, and it will also thicken slightly as it stands. If it is still thinner than you like after 30 minutes, whisk 1 more tablespoon of cornstarch with 1 tablespoon of cold water, stir it in, cover, and cook on HIGH for another 10 to 15 minutes. Add slurry gradually — a pot pie sauce should coat a spoon like a loose gravy, not sit stiff.
Can I make Slow Cooker Chicken Pot Pie ahead of time?
Yes, and it is a good make-ahead dinner. You can chop the onion, carrots, celery, and potatoes a day ahead and refrigerate them (keep the potato cubes in cold water so they do not brown, then drain well). You can also cook the filling completely, refrigerate it for up to 3 to 4 days, and reheat it gently while you bake a fresh batch of biscuits. For the best texture, always bake the biscuits the day you serve.

Hi, I’m Emma! I’m the cook and recipe developer behind Sizzle & Sage. From my sunny home kitchen, I share easy, flavor-packed recipes for real life — quick breakfasts, cozy weeknight dinners, and simple bakes anyone can make. Pull up a chair and stay a while!