Air Fryer Turkey Breast (Juicy Herb Butter, Crispy Skin)
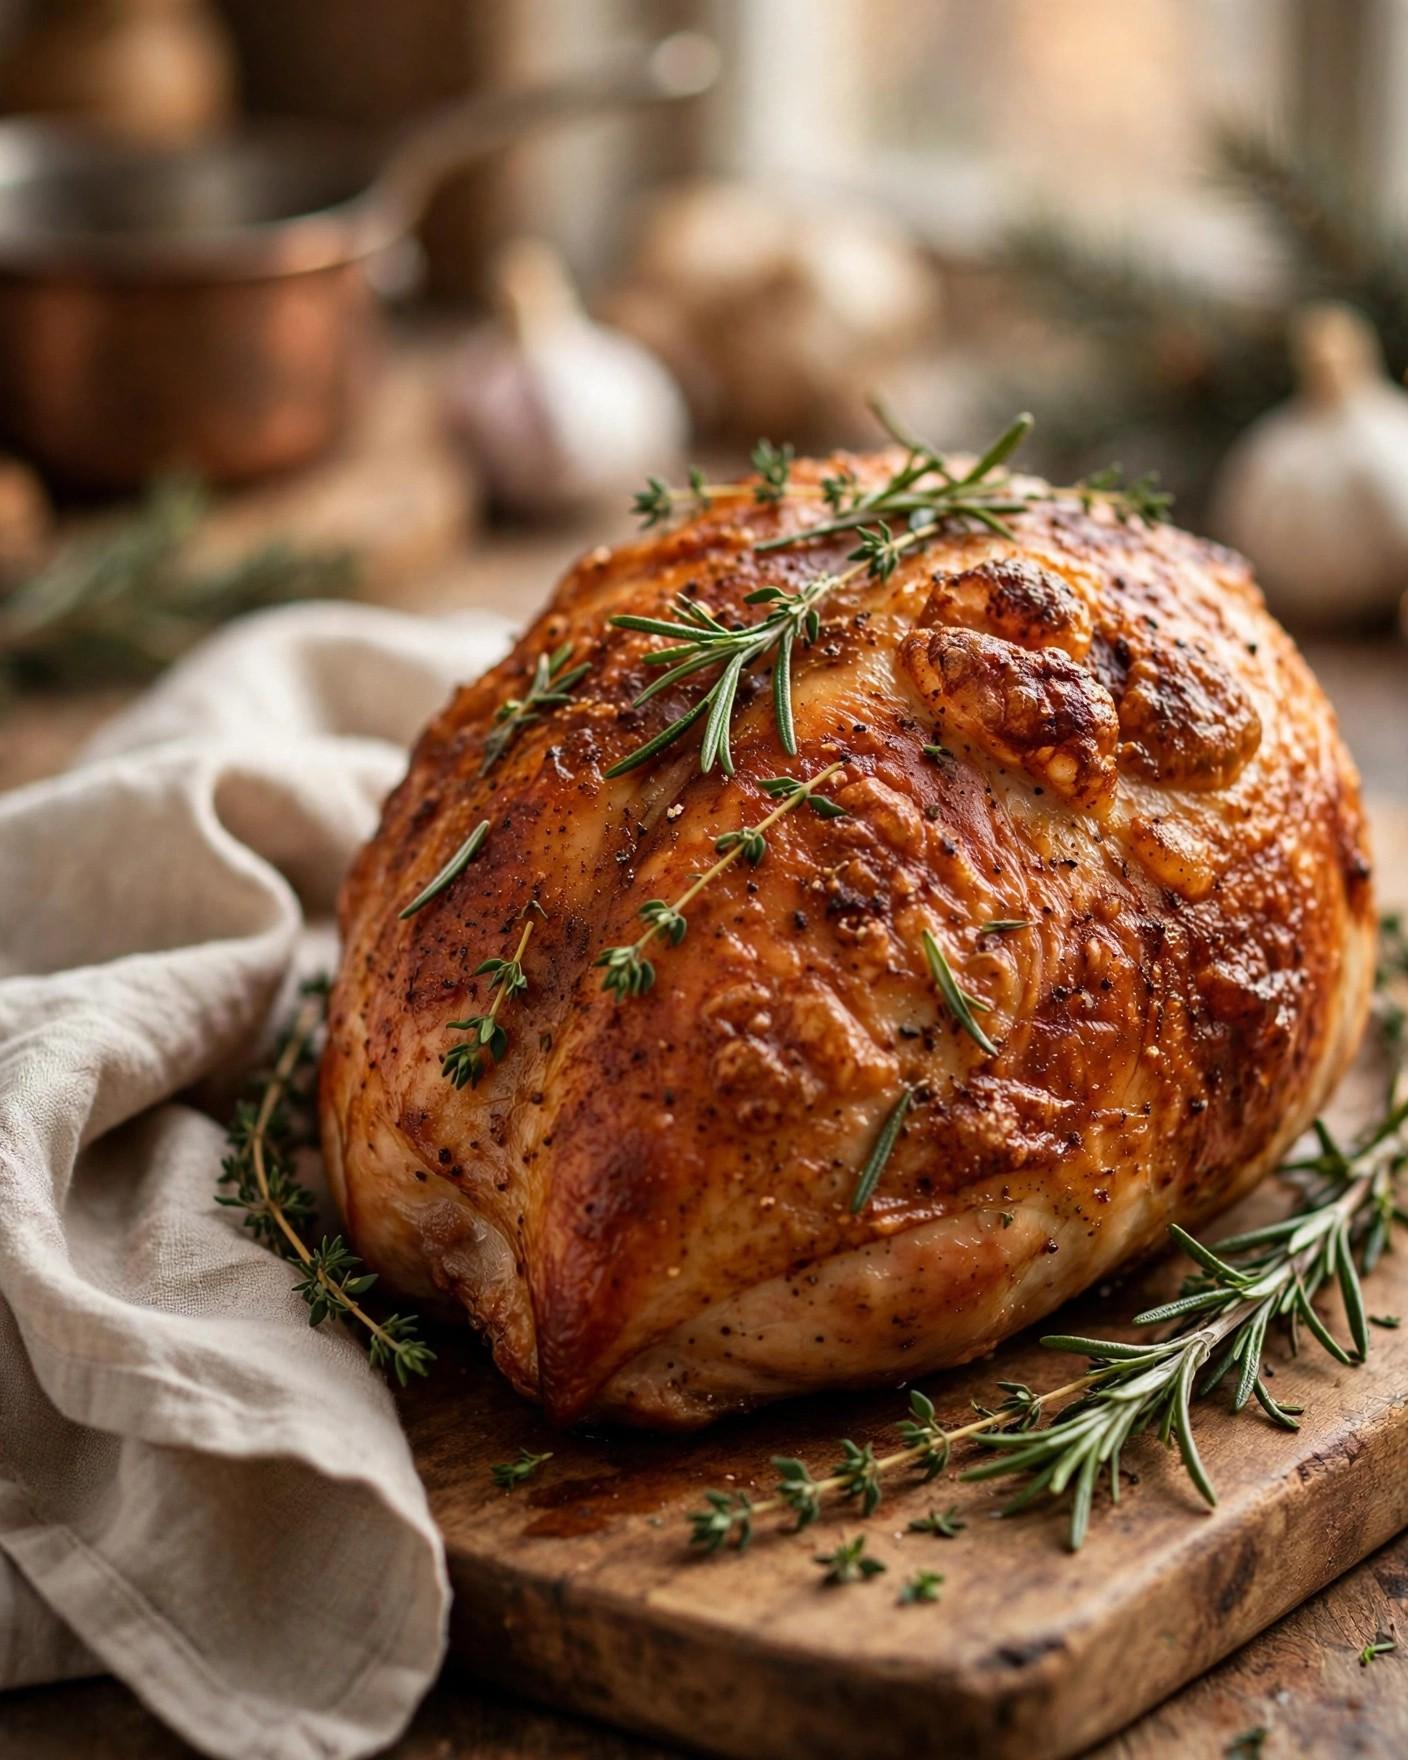
A whole roast turkey is a beautiful thing, but it is a lot of bird when the table seats four instead of fourteen. For small Thanksgivings, weeknight turkey dinners, and anyone who secretly prefers white meat anyway, a boneless skin-on turkey breast is the smarter move: all of the golden, crackling skin and juicy slices of breast meat, none of the all-day roast, the vat of drippings, or the strategic refrigerator surgery a twenty-pounder demands. And the air fryer turns out to be its ideal home. The same fast-circulating hot air that makes air-fried chicken skin shatteringly crisp works its magic on turkey breast, rendering the fat under the skin and browning it deeply while the meat inside stays tender. A two-and-a-half to three-pound breast cooks in about an hour, and it comes out of the basket looking like a magazine photo.
The method is simple but every step earns its place. The night before, the breast gets a dry brine — a generous rub of kosher salt and black pepper that dissolves into the meat overnight, seasoning it all the way to the center and helping it hold onto its juices in the heat. Then a compound butter made from softened butter, minced garlic, rosemary, thyme, sage, and lemon zest goes directly under the skin, where it melts into the meat as it cooks and bastes it from the inside. At 350 degrees F the air fryer cooks the breast through in about fifty-five minutes with one flip halfway, and an instant-read thermometer tells you exactly when to pull it: 160 degrees F in the thickest part, followed by a twenty-minute rest during which carryover heat brings it to the safe 165 degrees F.
This air fryer turkey breast is built for the way most of us actually celebrate now: a small table, an oven already packed with sides, and a cook who would rather enjoy the day than babysit a bird. It serves six comfortably with slices to spare for sandwiches, it frees your oven for the stuffing and the green bean casserole, and the leftovers are genuinely useful — tetrazzini, pot pie, and cold turkey sandwiches all start right here. If you have ever wondered whether an air fryer could handle a real holiday centerpiece, this is the recipe that answers the question.
Why You'll Love This Recipe
- Thanksgiving flavor without the whole bird. You get everything people actually fight over — golden crispy skin and thick, juicy slices of white meat — in a roast sized for a small table instead of a banquet.
- Dry-brined for seasoning to the center. Rubbing the breast with salt the night before draws seasoning deep into the meat and helps it retain moisture, so every slice tastes seasoned, not just the surface.
- Herb butter tucked under the skin. Garlic, rosemary, thyme, sage, and lemon zest melt into the meat as it roasts, basting it from the inside and perfuming the drippings. It is the highest-impact five minutes of prep in the whole recipe.
- Shatteringly crisp skin from the air fryer. The air fryer's fast-circulating heat renders the fat under the skin and browns it evenly, the way a rotisserie does — no flabby patches, no soggy underside.
- Frees your oven for sides. On Thanksgiving the oven is the bottleneck. Moving the turkey to the countertop air fryer means the stuffing, rolls, and casseroles all get their uninterrupted oven time.
- Done in about an hour, rest included. A three-pound breast needs roughly fifty-five minutes of cooking plus a twenty-minute rest. You can start it at four and carve at half past five without breaking a sweat.

Ingredients
For the dry brine
- 1 tablespoon Diamond Crystal kosher salt (or 2 teaspoons Morton kosher salt)
- 1 teaspoon freshly cracked black pepper
For the garlic-herb butter
- 1/2 cup (115 g) unsalted butter, softened to room temperature
- 4 garlic cloves, minced
- 1 tablespoon chopped fresh rosemary
- 1 tablespoon chopped fresh thyme leaves
- 1 tablespoon chopped fresh sage
- 1 teaspoon finely grated lemon zest
- 1/2 teaspoon smoked paprika (optional)
For the turkey
- 1 boneless skin-on turkey breast, 2 1/2 to 3 pounds
- 1 tablespoon olive oil
Why these ingredients matter
Boneless skin-on turkey breast. The skin is non-negotiable — it is what crisps in the air fryer and what protects the meat from the intense circulating heat. Boneless breasts cook more evenly than bone-in ones in an air fryer basket and slice into perfect medallions with zero waste. Buy one in the 2 1/2 to 3-pound range; anything larger may not fit a standard basket, and anything much smaller cooks so fast the skin can over-brown before the center is done.
Dry brine instead of wet brine. A wet brine means finding a container big enough to submerge a turkey breast for hours and then dealing with a splattery mess. A dry brine is just salt and pepper rubbed over the meat, left uncovered in the refrigerator overnight. The salt first draws moisture out, then dissolves into it and gets reabsorbed, seasoning the meat deeply and changing its protein structure so it holds onto juice during cooking. The uncovered rest also dries the skin, which is the secret to crispness.
Kosher salt, measured by brand. Diamond Crystal and Morton are not interchangeable by volume — Morton is nearly twice as salty per tablespoon. The recipe gives both measures; if you use fine table salt, use only 1 1/2 teaspoons. Getting the salt right matters more here than anywhere else, because a dry brine is the only seasoning the interior of the meat receives.
Softened butter, never melted. The compound butter needs to be soft enough to mash and spread but solid enough to stay put under the skin. Melted butter runs off and pools in the basket; softened butter clings to the meat and melts gradually as the breast cooks, releasing its garlic and herbs slowly. Set the butter out for about an hour, or microwave it in five-second bursts and stop the moment it gives to a fingertip.
Fresh garlic. Four cloves of fresh garlic, minced fine, give the butter a pungent, savory backbone that garlic powder cannot match. Mince it finely enough that no large chunks sit against the meat, where they could scorch. If raw garlic is too assertive for your table, smash the cloves and let them sit in the softened butter for an hour, then remove them before spreading — you will still get the flavor without the bite.
Fresh rosemary, thyme, and sage. This is the classic holiday-herb trio, and fresh beats dried here by a wide margin. Dried herbs can taste dusty against poultry; fresh ones release their oils into the butter and perfume the meat as it roasts. Chop them finely so the butter spreads smoothly and no woody stems end up under the skin. If you must use dried, cut each amount to one-third.
Lemon zest. A single teaspoon of zest lifts the whole compound butter, cutting through the richness of the butter and turkey with a bright citrus note that makes the meat taste fresher and more savory rather than lemony. Use only the yellow outer layer of the peel — the white pith underneath is bitter.
Smoked paprika. Optional, but it deepens the color of the finished skin to a gorgeous mahogany and adds a whisper of smoky warmth that plays well with the herbs. Sweet paprika works too; cayenne does not belong here unless your table enjoys a kick.
Olive oil. A thin slick of olive oil over the skin right before cooking helps the surface brown evenly and encourages the drippings to crisp rather than steam. It also gives the last of the seasoning something to stick to.
An instant-read thermometer. This is the one piece of equipment the recipe truly requires. Turkey breast goes from juicy to chalky in a span of about ten degrees, and the only way to hit 160 degrees F in the thickest part — the pull temperature that carries over to a safe 165 degrees F — is to measure it. A probe left in during cooking or a quick instant-read check both work; what does not work is guessing by time alone, because breasts vary in thickness.
Instructions
- Dry brine the breast (the night before). Pat the turkey breast completely dry with paper towels — dry skin crisps, wet skin steams. Rub the kosher salt and black pepper evenly over every surface, including under the loose edges of the skin. Set the breast on a wire rack set inside a rimmed baking sheet or plate, skin-side up, and refrigerate uncovered for 12 to 24 hours. The surface will look drier and slightly darker by morning; that is exactly what you want.
- Make the garlic-herb butter. About an hour before cooking, combine the softened butter, minced garlic, rosemary, thyme, sage, lemon zest, and smoked paprika (if using) in a small bowl. Mash with a fork until the herbs and garlic are evenly distributed and the butter is a uniform pale green-gold. Taste a crumb — it should be assertively garlicky and herbal, since it will mellow as it melts into the meat.
- Tuck the butter under the skin. Set the brined breast on a cutting board. Starting at the thick end, gently slide your fingers between the skin and the meat to loosen the skin, being careful not to tear it — the skin is a membrane, not shrink wrap, and it separates with patient, gentle pressure. Spread about two-thirds of the herb butter in an even layer directly on the meat under the skin, then smooth the skin back down over it. Rub the remaining butter over the outside of the skin.
- Oil and temper. Drizzle the olive oil over the skin and rub it in so the whole surface glistens. Let the breast sit at room temperature for 30 minutes while the air fryer preheats — a tempered breast cooks more evenly than one straight from the refrigerator, and this is also the window to make sure the basket is clean and dry.
- Preheat the air fryer. Set the air fryer to 350 degrees F (175 degrees C) and let it preheat for 5 minutes with the empty basket inside. A hot basket sears the first surface on contact, which jump-starts the crisping. Lightly mist or brush the basket with oil if your air fryer tends to stick.
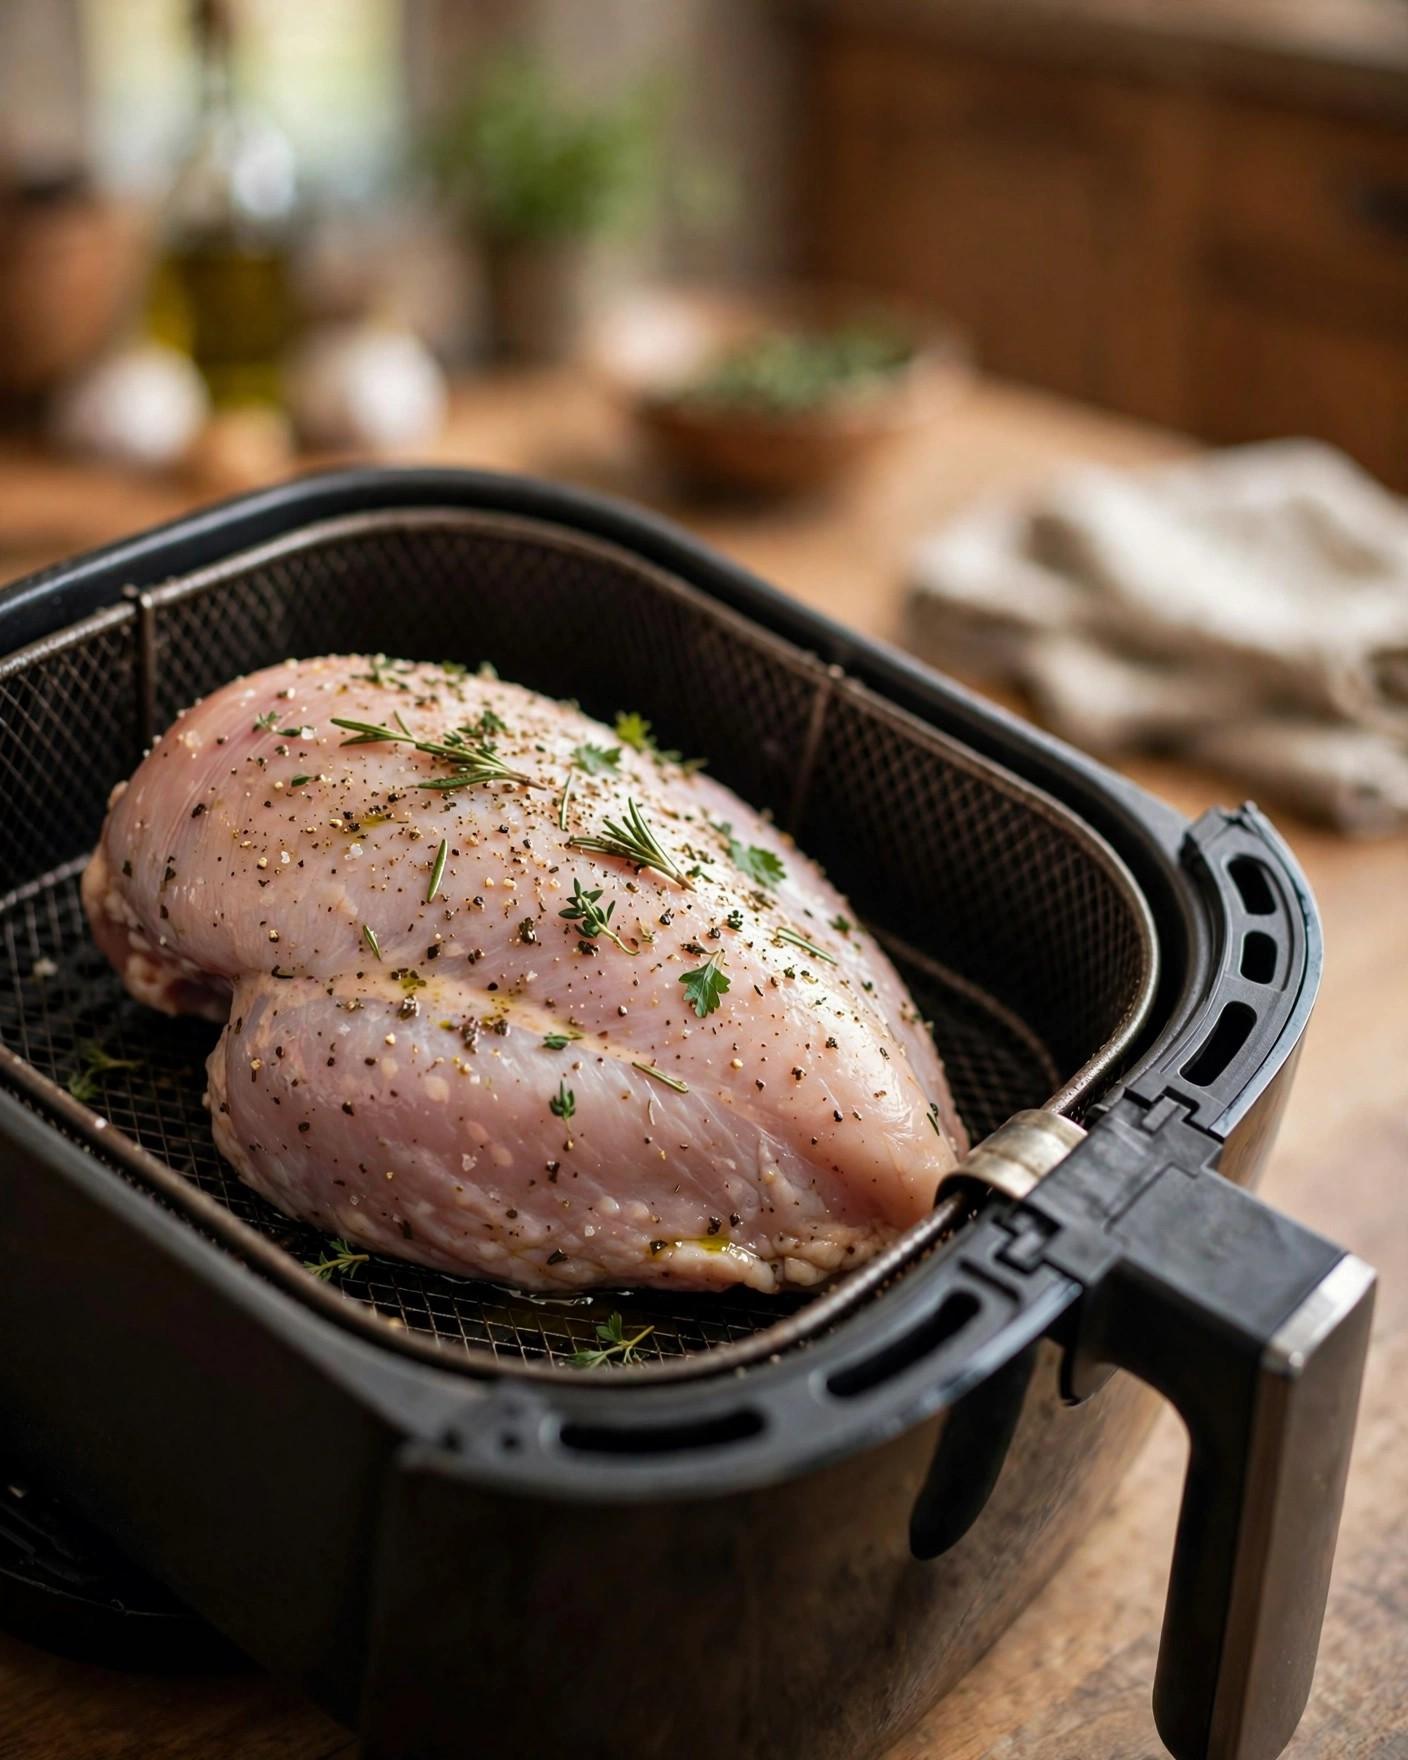
- Air fry, breast-side down first. Place the turkey breast in the hot basket skin-side down. Cook at 350 degrees F (175 degrees C) for 25 minutes. The breast-side-down start renders the fat cap and crisps the underside, which is the side that would otherwise sit in its own juices.
- Flip and finish. Using tongs and a wide spatula for support, carefully flip the breast skin-side up. Cook for 25 to 30 minutes more, until an instant-read thermometer inserted into the thickest part reads 160 degrees F (71 degrees C). If the skin is browning faster than the center is cooking — common in smaller, hotter-running baskets — tent the breast loosely with a small piece of foil for the last 10 minutes. Total cooking time for a 2 1/2 to 3-pound breast is typically 50 to 55 minutes.
- Rest before carving. Transfer the breast to a cutting board and tent it loosely with foil. Rest for a full 20 minutes. The internal temperature will climb to 165 degrees F (74 degrees C) as the juices redistribute, and skipping this rest is the fastest way to watch all that juiciness run out onto the board instead of staying in the slices.
- Carve and serve. Slice the breast against the grain into 1/2-inch medallions, starting at the thinner tapered end. Fan the slices on a warm platter, spoon over any juices that collected on the board, and tuck a few fresh herb sprigs around the edges if you like. Serve with the pan drippings, gravy, or cranberry sauce.


Tips for Success
- Do not skip the overnight dry brine. It is the single biggest difference between a good turkey breast and a great one. Salt applied the night before seasons the meat to the center and helps it stay juicy; salt applied at the last minute only seasons the surface.
- Pat the skin bone-dry. Moisture is the enemy of crisp skin. Pat the breast dry before brining, let it air-dry uncovered in the refrigerator overnight, and pat it once more before the butter goes on.
- Buy a breast that fits your basket. Measure your air fryer basket before you shop. A 2 1/2 to 3-pound boneless breast fits most 5-quart and larger baskets; if yours is a compact 3-quart model, look for a breast under 2 pounds and start checking the temperature at 40 minutes.
- Pull at 160 degrees F, not 165. Carryover heat during the twenty-minute rest reliably brings the breast up to the safe 165 degrees F. Pulling at 165 means it coasts to 170 or higher, which is where breast meat turns dry and chalky.
- Use the foil tent if the skin races ahead. Air fryers vary in how aggressively they brown. If the skin is deep mahogany and the thermometer still reads under 150, lay a loose foil tent over the breast for the remainder of the cook — it slows browning without steaming the skin.
- Slice against the grain. Turkey breast fibers run lengthwise; cutting across them into 1/2-inch medallions gives tender bites instead of stringy ones. The tapered thin end is the cook's preview slice — quality control is a holiday tradition.
Variations
- Maple-mustard glazed. Whisk 2 tablespoons pure maple syrup with 1 tablespoon Dijon mustard and brush it over the skin during the last 10 minutes of cooking for a glossy, sweet-savory finish with lightly caramelized edges.
- Cajun-spiced. Replace the herb butter's rosemary, thyme, sage, and paprika with 2 tablespoons of Cajun seasoning mixed into the softened butter, and add the zest of one orange instead of lemon for a bolder, spicier holiday bird.
- Lemon-oregano Mediterranean. Swap the rosemary and sage for 2 tablespoons chopped fresh oregano, double the lemon zest, and add 1/2 teaspoon of cracked coriander seed to the butter for a brighter, Greek-leaning profile.
- Bone-in breast. A 4 to 5-pound bone-in, skin-on breast works with the same method — it just needs a bigger basket and more time, typically 60 to 75 minutes at 350 degrees F, pulled at the same 160 degrees F. The bone adds flavor and a little insurance against drying.
- Brown-butter baste. Brown the butter in a skillet until nutty and amber, let it cool until spreadable, then mix in the garlic and herbs. It adds a toasty depth that tastes like the drippings of a much longer roast.
Storage
Cooked turkey breast keeps well in the refrigerator for up to 4 days. Let it cool to room temperature — no more than 2 hours on the counter — then store sliced or whole in an airtight container or wrapped tightly in foil. To reheat without drying it out, warm slices in a 300 degree F (150 degree C) oven covered with foil and a splash of broth, or give them a quick 2 to 3-minute refresh in the air fryer at 350 degrees F. Cold slices straight from the refrigerator make the best next-day sandwiches, layered with cranberry sauce and stuffing on toasted bread.
For longer storage, the freezer is your friend. Wrap the cooled breast tightly in plastic wrap, then in foil or a freezer bag with the air pressed out, and freeze for up to 3 months. Thaw overnight in the refrigerator before reheating. Freezing the meat in its sliced form with a little of the pan juices spooned over makes reheating gentler — the slices warm through before they can dry out. Label the package with the date; frozen turkey is safe indefinitely but the texture is best within that three-month window.
To make this ahead for a holiday, do the dry brine up to 24 hours in advance — that part is already done the night before by design. The garlic-herb butter can be mixed up to 3 days ahead and kept refrigerated; let it soften at room temperature for an hour before you tuck it under the skin. You can even assemble the whole buttered, seasoned breast the morning of, cover it, and refrigerate until 30 minutes before it goes into the air fryer. The one thing not to do ahead is the cooking itself on the big day — turkey breast is at its juiciest carved fresh after its rest.
FAQ
Can I use a bone-in turkey breast instead of boneless? Yes, and it is a fine choice if your air fryer basket is large enough. Use a 4 to 5-pound bone-in, skin-on breast and keep the same method: dry brine overnight, herb butter under the skin, 350 degrees F with a flip halfway. Plan on 60 to 75 minutes total and pull it at 160 degrees F in the thickest part, away from the bone. The bone conducts heat a little differently, so check the temperature in two or three spots before calling it done.
What if my turkey breast does not fit in my air fryer? Size the breast to your basket before you buy — a 2 1/2 to 3-pound boneless breast fits most 5-quart or larger baskets, while compact 3-quart models need a breast under 2 pounds. If the breast you brought home is too snug, you can split it: cut it in half through the thickest part so the two halves sit side by side with air circulating around them, and start checking the temperature at 40 minutes since thinner pieces cook faster. Do not wedge a too-big breast in tightly; blocked airflow means steamed, pale skin instead of crisp.
How do I know the turkey is done if I do not have a thermometer? Honestly, get a thermometer — turkey breast has a narrow window between juicy and dry, and there is no reliable visual substitute. The juices running clear is a folk rule, not a measurement, and cutting the breast open to peek lets precious juices escape. An inexpensive instant-read thermometer removes all guesswork: pull the breast at 160 degrees F in the thickest part, rest it 20 minutes, and carryover heat brings it to the safe 165 degrees F. It is the cheapest insurance policy in your kitchen drawer.
Can I cook this ahead of time and reheat it? You can, though freshly cooked and rested is always juiciest. If you need to cook ahead, roast the breast fully, rest it, then refrigerate it whole and unsliced — slicing exposes more surface area to drying. Reheat the whole breast covered in foil at 300 degrees F (150 degrees C) with a few tablespoons of broth or pan drippings until it reaches 150 degrees F internally, about 20 to 25 minutes, then slice. For a holiday, a better plan is prepping everything ahead — the dry brine and the herb butter — and cooking the breast fresh while the sides finish.

Recipe Card
Air Fryer Turkey Breast (Juicy Herb Butter, Crispy Skin)
- Prep Time: 15 minutes (PT15M)
- Cook Time: 55 minutes (PT55M)
- Total Time: 90 minutes (PT90M)
- Servings: 6
- Calories: 310 kcal per serving (estimated)
A boneless skin-on turkey breast dry-brined overnight, tucked with garlic-herb butter under the skin, and air-fried at 350 degrees F until deeply golden and crisp outside and juicy inside — a small-Thanksgiving centerpiece that frees your oven for sides.

Hi, I’m Emma! I’m the cook and recipe developer behind Sizzle & Sage. From my sunny home kitchen, I share easy, flavor-packed recipes for real life — quick breakfasts, cozy weeknight dinners, and simple bakes anyone can make. Pull up a chair and stay a while!