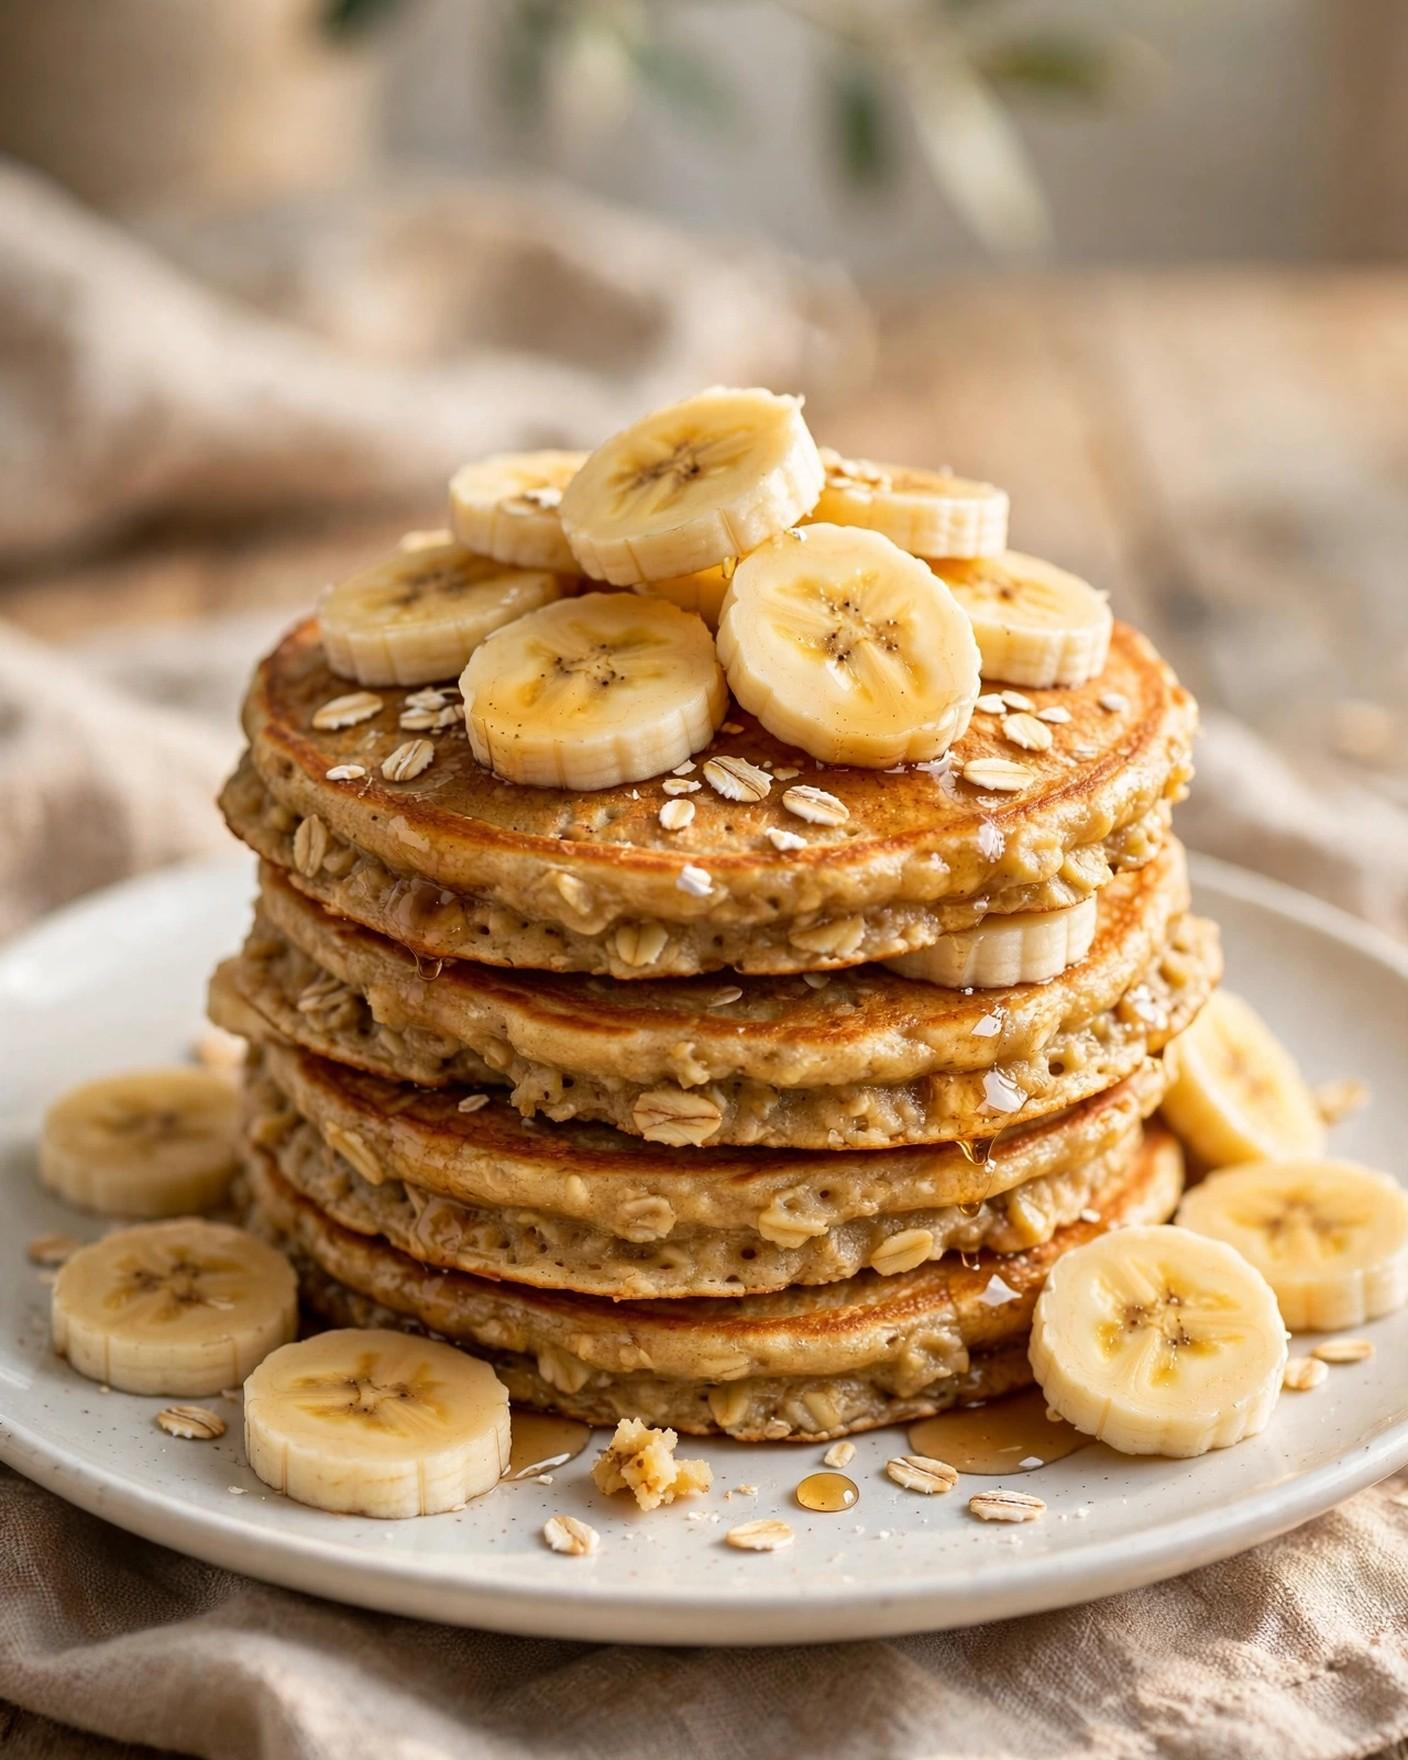
3-Ingredient Banana Oat Pancakes
There is a particular kind of morning magic in a recipe that asks for almost nothing and gives back a warm stack of pancakes. 3-Ingredient Banana Oat Pancakes are exactly that kind of recipe. Two ripe bananas, a cup of old-fashioned rolled oats, and two eggs — that is the whole foundation. No flour to measure, no milk to pour, and no long shopping list standing between you and breakfast. Everything blends or mashes together into one thick, golden batter, rests for a few minutes while the pan warms, and cooks into tender pancakes with soft centers, lightly crisped edges, and a gentle banana sweetness in every bite.
Bananas bring moisture, natural sugar, and binding power. Oats bring structure, body, and a mild, toasty flavor, especially when blended into a coarse flour first. Eggs bring protein, richness, and the setting power that turns a bowl of mashed banana and oats into something you can flip in a skillet and stack on a plate. Each ingredient does at least two jobs at once, which is why a list this short still works.
Ripeness matters more here than in almost any other pancake recipe. Because there is no added sugar in the core batter and no flour to dilute the fruit, the bananas are the flavor. A ripe banana — yellow with plenty of brown speckles, soft when squeezed gently, and fragrant the moment you peel it — mashes smoothly, sweetens the whole batch, and helps the batter behave. This recipe is, in the best way, a rescue mission for the two bananas on the counter that have gone a day past their prettiest. Those bananas are not past their prime for this job; they are exactly at it.
You also get a choice about texture. Blend the oats into a coarse flour and blend everything thoroughly, and the pancakes come out relatively smooth and tender, close in spirit to a classic pancake, only heartier. Leave the oats whole, or blend them only partway, and the pancakes turn rustic, with a pleasant chew and visible oat texture. The smooth version pleases traditional pancake lovers, while the whole-oat version suits oatmeal fans. Both paths are explained below.
A few optional pantry extras — baking powder for fluffiness, cinnamon and a pinch of salt for depth — are labeled optional every time they appear. The core pancakes work with three ingredients alone.
These pancakes cook quickly, but they do ask for one adjustment if you are used to cooking regular pancakes over brisk medium heat. Banana batter is rich in natural sugars, and sugar browns fast. Medium-low heat, a patient first side, and an eye on the color rather than the clock will give you pancakes that are deeply golden instead of scorched outside and raw in the middle. Learn the cues — bubbles at the edges, a set, slightly matte surface, firm edges — and the rest of the batch moves easily.
Six pancakes, two servings of three each, doubles cleanly in a blender, and the Storage section explains reheating leftovers. However you plate them, you are about twenty minutes and three ingredients away from a breakfast that tastes like you tried much harder than you did.
Why You'll Love This Recipe
- Only three core ingredients, and you probably have them. Everyday staples — no flour, milk, butter, or added sugar required.
- Naturally sweet, with no added sugar in the batter. Ripe bananas do all the sweetening, and they do it with fruit flavor rather than plain sweetness, so the pancakes taste warmly of banana instead of tasting sugary. Toppings can then add as much or as little extra sweetness as each person wants.
- Ready in about 20 minutes, start to finish. Much of that time is the batter resting while you warm the pan; the active work is brief and calm.
- Two textures from one batter. Blend the oats fully for a smoother, more classic pancake, or leave them whole or partly blended for a heartier, chewier bite. The same three ingredients give you both options, so the recipe bends toward whoever is sitting down to eat.
- Tender, golden, and satisfying. Oats give real staying power, and the egg sets them into soft rounds that stack neatly and reheat well.
- Easy to adjust without breaking it. The optional baking powder, cinnamon, and salt are clearly marked additions, not requirements, and the Variations section offers directions for chocolate chips, blueberries, nut butter, and more. The base stays simple while still leaving room to make it yours.

Ingredients
For the pancakes
- 2 ripe medium bananas (about 240 g peeled), yellow with plenty of brown speckles
- 1 cup (90 g) old-fashioned rolled oats
- 2 large eggs, at room temperature if convenient
- 1 teaspoon neutral oil or a light coating of cooking spray, for the skillet, as needed
Optional pantry extras
- 1 teaspoon baking powder, optional, for fluffier pancakes
- 1/2 teaspoon ground cinnamon, optional
- Pinch of fine sea salt, optional
For serving, optional
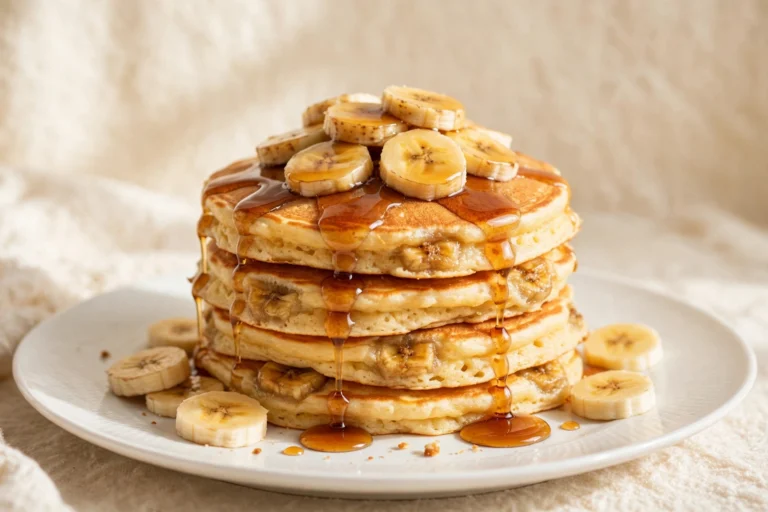
- Fresh banana slices, strawberries, or blueberries
- Maple syrup, honey, or a spoonful of plain or Greek yogurt
- A small handful of chopped walnuts or pecans, if you like crunch
Why these ingredients matter
Ripe bananas. The bananas carry more responsibility than any other ingredient here. They provide the sweetness, because there is no added sugar in the core batter. They provide most of the moisture, because there is no milk added. They provide much of the binding, because mashed ripe banana is naturally thick and helps hold the oats and egg together in the pan. And they provide the defining flavor. As a banana ripens, its starches convert to sugars, so a speckled banana tastes far sweeter, and its flesh softens into a smooth pulp. Choose bananas that are deeply yellow with brown speckles, give slightly when squeezed, and smell sweet at the stem. A mostly brown peel still works if the flesh inside looks creamy. Truly black, leaking, or fermented-smelling fruit has gone too far.
Old-fashioned rolled oats. Oats are the structure of these pancakes, standing in for flour, and the style matters. Old-fashioned rolled oats hit the ideal middle ground: they blend into a coarse meal, soften reliably during the rest when left whole, and give a mild, toasty flavor. Quick oats work in a pinch, with a shorter rest and a softer texture. Steel-cut oats do not work at all; they stay gritty and raw-tasting because they cannot soften in a ten-minute rest or a few minutes in a skillet. If you need gluten-free pancakes, choose rolled oats specifically labeled gluten-free, since ordinary oats are often processed near wheat.
Eggs. Eggs turn a sweet oat-and-banana mixture into an actual pancake. As the batter cooks, the egg proteins set, giving each pancake structure firm enough to flip, stack, and cut with a fork. Eggs also add richness, golden color, and protein that makes a three-pancake serving feel like a real breakfast rather than a snack. Two large eggs is the balanced amount: one makes a fragile batter, while three push the flavor toward an omelet. Room-temperature eggs blend a little more smoothly, but eggs straight from the refrigerator work perfectly well. If your eggs are small and the batter looks especially thick, a teaspoon of water will loosen it.
Baking powder, clearly optional. Baking powder is the one optional extra that changes the texture visibly, so it deserves an honest explanation. It is a leavener: when it meets moisture and then heat, it releases small bubbles of gas that puff the batter as it cooks, giving a lighter, fluffier, slightly taller pancake. Without it, the pancakes are flatter, denser, and still delicious. With exactly 1 teaspoon, they rise gently and feel airier in the center. More is not better; too much can leave a faint bitter aftertaste and make the pancakes rise fast and then collapse. The recipe card lists it as optional because it is: try it once each way and learn which style your household prefers.
Ground cinnamon and salt, both optional. Cinnamon and salt work in the background, and a half teaspoon of cinnamon with a small pinch of salt is enough to notice without turning banana pancakes into spice pancakes. Cinnamon has a natural affinity with banana and oats, and adds aroma the moment the batter hits the pan. Salt does not make them salty; it sharpens sweetness and keeps the banana flavor from tasting flat. Both are pantry extras rather than core ingredients.
Oil for the skillet. A small amount of oil is a cooking tool here rather than a batter ingredient, and it matters because banana batter likes to stick and brown unevenly on a completely dry surface. A neutral oil, melted butter, or cooking spray all work; the goal is the thinnest film that lets the pancakes release cleanly. Nonstick skillets and well-seasoned griddles need the least. Wipe the pan with a folded paper towel after oiling it and you will get an even surface and the prettiest golden color.
Toppings and serving extras, all optional. Nothing on the serving list is required, and the pancakes are genuinely good eaten warm and plain, straight off the griddle. Toppings personalize each serving: berries keep the plate bright, maple syrup leans classic, yogurt adds tang and protein, and nuts bring crunch. Because the pancakes are only gently sweet, a toppings spread can be as simple as berries and the syrup bottle.
Instructions
- Blend the oats, if you want a smoother pancake. Add the 1 cup (90 g) of rolled oats to a blender or food processor and pulse for 15 to 30 seconds, until the flakes break down into a coarse, floury meal with some small flakes still visible. A coarse meal, not a fine powder, keeps the body that makes oat pancakes satisfying. For the heartier, whole-oat version, skip this step entirely and use the oats as they come from the container — the batter will be lumpier, the pancakes chewier, and the rest in the next steps becomes especially important, because whole flakes need those minutes to drink in moisture and soften.
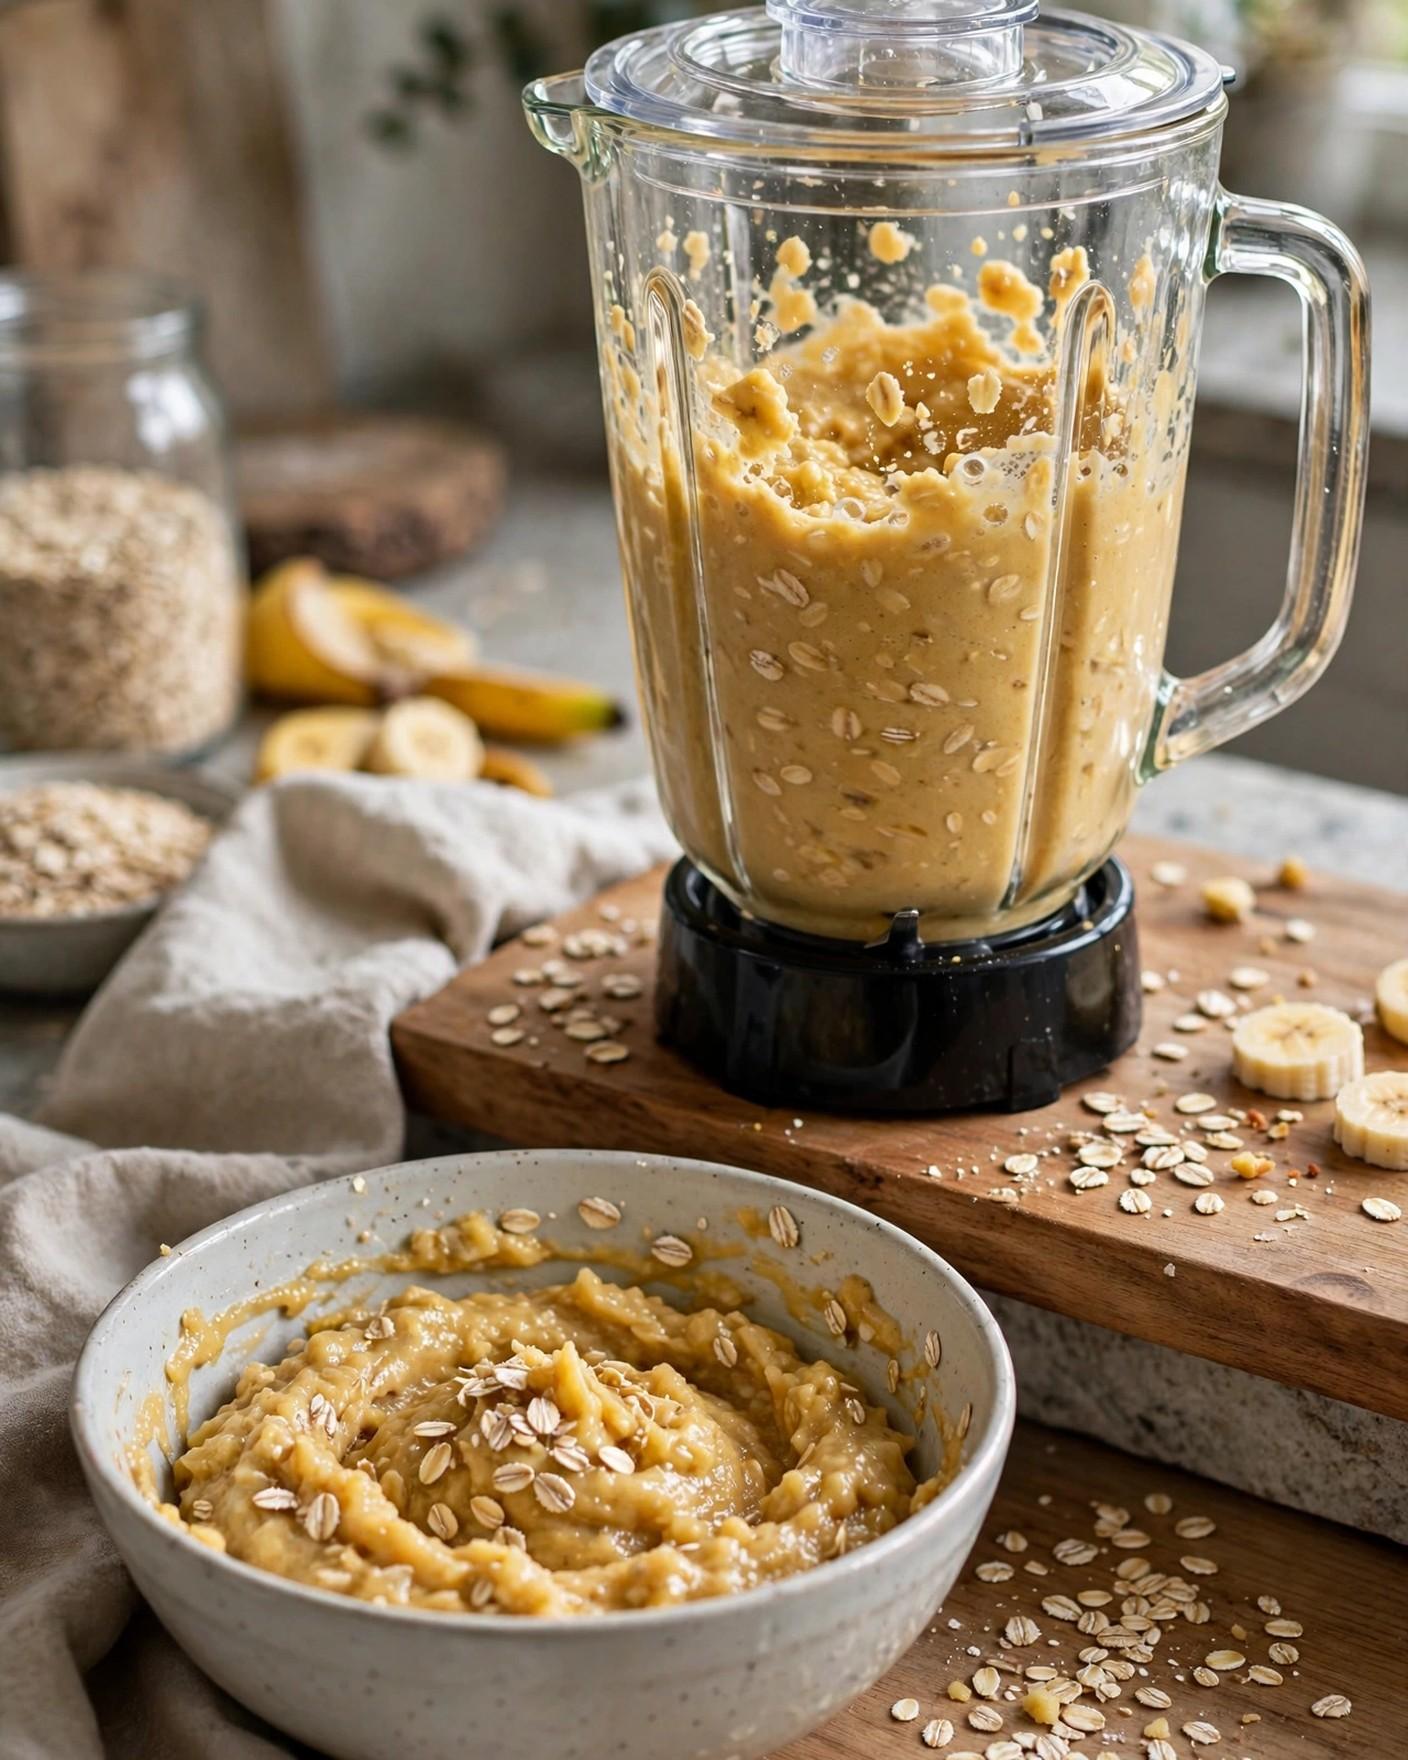
- Make the batter. Add the peeled bananas and eggs to the blender with the ground oats, plus the baking powder, cinnamon, and salt if using them, and blend for 15 to 20 seconds, just until thick, pourable, and mostly smooth. If you left the oats whole, or prefer to work by hand, mash the bananas in a medium bowl with a fork until almost liquid with only small soft lumps, whisk in the eggs until even, then stir in the oats and any optional extras until no dry pockets remain. Either way, stop as soon as the batter comes together; a few small flecks of oat or banana are a feature, not a flaw.
- Rest the batter for 5 to 10 minutes. Pour the batter into a bowl if it is in a blender, set it on the counter, and leave it alone for at least 5 minutes and up to 10. During the rest, the oats absorb moisture and swell, the batter thickens from pourable to scoopable, and blending bubbles settle out. A rested batter holds a round shape in the pan, cooks more evenly, and flips without tearing. It is ready when it falls from a spoon in a thick ribbon and briefly holds its shape before relaxing.
- Warm the skillet gently. Place a nonstick skillet or griddle over medium-low heat and let it warm for 2 to 3 minutes while the batter finishes resting. Add the thinnest film of oil, spreading it with a brush or folded paper towel so the surface looks evenly slick with no puddles. Medium-low is correct here: banana sugars scorch quickly, and a hot pan gives pancakes dark outside and wet in the center. If the oil smokes, the pan is too hot — lift it off the heat for a minute and let it settle.
- Scoop the first pancakes. Using a 1/4-cup (60 ml) measure, scoop the batter into the warmed skillet in small rounds, leaving space between them for spreading and for your spatula. This batter is thicker than a flour batter, so use the back of the measure to nudge each scoop into a round roughly 3 1/2 to 4 inches (9 to 10 cm) across and about 1/4 inch (6 mm) thick. Even thickness lets the centers set at the same pace as the edges brown. Most home skillets hold two or three pancakes of this size at once. Resist making them larger: wide banana oat pancakes are fragile in the middle and are the ones that break during the flip.
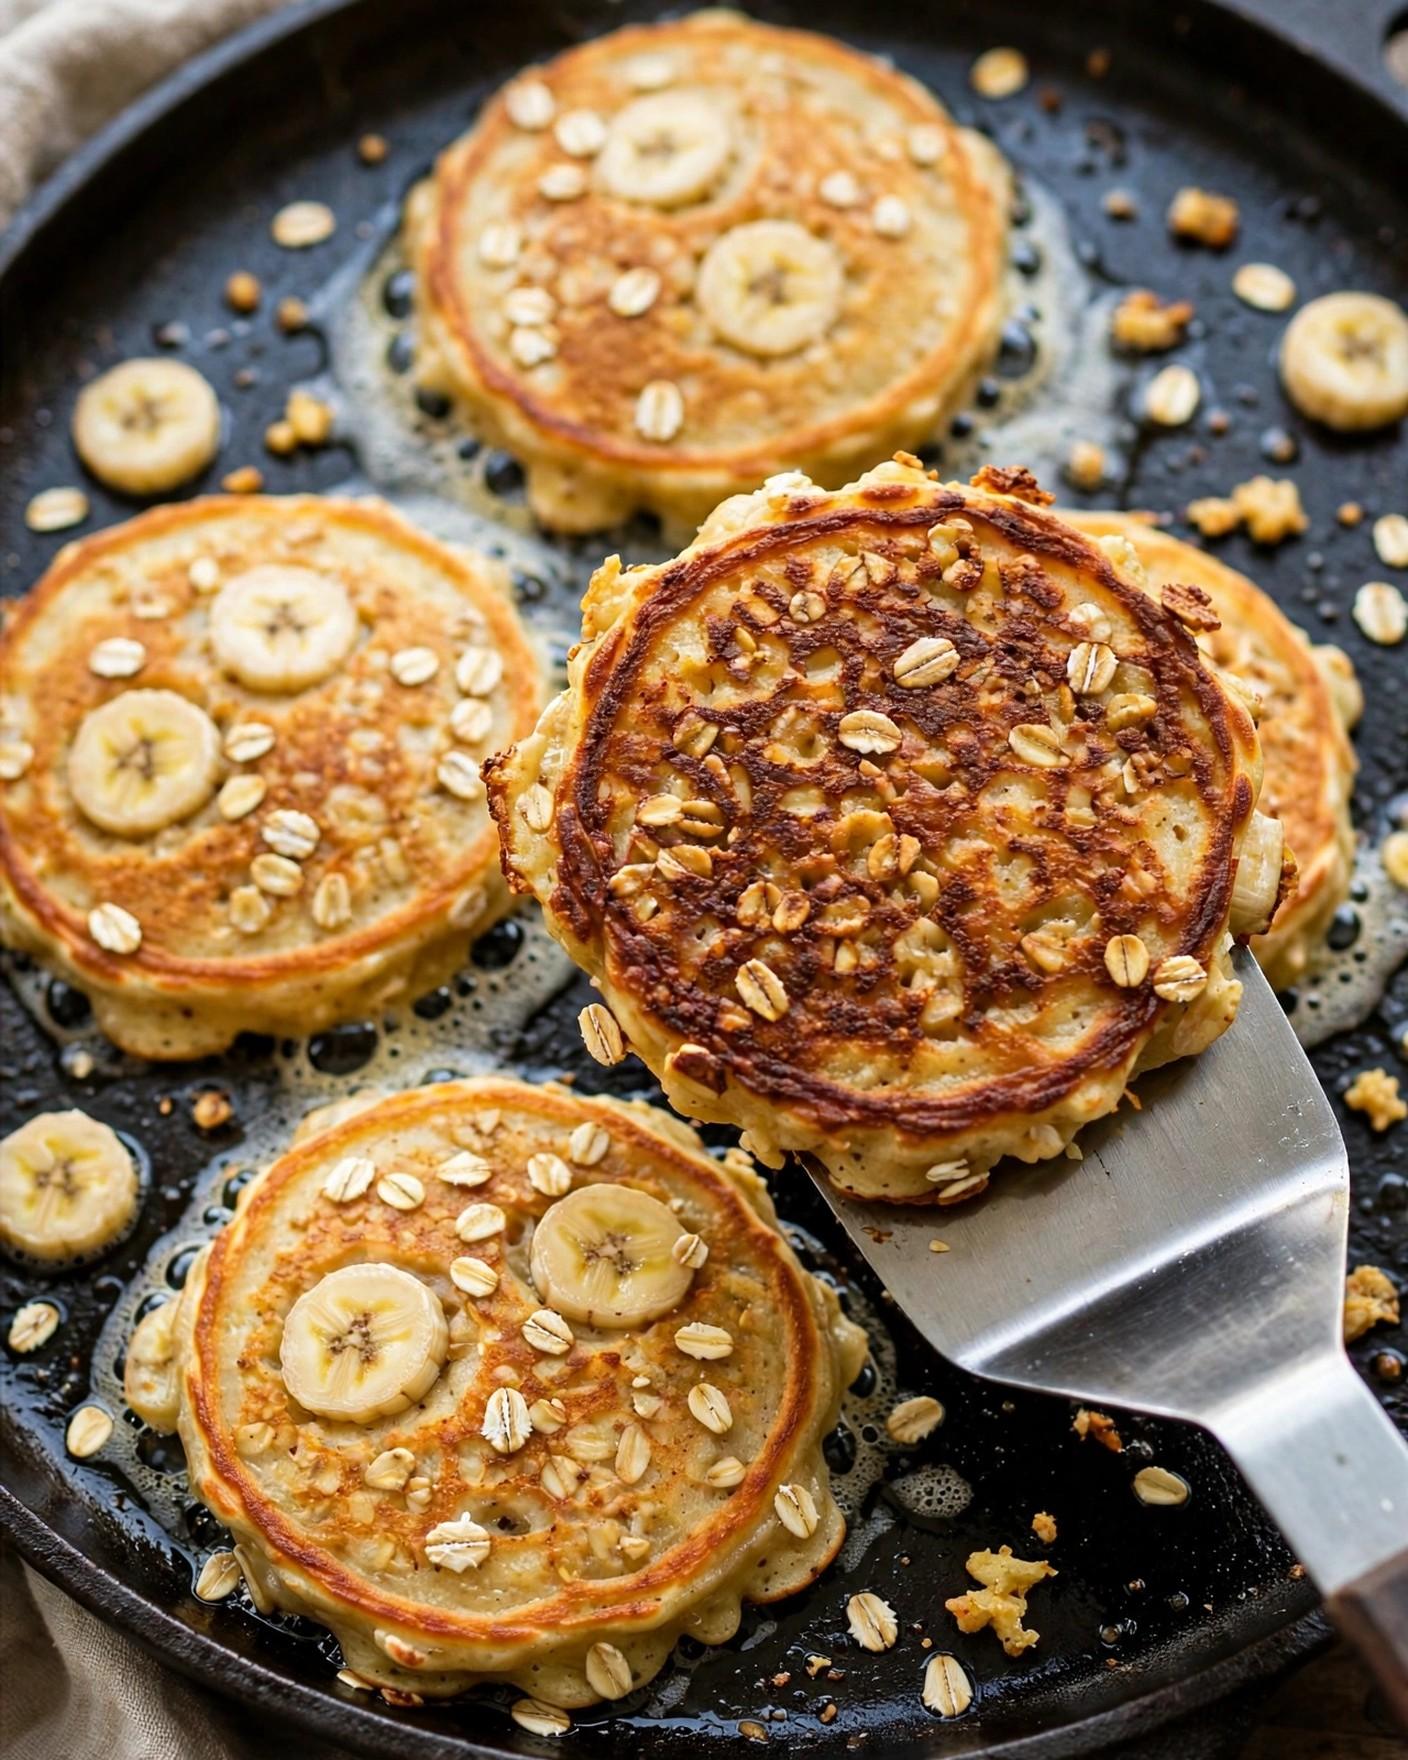
- Cook the first side until set at the edges, 2 to 3 minutes. Leave the pancakes alone while they cook. The surface will begin to lose its wet shine, and small bubbles will form, first around the edges and then across the surface. In this thick batter bubbles are slower and fewer than in flour batter, so judge by a combination of cues. The pancake is ready to flip when the edges look set and slightly dry, the surface looks mostly matte with a few bubbles that hold their shape, the underside is deep, even golden brown when you lift a corner to peek, and the whole pancake feels firm enough to slide when nudged. At medium-low heat this usually takes 2 to 3 minutes.

- Flip once, with confidence. Slide a thin, wide spatula fully under one pancake until most of its surface is supported, lift it just clear of the pan, and turn it over in one smooth motion, laying it back down gently rather than dropping it. Cook the second side for 1 to 2 minutes, until golden brown in spots and the center feels firm and springy when pressed very lightly with the spatula. The internal temperature at the center will be around 200°F (93°C) if you check with a thermometer, but firmness is a reliable guide. Avoid pressing down hard, which squeezes out moisture. Flip only once, because repeated flipping toughens the texture.
- Serve warm, and cook the remaining batter. Transfer the finished pancakes to a warm plate and serve right away for the best texture, or keep them warm for a few minutes in a low oven at about 200°F (93°C) while you cook the rest. Give the batter a gentle stir, check the pan, and add another whisper of oil only if it looks dry. Cook the remaining batter the same way, adjusting the heat down slightly if the pan has built up heat. Stack three pancakes per serving, add banana slices, berries, maple syrup, yogurt, or nuts as you like, and bring them to the table while they are still steaming gently.
Tips for Success
- Use bananas at the right stage of ripe. Speckled, fragrant, and soft is the target. Underripe bananas make bland, starchy pancakes that bind poorly, while ripe bananas sweeten, moisten, and hold the batter together. If your bananas ripen early, peel and freeze them; thawed frozen bananas work beautifully here.
- Do not skip the rest. Five to ten minutes of resting lets the oats hydrate, and hydrated oats are the difference between a scoopable batter that flips cleanly and a thin batter that spreads, tears, and cooks up gummy in the middle. If the morning allows only one patient step, make it this one — and use the time to warm the pan properly.
- Keep the heat at medium-low. This is the most important cooking tip in the recipe. Banana batter browns faster than flour batter because of its natural sugars, and high heat scorches the outside before the egg in the center can set. A gentle pan and small adjustments between batches give evenly cooked pancakes every time.
- Make them small. Quarter-cup scoops, about 3 1/2 to 4 inches (9 to 10 cm) across, are the sweet spot. Small pancakes are sturdy enough to flip in one motion, cook through in the center, and stack neatly. Large, wide versions of this batter are the ones that crack, fold, and frustrate, no matter how good the batter is.
- Read the pancake, not just the clock. Look for edges that appear set, a surface turning matte, bubbles that form and hold, and an underside that is deep golden when you peek. Time ranges guide you, but pans, stoves, and batter thickness all vary, and those cues are how experienced pancake cooks decide the moment to flip.
- Serve with contrast in temperature and texture. Warm, soft pancakes are at their best against something cool, fresh, or crisp: cold berries, a spoonful of yogurt straight from the refrigerator, toasted chopped nuts, or banana slices added at the table rather than cooked into the batter. That contrast keeps a simple three-ingredient stack from tasting one-note, and it lets each person build a plate that feels complete without changing the batter at all.
- Support the whole pancake when you flip. Use the widest, thinnest spatula you own, slide it fully underneath, and turn the pancake in one smooth motion close to the surface of the pan. If one folds or breaks, press it gently back together in the pan — it will still taste exactly as good.
Variations
- Blueberry banana oat pancakes. Fold 1/2 cup (75 g) of fresh blueberries into the rested batter, or drop a few berries onto each pancake right after scooping it into the pan, which distributes them most evenly. Berries add bright, jammy pockets. Frozen blueberries go in still frozen.
- Chocolate chip banana oat pancakes. Stir 3 tablespoons of mini chocolate chips into the batter after its rest, or sprinkle a few onto each pancake in the pan. Mini chips distribute better than full-size ones in a small pancake and melt into small pockets instead of heavy pools.
- Peanut butter banana oat pancakes. Whisk 2 tablespoons of smooth peanut butter or another nut or seed butter into the batter with the eggs, or serve the plain pancakes with a warm spoonful spread over the stack. The pairing with banana is classic, the pancakes become richer and more filling, and a few chopped peanuts on top completes the idea.
- Banana bread spice pancakes. Lean into the optional extras: keep the 1/2 teaspoon of cinnamon, add a pinch of ground nutmeg and a small drop of vanilla extract if you have them, and fold 1/4 cup (30 g) of finely chopped walnuts into the batter. The result tastes warmly spiced and cozy, very much in the spirit of banana bread, and it is especially good in cooler months with maple syrup alongside.
- Double batch for a family table. Double every core ingredient — 4 ripe bananas (about 480 g peeled), 2 cups (180 g) of rolled oats, and 4 large eggs, with 2 teaspoons of baking powder if using it — and blend in a full-size blender in the same order. Cook in batches over steady medium-low heat, keep finished pancakes warm in a 200°F (93°C) oven, and expect about 12 pancakes, or 4 servings of three.
- Savory-leaning breakfast plate. The pancakes themselves are gently sweet rather than sugary, so they sit happily beside savory breakfast foods. Serve a stack with plain Greek yogurt, a side of scrambled eggs, or fresh fruit and a sprinkle of flaky salt on the finished pancakes to sharpen their flavor.
Storage
Let any leftover pancakes cool completely on a plate or rack before storing them, because sealing warm pancakes in a container traps steam and makes their surfaces damp and gummy. Once cool, stack them with a small piece of parchment paper between them if you have it — banana oat pancakes are tender and slightly sticky, and the parchment keeps them from fusing into a single block — then seal the stack in an airtight container or a zip-top bag with the air pressed out. Refrigerated, the pancakes keep well for up to 3 days.
To reheat, warm the pancakes gently so they heat through without drying or scorching, remembering that their natural sugars brown quickly a second time, too. A skillet or griddle over low heat for about 1 minute per side, with no extra oil or just the lightest film, brings back a little of the original edge and is the best method when you have a minute to spare. The microwave is fastest — 20 to 30 seconds for a short stack on a microwave-safe plate — and produces the softest result. Serve reheated pancakes promptly.
For longer storage, these pancakes freeze successfully. Arrange the completely cooled pancakes in a single layer on a parchment-lined baking sheet, freeze until firm, about 1 hour, then transfer them to a freezer-safe bag or container with parchment between layers; this flash-freezing step lets you remove one or two at a time instead of prying apart a frozen stack. Frozen pancakes keep well for up to 2 months. Reheat from frozen in a low toaster, in a low skillet with a lid for a few minutes, or in the microwave in short intervals, checking that the centers are hot and soft all the way through. Leftover batter is best cooked off rather than stored, since the oats keep absorbing moisture and the banana darkens.
FAQ
Can I make 3-Ingredient Banana Oat Pancakes without a blender? Yes, easily. Mash the ripe bananas in a bowl with a fork until they are almost liquid, whisk in the eggs until the mixture looks even, and then stir in the rolled oats — whole for a hearty texture, or briefly crushed with the bottom of a jar if you want them finer. The hand-mashed batter is a little more textured, and the pancakes cook exactly the same way. Give a hand-mashed, whole-oat batter the full 10-minute rest, because the flakes need that time to soften in the banana and egg before they go into the pan. A ripe banana should mash almost the way soft butter spreads, with very little pressure from the fork, and any small lumps that remain will soften further as the batter rests and cooks.
Why are my pancakes browning too fast or falling apart when I flip them? Fast browning almost always means the pan is too hot for a sugar-rich banana batter, so lower the heat to medium-low, let the pan settle for a minute, and cook the next batch more gently. Pancakes that fall apart are usually flipped too early, made too large, or cooked from batter that did not rest long enough for the oats to hydrate and thicken it. Keep the scoops to 1/4 cup (60 ml), wait until the edges look set and the surface looks mostly matte, support the whole pancake on a wide spatula, and the flips will become much more reliable.
Can I use quick oats or steel-cut oats instead of rolled oats? Quick oats work as a substitute and produce a softer pancake, because their finer cut absorbs moisture faster; shorten the rest to about 5 minutes and expect a slightly less hearty texture. Steel-cut oats do not work in this recipe, even with a longer rest, because they are dense pieces of the whole groat that cannot soften in a few minutes of resting and a few minutes in a skillet, so the pancakes would stay gritty and undercooked at the center. Old-fashioned rolled oats remain the best choice because they blend into a coarse flour when you want smoothness and still hold a pleasant chew when left whole.
Are these pancakes gluten-free and can I freeze them? They are gluten-free only if the oats you buy are labeled gluten-free, because ordinary oats are frequently grown, transported, or processed alongside wheat and cannot be assumed safe for someone who must avoid gluten, even though oats themselves do not contain gluten. With certified gluten-free rolled oats and a clean pan, the recipe itself needs no other change. Freezing works very well: cool the pancakes completely, freeze them in a single layer until firm, then store them in a freezer bag with parchment between layers for up to 2 months, and reheat from frozen in a low toaster, a covered low skillet, or the microwave.

Recipe Card
3-Ingredient Banana Oat Pancakes
- Prep Time: 10 minutes (PT10M)
- Cook Time: 10 minutes (PT10M)
- Total Time: 20 minutes (PT20M)
- Servings: 2 servings
- Calories: 320 kcal per serving (estimated)
Two ripe bananas, rolled oats, and eggs blended into a thick batter, rested until scoopable, and cooked in small golden rounds over medium-low heat. Makes 6 pancakes, 3 per serving. Optional: add 1 teaspoon baking powder for fluffier pancakes, plus 1/2 teaspoon ground cinnamon and a pinch of salt as optional pantry extras.
Nutrition (estimated): 320 kcal per serving (estimated, without toppings), 54 g carbohydrates, 11 g protein, 7 g fat, 6 g fiber, 20 g sugar, 75 mg sodium. Nutrition is estimated and will vary with the exact size and ripeness of the bananas, the brand of oats, the size of the eggs, and any optional extras or toppings.
Can I make 3-Ingredient Banana Oat Pancakes without a blender?
Yes, easily. Mash the ripe bananas in a bowl with a fork until they are almost liquid, whisk in the eggs until the mixture looks even, and then stir in the rolled oats — whole for a hearty texture, or briefly crushed with the bottom of a jar if you want them finer. The hand-mashed batter is a little more textured, and the pancakes cook exactly the same way. Give a hand-mashed, whole-oat batter the full 10-minute rest, because the flakes need that time to soften in the banana and egg before they go into the pan. A ripe banana should mash almost the way soft butter spreads, with very little pressure from the fork, and any small lumps that remain will soften further as the batter rests and cooks.
Why are my pancakes browning too fast or falling apart when I flip them?
Fast browning almost always means the pan is too hot for a sugar-rich banana batter, so lower the heat to medium-low, let the pan settle for a minute, and cook the next batch more gently. Pancakes that fall apart are usually flipped too early, made too large, or cooked from batter that did not rest long enough for the oats to hydrate and thicken it. Keep the scoops to 1/4 cup (60 ml), wait until the edges look set and the surface looks mostly matte, support the whole pancake on a wide spatula, and the flips will become much more reliable.
Can I use quick oats or steel-cut oats instead of rolled oats?
Quick oats work as a substitute and produce a softer pancake, because their finer cut absorbs moisture faster; shorten the rest to about 5 minutes and expect a slightly less hearty texture. Steel-cut oats do not work in this recipe, even with a longer rest, because they are dense pieces of the whole groat that cannot soften in a few minutes of resting and a few minutes in a skillet, so the pancakes would stay gritty and undercooked at the center. Old-fashioned rolled oats remain the best choice because they blend into a coarse flour when you want smoothness and still hold a pleasant chew when left whole.
Are these pancakes gluten-free and can I freeze them?
They are gluten-free only if the oats you buy are labeled gluten-free, because ordinary oats are frequently grown, transported, or processed alongside wheat and cannot be assumed safe for someone who must avoid gluten, even though oats themselves do not contain gluten. With certified gluten-free rolled oats and a clean pan, the recipe itself needs no other change. Freezing works very well: cool the pancakes completely, freeze them in a single layer until firm, then store them in a freezer bag with parchment between layers for up to 2 months, and reheat from frozen in a low toaster, a covered low skillet, or the microwave.
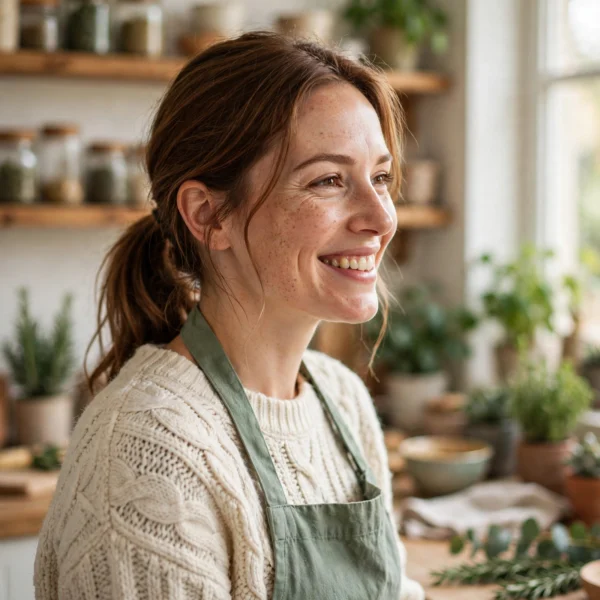
Hi, I’m Emma! I’m the cook and recipe developer behind Sizzle & Sage. From my sunny home kitchen, I share easy, flavor-packed recipes for real life — quick breakfasts, cozy weeknight dinners, and simple bakes anyone can make. Pull up a chair and stay a while!