Homemade Brioche Buns (Soft, Buttery, and Golden)
There is a specific kind of bun that makes a burger feel like an event and a dinner table feel complete: the brioche bun. Soft without being flimsy, rich without being heavy, with a golden, glossy top that gives way to a tender, feathery crumb. Bakery versions sell out for a reason, but brioche is one of the most rewarding breads to bake at home — the dough asks for a little patience and a lot of butter, and it pays you back with buns that taste like a special occasion.
The technique behind brioche is simpler than its reputation suggests. The dough starts like any enriched yeast dough — flour, eggs, milk, sugar, and yeast — and develops its gluten first. Then, and only then, the softened butter goes in, a little at a time, until the dough transforms into something silky and elastic. That two-stage process is the entire secret: gluten first for structure, butter second for richness. Once you see the dough turn glossy and pull cleanly away from the bowl, you will recognize that you have brioche on your hands.
This homemade brioche buns recipe walks through every stage with clear visual cues. It covers the sticky-dough stage (completely normal), how to shape tight, smooth balls for an even rise, how to read the proof with a simple poke test, and how the egg wash builds that signature lacquered top. The same batch works as burger buns or classic dinner rolls — and with the make-ahead and freezer tips below, you can have fresh brioche on your schedule instead of the oven's.
Why You'll Love This Recipe
- Bakery-soft texture, at home. The two-stage butter method — gluten developed first, butter folded in after — gives these buns a tender, feathery crumb with real structure.
- The glossy golden top. A simple egg wash before baking builds that signature lacquered finish, so every bun looks like it belongs in a bakery window.
- One dough, two jobs. Shape the same dough into burger buns or dinner rolls. The buns are sturdy enough to hold a juicy burger and soft enough to tear apart warm at the dinner table.
- Clear cues at every stage. No guessing: the recipe tells you what the dough should look, feel, and behave like at each step, from the sticky-butter stage to the poke test on the final proof.
- Make-ahead friendly. The dough happily rests overnight in the refrigerator, so the long rise can happen while you sleep and the buns can be shaped and baked fresh in the morning.
- Freezer-proof results. Baked buns freeze beautifully for up to three months, which means one batch can cover weeknight burgers, holiday dinners, and everything in between.
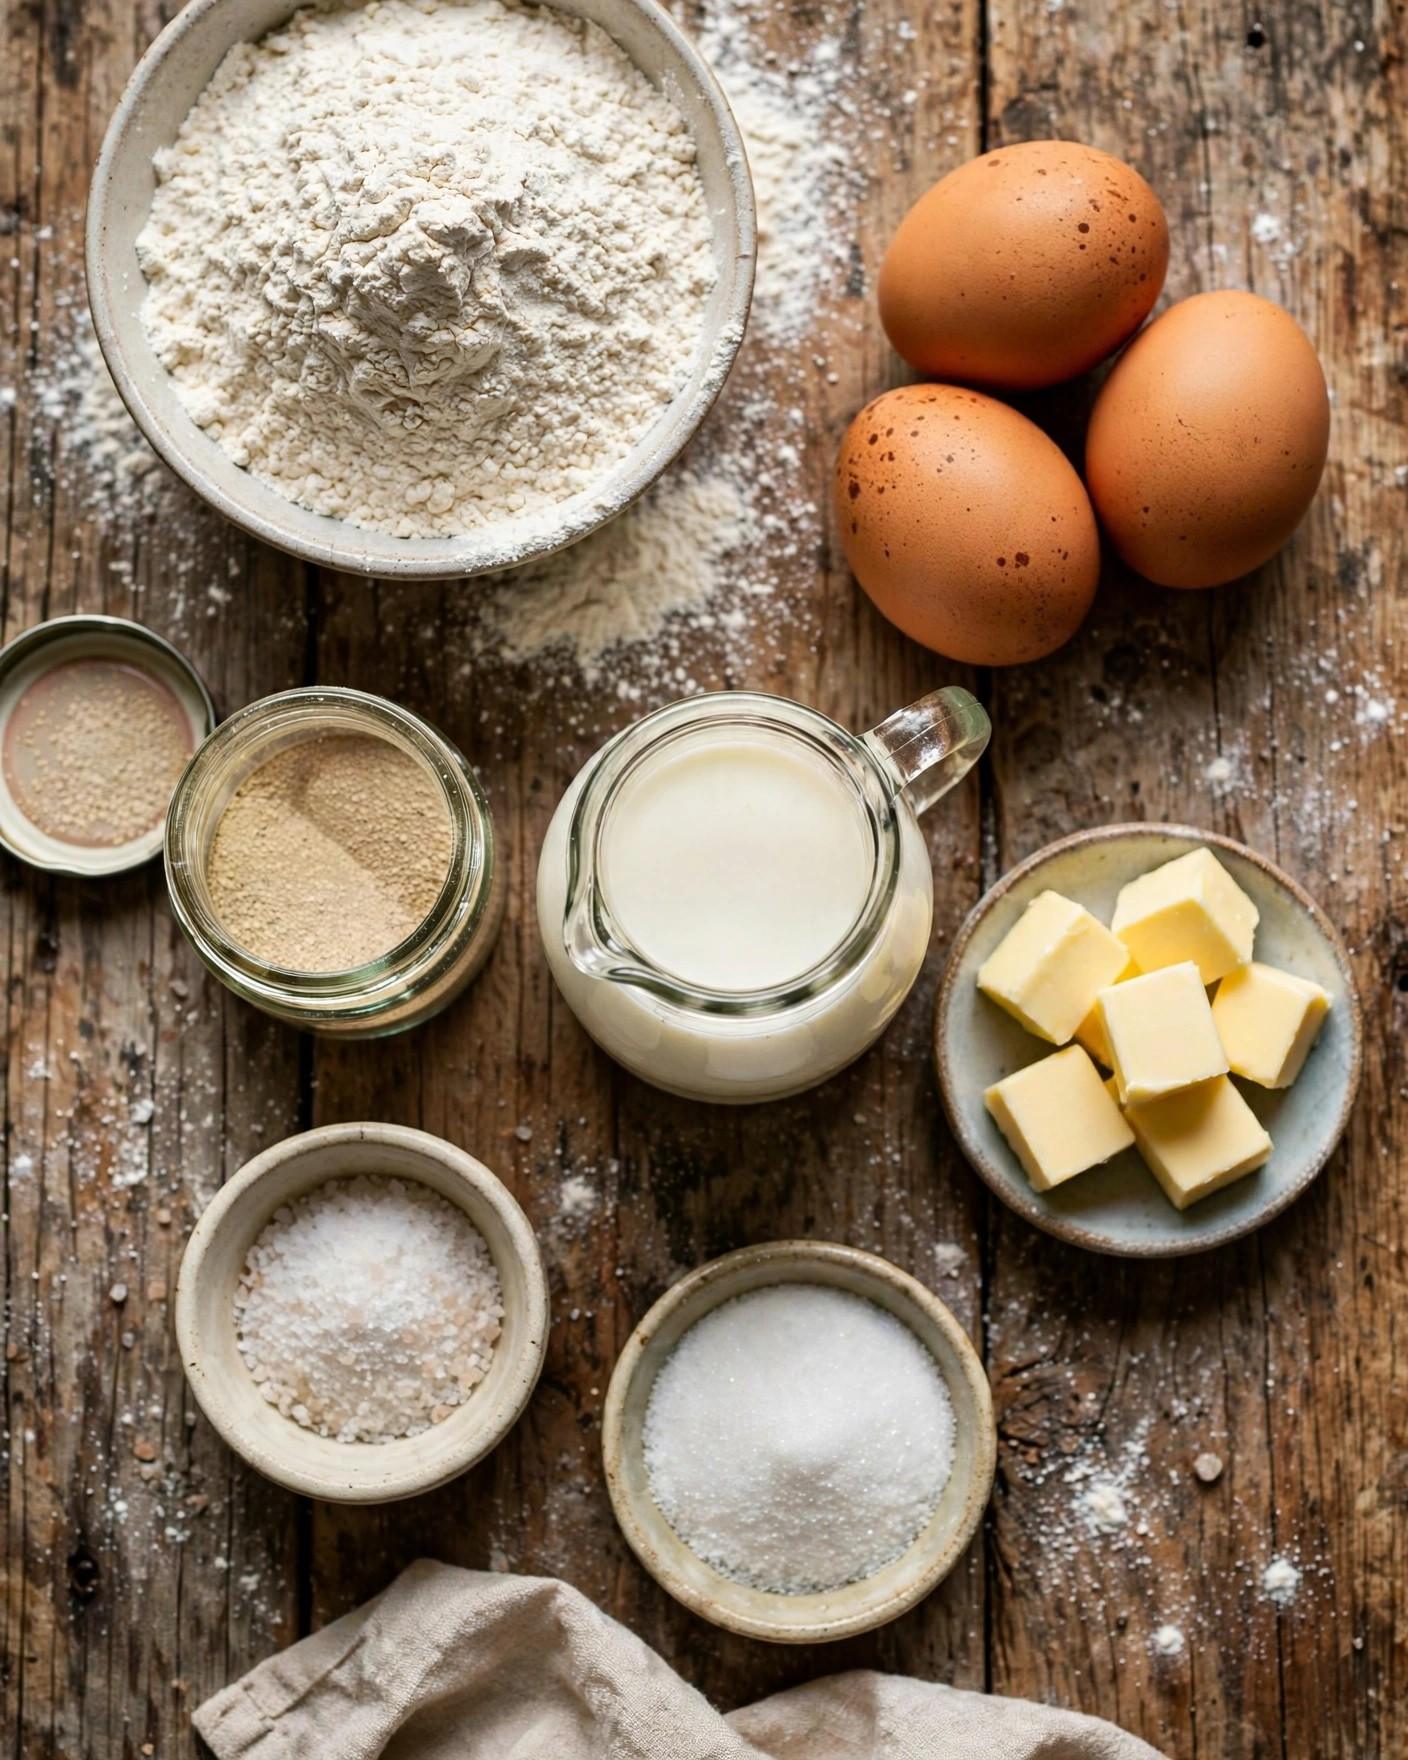
Ingredients
For the dough
- 4 1/2 cups (540 g) bread flour, plus a little extra for dusting
- 1/4 cup (50 g) granulated sugar
- 2 1/4 teaspoons (7 g) instant yeast (one standard packet)
- 1 1/2 teaspoons (9 g) fine sea salt
- 1 cup (240 ml) whole milk, warmed to about 105 to 110 degrees F (40 to 43 degrees C)
- 3 large eggs, at room temperature
- 1/2 cup (113 g / 1 stick) unsalted butter, softened to room temperature
For the egg wash
- 1 large egg
- 1 tablespoon whole milk or water
- Sesame seeds, for sprinkling (optional)
Why these ingredients matter
Bread flour. Brioche dough carries a lot of butter and eggs, so it needs the extra protein in bread flour — typically 12 to 14 percent — to build enough gluten to support all that enrichment. All-purpose flour will still make a good bun, but the texture will be slightly less lofty.
Instant yeast. Instant yeast can go straight into the dry ingredients with no blooming required, which keeps this recipe moving. Active dry yeast works too, but it must be dissolved in the warm milk with a pinch of sugar and left for about 10 minutes until foamy before mixing into the flour.
Warm milk. Milk adds tenderness and a gentle sweetness that water cannot match, and warming it to roughly 105 to 110 degrees F wakes the yeast up. Milk hotter than about 120 degrees F can kill yeast — the most common cause of dough that refuses to rise.
Eggs. Three whole eggs make this dough a true brioche rather than a plain soft roll. Eggs enrich the dough with fat and protein, which tenderizes the crumb, deepens the golden color, and adds the custardy richness that defines brioche. Room-temperature eggs incorporate far more evenly than cold ones.
Sugar. The quarter cup of sugar feeds the yeast during fermentation, improving both the rise and the browning. This is a mild sweetness, not a dessert sweetness; the finished buns taste buttery and bready, not sugary.
Softened butter. Butter is the soul of brioche, and two details matter: it goes in after the dough is already kneaded, and it must be truly soft — creamy and spreadable, not melted and not fridge-cold. Adding softened butter to an already-developed dough lets the gluten network form first and then get coated and tenderized by the fat.
Salt. Salt tightens the gluten structure and controls fermentation so the dough does not overproof. Fine sea salt dissolves evenly into the dough.
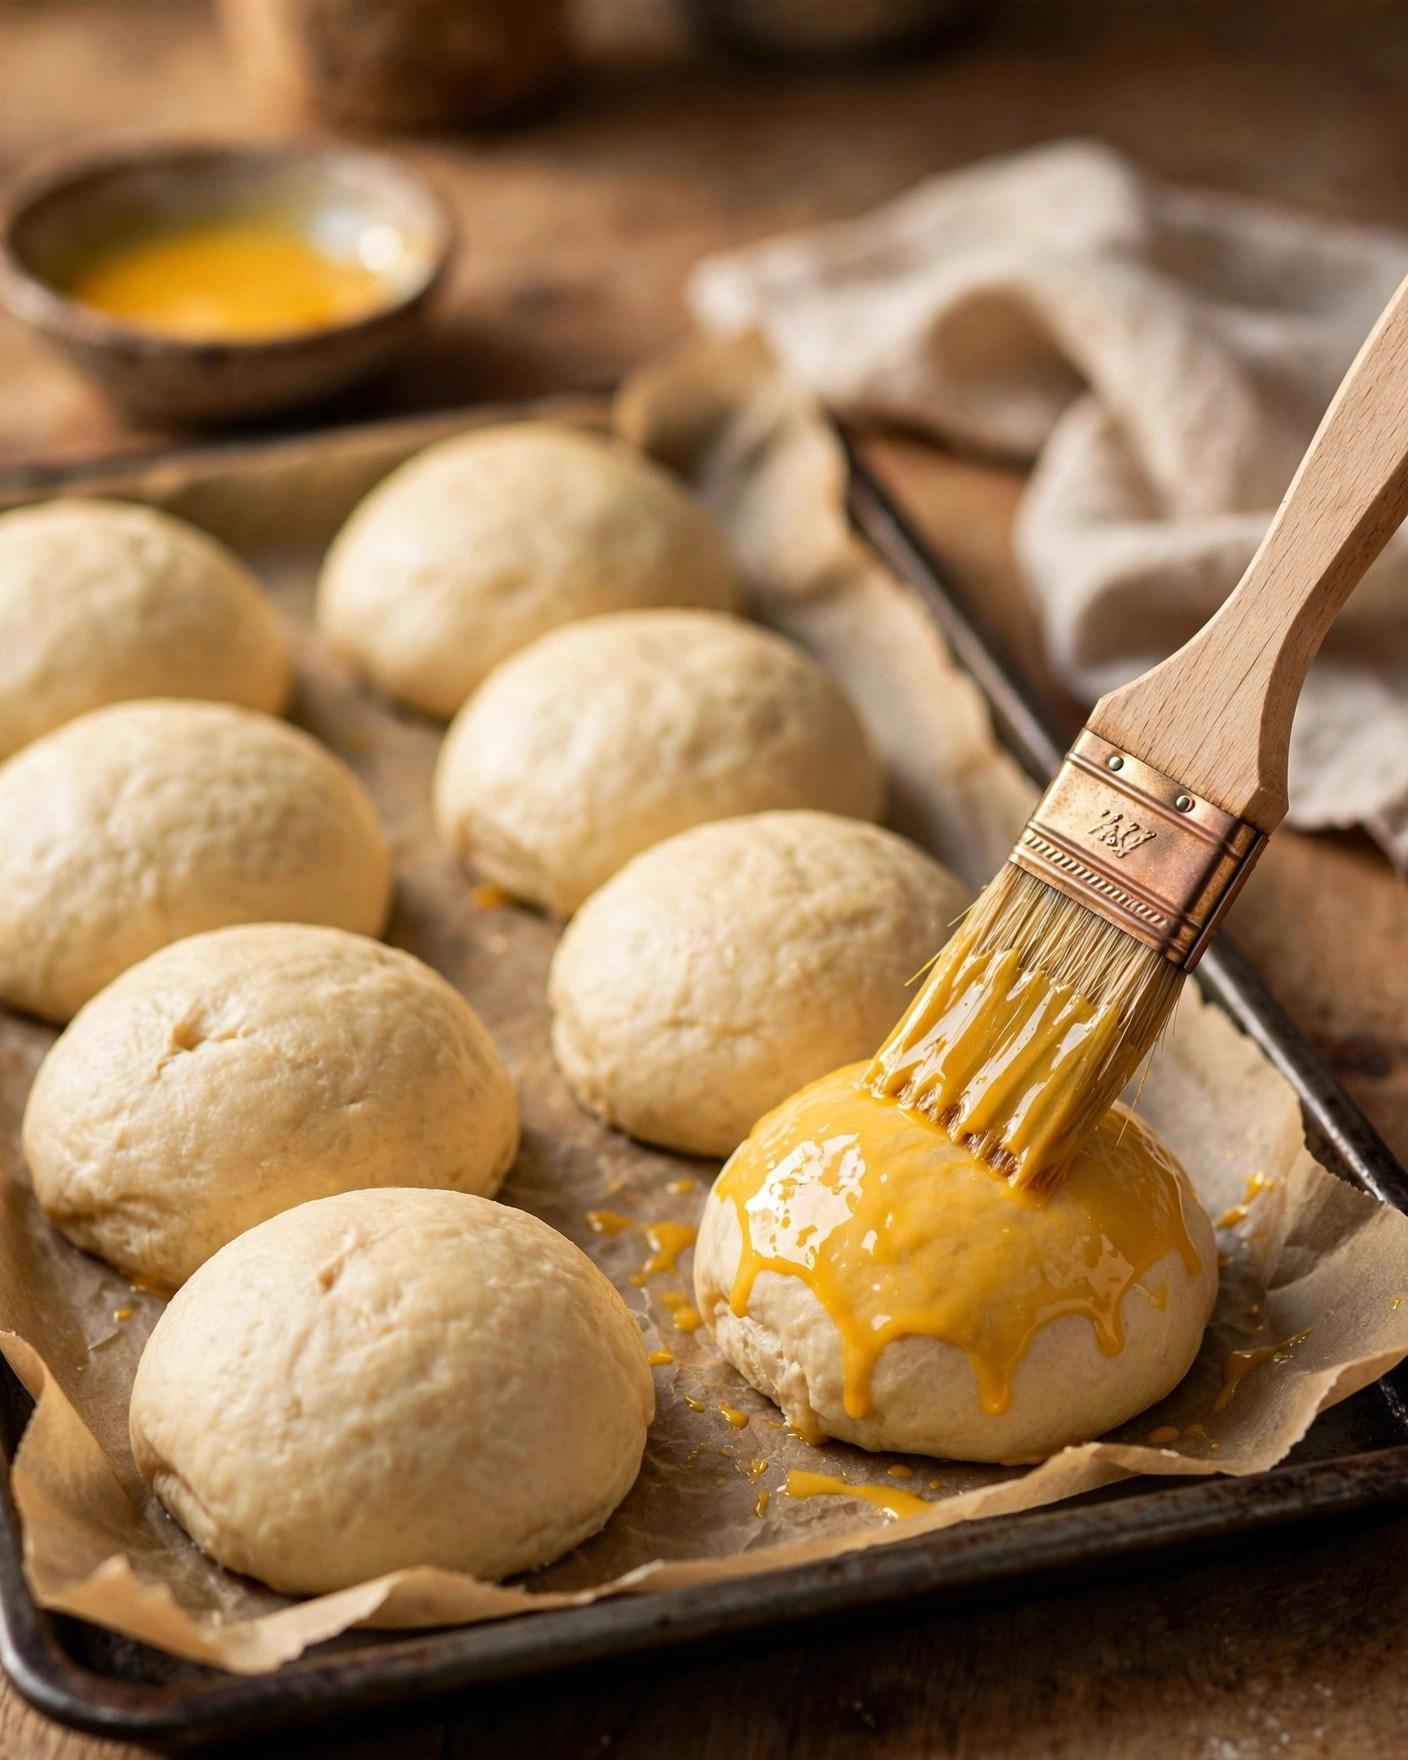
The egg wash. Beaten egg plus a splash of milk, brushed gently over the risen buns, is what produces the deep-golden, glossy crust. The proteins and sugars in the egg brown in the oven's heat and form a thin lacquer that also keeps the crust soft and pliable.
Instructions
- Combine the dry ingredients. In the bowl of a stand mixer fitted with the dough hook, whisk together the bread flour, sugar, instant yeast, and fine sea salt. If you are using active dry yeast instead of instant, dissolve it in the warm milk with a pinch of the sugar first and let it stand for about 10 minutes until foamy, then proceed with the recipe.
- Add the milk and eggs. With the mixer on low speed, pour in the warm milk and add the room-temperature eggs. Mix for about 2 minutes, until a shaggy dough forms and no dry flour remains at the bottom of the bowl. Scrape down the sides of the bowl once with a spatula to make sure everything is incorporated.
- Knead until the dough strengthens. Increase the speed to medium and knead for 8 to 10 minutes. The dough will start rough and sticky, then gradually become smoother and more elastic. It is ready for the butter when it pulls away from the sides of the bowl in one piece and stretches without tearing immediately when you pull a small piece between your fingers.
- Add the butter, a little at a time. With the mixer on medium-low, add the softened butter one tablespoon at a time, waiting until each addition is fully absorbed before adding the next. This takes about 5 to 8 minutes total. The dough will look sloppy and greasy at first — this is completely normal. Keep going, and it will suddenly transform: it will turn glossy, supple, and elastic, and it will start slapping against the sides of the bowl.
- Finish kneading. Continue kneading for another 3 to 5 minutes after the last of the butter is absorbed. The finished dough should be smooth, satiny, and elastic. To check, stretch a small piece thin between your fingers: if it forms a translucent membrane without tearing — the windowpane test — the gluten is fully developed. The dough will still be soft and slightly tacky to the touch; it should not be stiff or dry.
- First rise. Shape the dough into a ball and place it in a lightly greased large bowl, turning it once to coat the surface. Cover with plastic wrap or a damp kitchen towel and let it rise in a warm, draft-free spot for 1 to 1 1/2 hours, or until roughly doubled in size. Pressing a finger into the dough should leave an indentation that fills back only slowly.
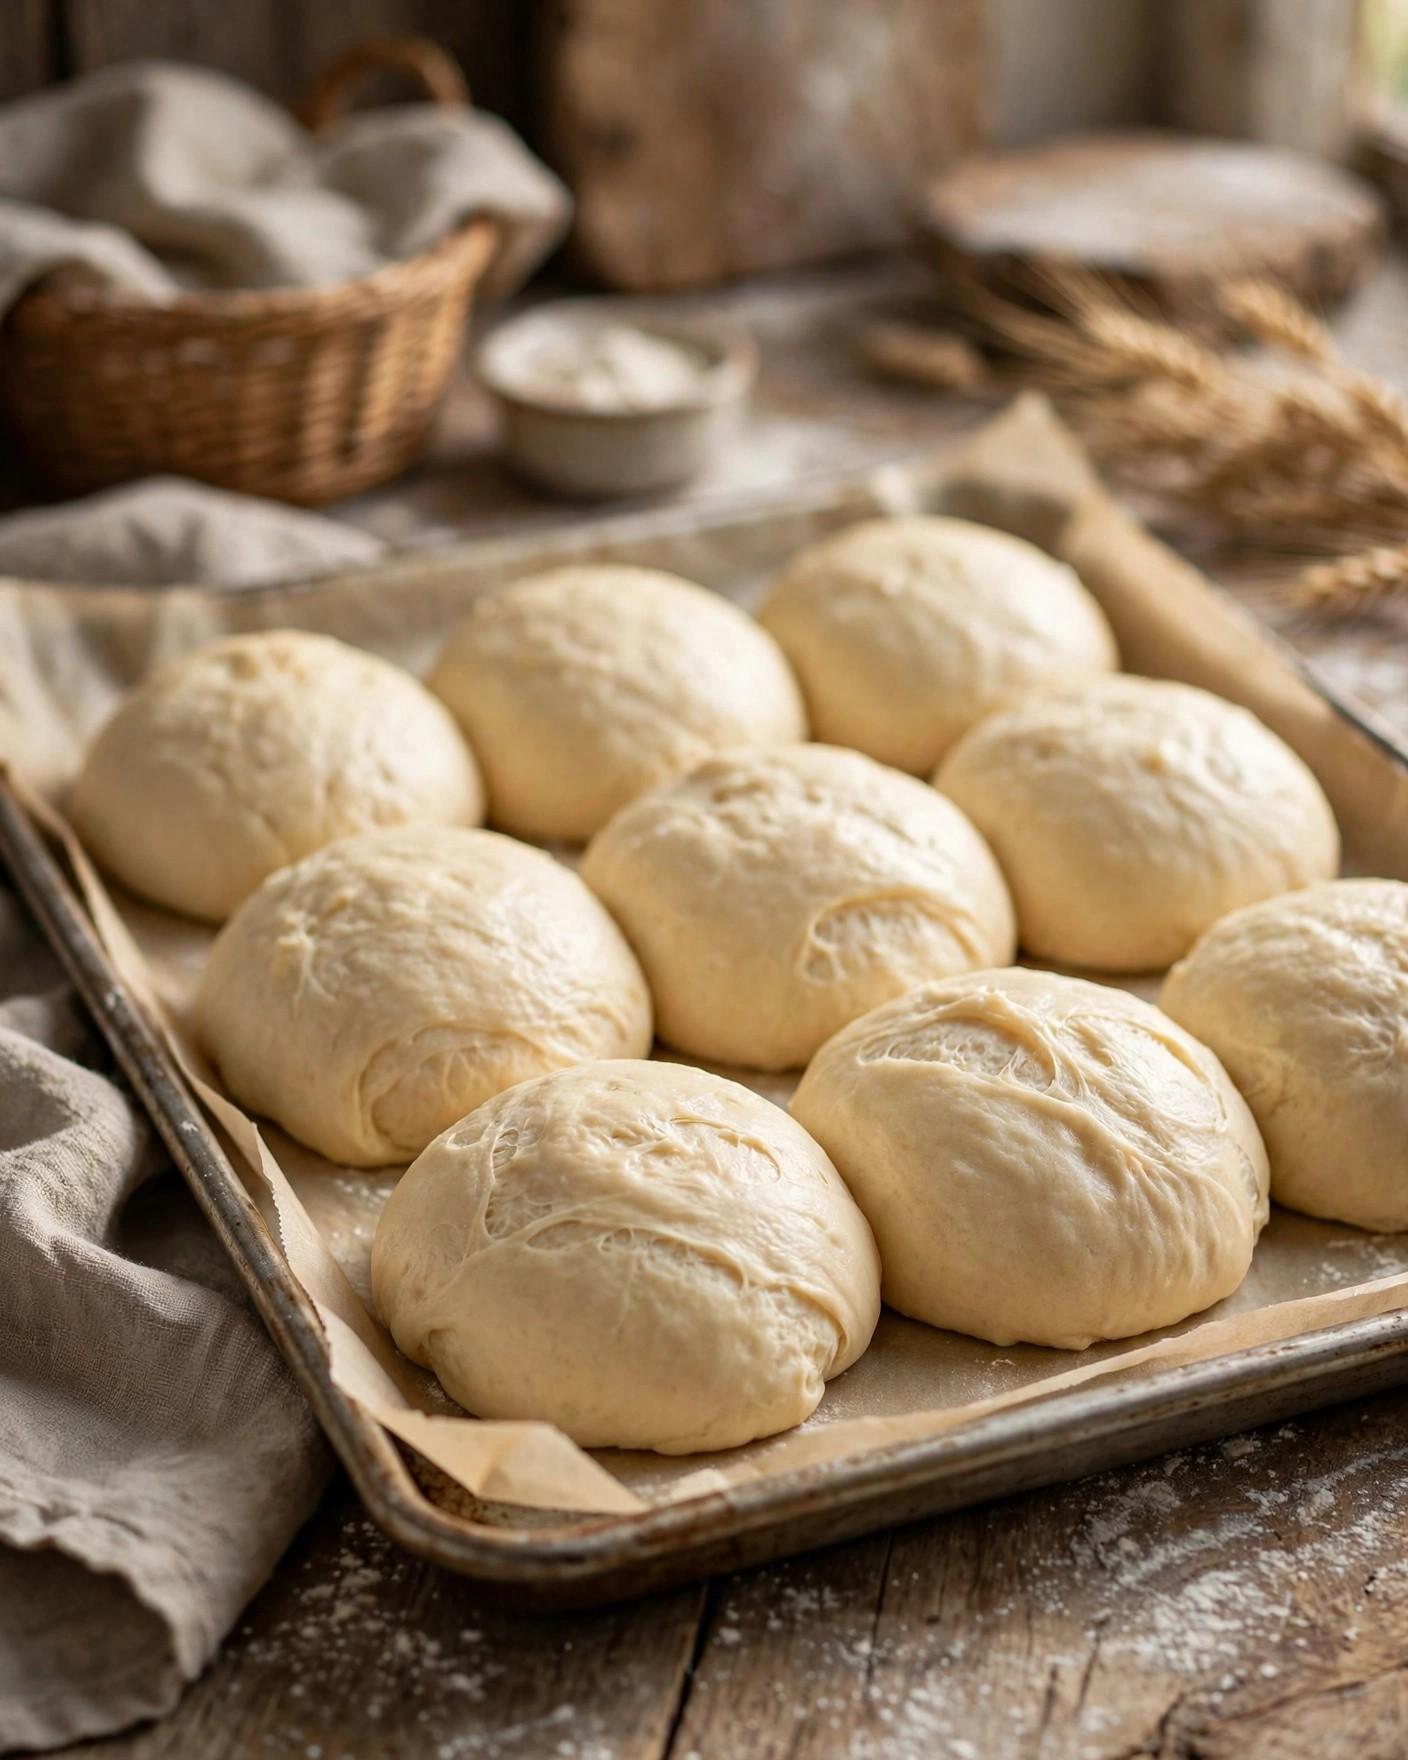
- Shape the buns. Turn the risen dough out onto a lightly floured surface and press it gently to deflate. Divide it into 8 equal pieces — a kitchen scale helps here, with each piece weighing about 125 g. To shape each bun, flatten a piece into a rough circle, gather the edges up and over the center, pinch the seam closed, then turn it seam-side down. Cup your hand over the dough and roll it in small circles on the counter, keeping the seam tucked underneath, until the top is smooth and taut. Place the shaped buns 2 to 3 inches apart on two parchment-lined baking sheets.
- Final proof. Cover the shaped buns loosely with greased plastic wrap or a light kitchen towel and let them rise for 45 minutes to 1 hour, until they look puffy and have grown by about half again. Use the poke test: press a floured fingertip gently into the side of a bun. If the indentation springs back immediately, it needs more time. If it fills back slowly and only partially, the buns are ready for the oven. If the indentation stays completely and the dough looks deflated, it has overproofed — bake it right away anyway.
- Egg wash and bake. About 20 minutes before the proof finishes, heat the oven to 375 degrees F (190 degrees C). Whisk the egg with the milk or water until completely smooth. Brush the tops and sides of each bun gently with the egg wash, using light strokes so you do not deflate the proofed dough. Sprinkle with sesame seeds if using. Bake for 18 to 22 minutes, until the tops are a deep, even golden brown and the buns sound hollow when tapped on the bottom. Cool on a wire rack for at least 20 minutes before slicing — the crumb is still setting while the buns are hot.

Tips for Perfect Brioche Buns
- Resist adding extra flour. Brioche dough is supposed to be soft and tacky. Adding flour to make it easier to handle produces a dense, dry bun. Dust your hands and the counter lightly instead, and trust that the dough firms up as the butter works in and as it chills if you refrigerate it.
- Butter temperature matters. Truly softened butter — creamy and spreadable, still cool to the touch — blends into the dough in minutes. Melted butter makes the dough greasy and slack; cold butter leaves visible chunks.
- Weigh the flour if you can. A cup of flour can weigh anywhere from 120 to 150 g depending on how it is scooped. This recipe is built around 540 g total; too much flour is the most common reason brioche turns out heavy.
- Create a warm rising spot. Yeast likes temperatures around 75 to 80 degrees F. On a cool day, let the dough rise in the oven with just the oven light on — the light raises the temperature of the box by several degrees without any risk of cooking the dough. Remember to take the dough out before preheating.
- Do not skip the poke test. Timers estimate; dough tells. Room temperature, humidity, and the warmth of your kitchen all change how fast dough ferments, so the poke test is the only reliable signal that the final proof is done.
- Brush the egg wash gently. By the time the buns are proofed, they are full of gas. Heavy brush strokes can knock that air out. Use the lightest touch, and dip the brush often rather than pressing harder.
- Cool before slicing. The interior crumb is still finishing its structure in the first 15 to 20 minutes out of the oven. Cutting too early can make the center gummy. Let them cool to just warm, then slice.
Variations
- Sesame-topped burger buns. Brush with egg wash and sprinkle generously with sesame seeds before baking — the classic burger-joint finish. For a seeded dinner roll, use a mix of sesame and poppy seeds.
- Everything-seasoning dinner rolls. Skip the sesame and top the egg-washed buns with everything bagel seasoning for savory dinner rolls with a crunchy, seasoned crust.
- Honey-butter buns. Warm 2 tablespoons of honey with 2 tablespoons of butter until melted and brush it over the hot buns the moment they come out of the oven. The tops turn sticky, glossy, and faintly sweet — excellent with fried chicken.
- Slider buns. Divide the dough into 12 pieces of about 85 g each instead of 8, and bake for 14 to 16 minutes. The smaller size is ideal for party sliders and mini pulled-pork sandwiches.
- Whole wheat brioche. Replace up to 1 1/2 cups (180 g) of the bread flour with white whole wheat flour. The buns will be slightly denser and nuttier; add 1 to 2 tablespoons of extra milk if the dough feels dry.
- Chocolate chip breakfast buns. Fold 3/4 cup of mini chocolate chips into the finished dough before the first rise, and reduce the salt to 1 teaspoon. Baked and served warm, they cross the line from bun to pastry.
Storage
Baked brioche buns keep at room temperature in an airtight bag or container for 2 to 3 days. Because of their high butter and egg content, they stay softer than lean rolls, but they do stale faster than a crusty bread once cut — so slice them only when you are ready to serve.
For longer storage, freeze the buns. Cool them completely, then wrap each bun individually in plastic wrap and place them in a freezer bag with the air pressed out. They keep for up to 3 months. Thaw at room temperature for about 1 hour, still wrapped, and refresh in a 350 degree F (175 degree C) oven for 5 to 8 minutes to bring back the soft crumb and crisp up the crust slightly.
The unbaked dough is also a good candidate for the refrigerator. After the first rise, punch the dough down, cover it tightly, and refrigerate for 8 to 24 hours. The cold slows the yeast to a crawl while the flavor deepens. Shape the cold dough straight from the fridge — it will be firm and easy to handle — then let the shaped buns proof a little longer than usual, about 1 to 1 1/4 hours, since they are starting cold.

Nutrition
Estimated per serving (recipe makes 8 buns; one serving is 1 bun):
- Calories: 290
- Total Fat: 11 g
- Saturated Fat: 6 g
- Cholesterol: 95 mg
- Sodium: 390 mg
- Total Carbohydrates: 41 g
- Dietary Fiber: 2 g
- Total Sugars: 7 g
- Protein: 8 g
Nutrition values are estimates calculated from the listed ingredients and will vary with the exact flour measurement, butter brand, and egg size.
FAQ
Why is my brioche dough so sticky? Is that normal? Yes — sticky is normal for brioche. This is a high-hydration, high-fat enriched dough, and it goes through a greasy, slack stage when the butter is being worked in before it turns smooth and glossy. Do not fix it with lots of extra flour; that is the fastest way to a dense, heavy bun. A light dusting of flour on your hands and the counter is enough, and the dough feels much firmer after the first rise.
Can I make the dough ahead of time? Yes, and the overnight method actually improves the flavor. Complete the first rise, punch the dough down, cover it tightly, and refrigerate for 8 to 24 hours. Shape the cold dough directly from the refrigerator, then give the shaped buns a slightly longer final proof — about 1 to 1 1/4 hours — because they start out cold.
Can I freeze homemade brioche buns? Baked buns freeze very well. Cool them completely, wrap each one individually in plastic wrap, and freeze in a zip-top bag with the air pressed out for up to 3 months. Thaw at room temperature for about an hour, then refresh in a 350 degree F (175 degree C) oven for 5 to 8 minutes. Raw, shaped buns are not a good freezing candidate for home bakers — the yeast often does not survive the freeze-thaw cycle evenly, which leads to a dense, under-risen bun.
Why didn't my buns rise? The most common causes are dead yeast or the wrong liquid temperature. Yeast past its expiration date, or stored in a warm cupboard instead of the refrigerator or freezer, loses its strength. Milk hotter than about 120 degrees F kills yeast outright, while milk straight from the refrigerator slows it to a crawl. Check the yeast date first, measure the milk temperature with a thermometer, and give the dough a warm, draft-free spot — then let the poke test, not the clock, tell you when the proof is done.
Recipe Card
Homemade Brioche Buns
- Prep Time: 30 minutes (PT30M)
- Cook Time: 20 minutes (PT20M)
- Total Time: 3 hours (PT3H)
- Servings: 8 buns
- Calories: 290 kcal per serving (estimated)
Soft, buttery homemade brioche buns with a glossy egg-wash top and a tender, feathery crumb. The enriched dough develops its gluten first, then folds in softened butter for that signature rich texture — shaped into smooth buns, proofed until puffy, and baked deep golden. Perfect as burger buns or warm dinner rolls, with make-ahead and freezer options for fresh brioche on your schedule.

Hi, I’m Emma! I’m the cook and recipe developer behind Sizzle & Sage. From my sunny home kitchen, I share easy, flavor-packed recipes for real life — quick breakfasts, cozy weeknight dinners, and simple bakes anyone can make. Pull up a chair and stay a while!