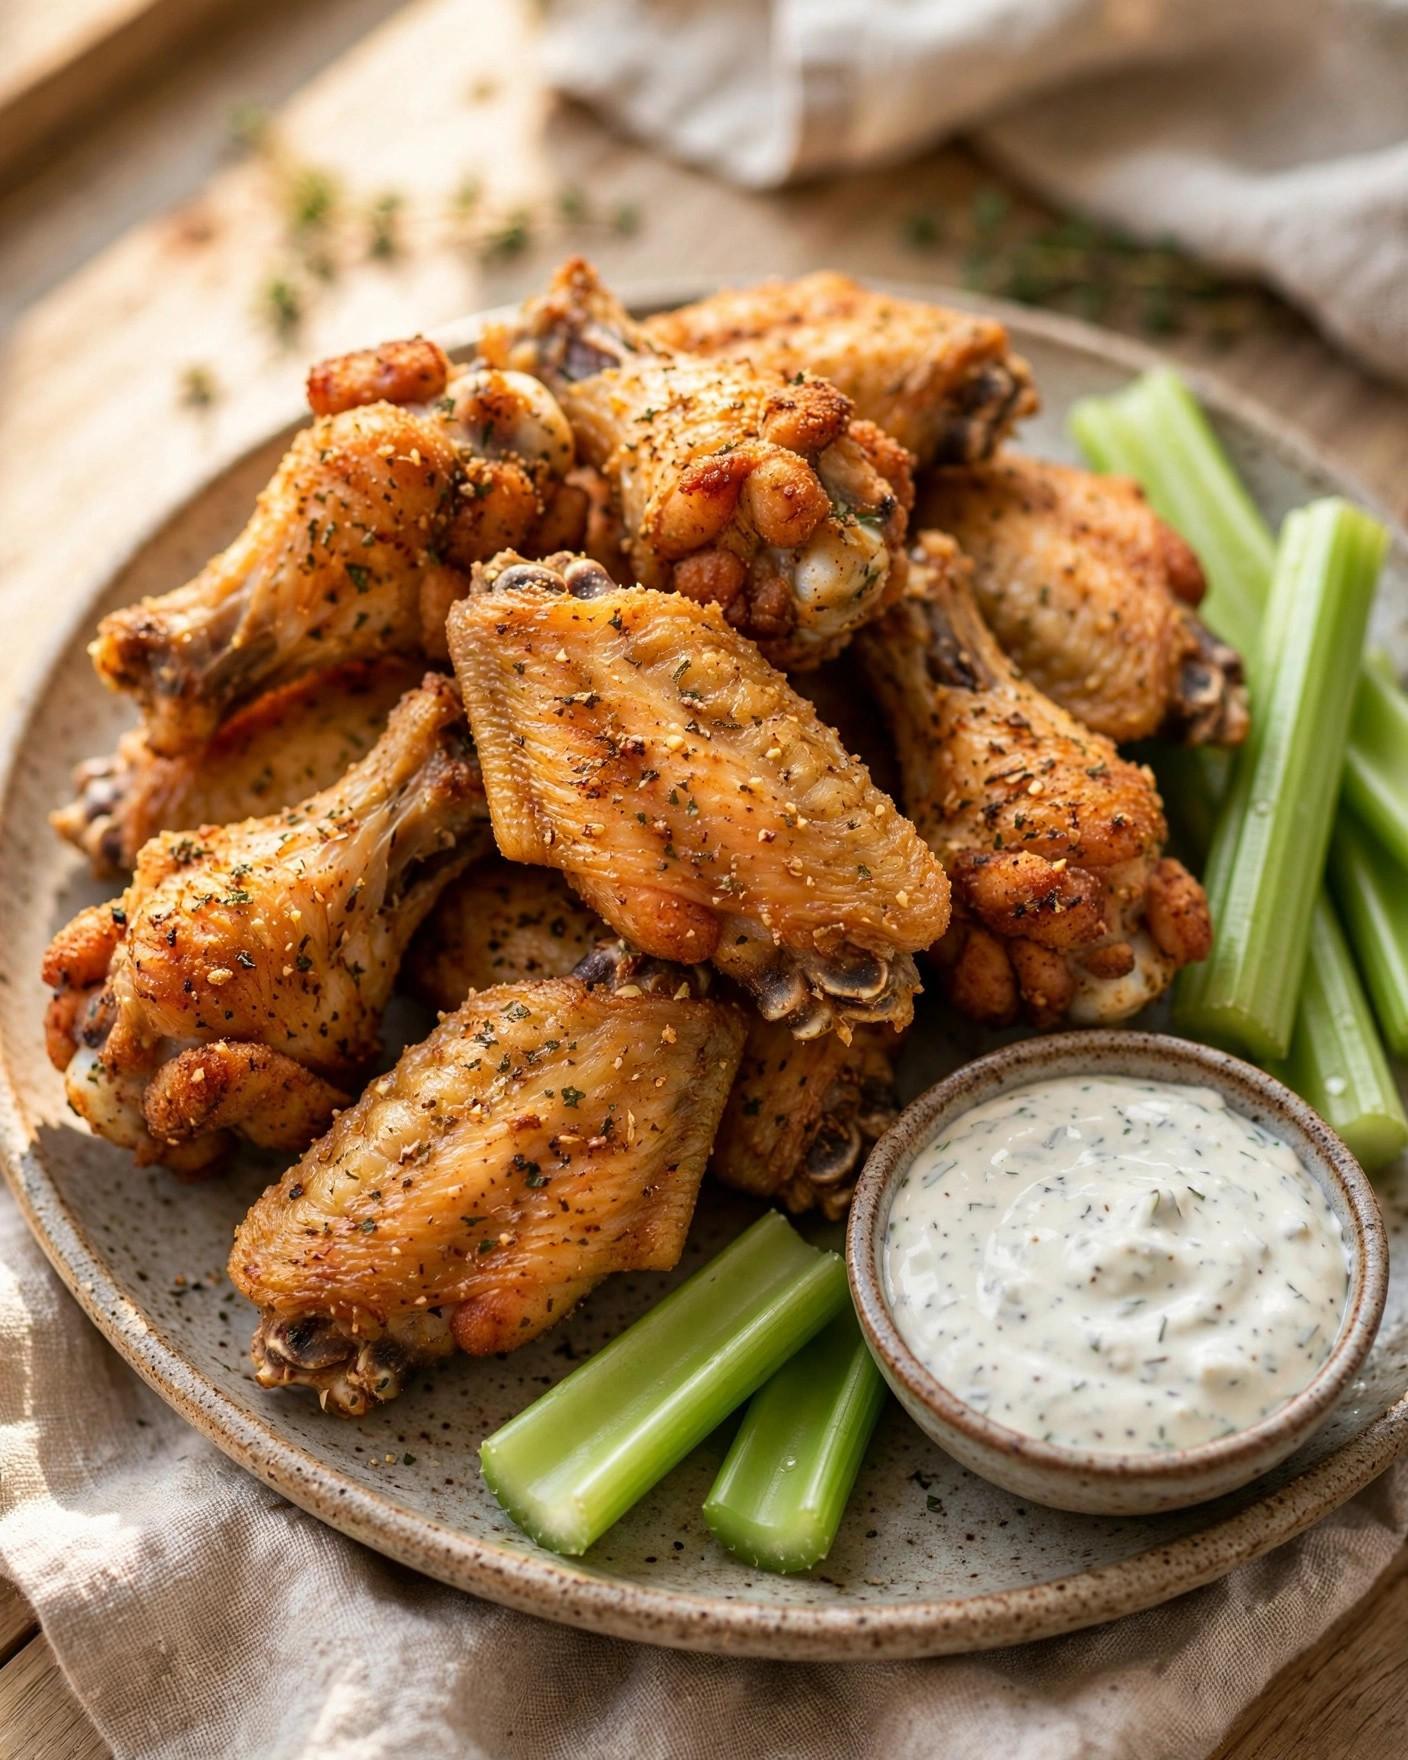
Crispy Air Fryer Chicken Wings
Some appetizers need a long ingredient list and a lot of explaining. Chicken wings are not one of them. At their best, wings are about two things: skin that shatters a little when you bite it, and juicy meat underneath that pulls cleanly from the bone. These crispy air fryer chicken wings get there the straightforward way — a thorough pat-dry, a simple dry seasoning you probably already own, and one small trick that changes everything: a light coating of baking powder that helps the skin dry out, blister, and turn deeply golden in the hot circulating air at 400 degrees F (200 degrees C).
There is no breading to set up, no flour dredge station, and no pot of oil to heat, watch, and strain afterwards. The wings cook in their own rendered fat, seasoned simply with salt, black pepper, smoked paprika, and onion powder, so the chicken itself stays the main flavor. That plain, well-seasoned base is deliberate. It means the finished wings are wonderful exactly as they come out of the basket, and equally happy tossed in sauce at the end.
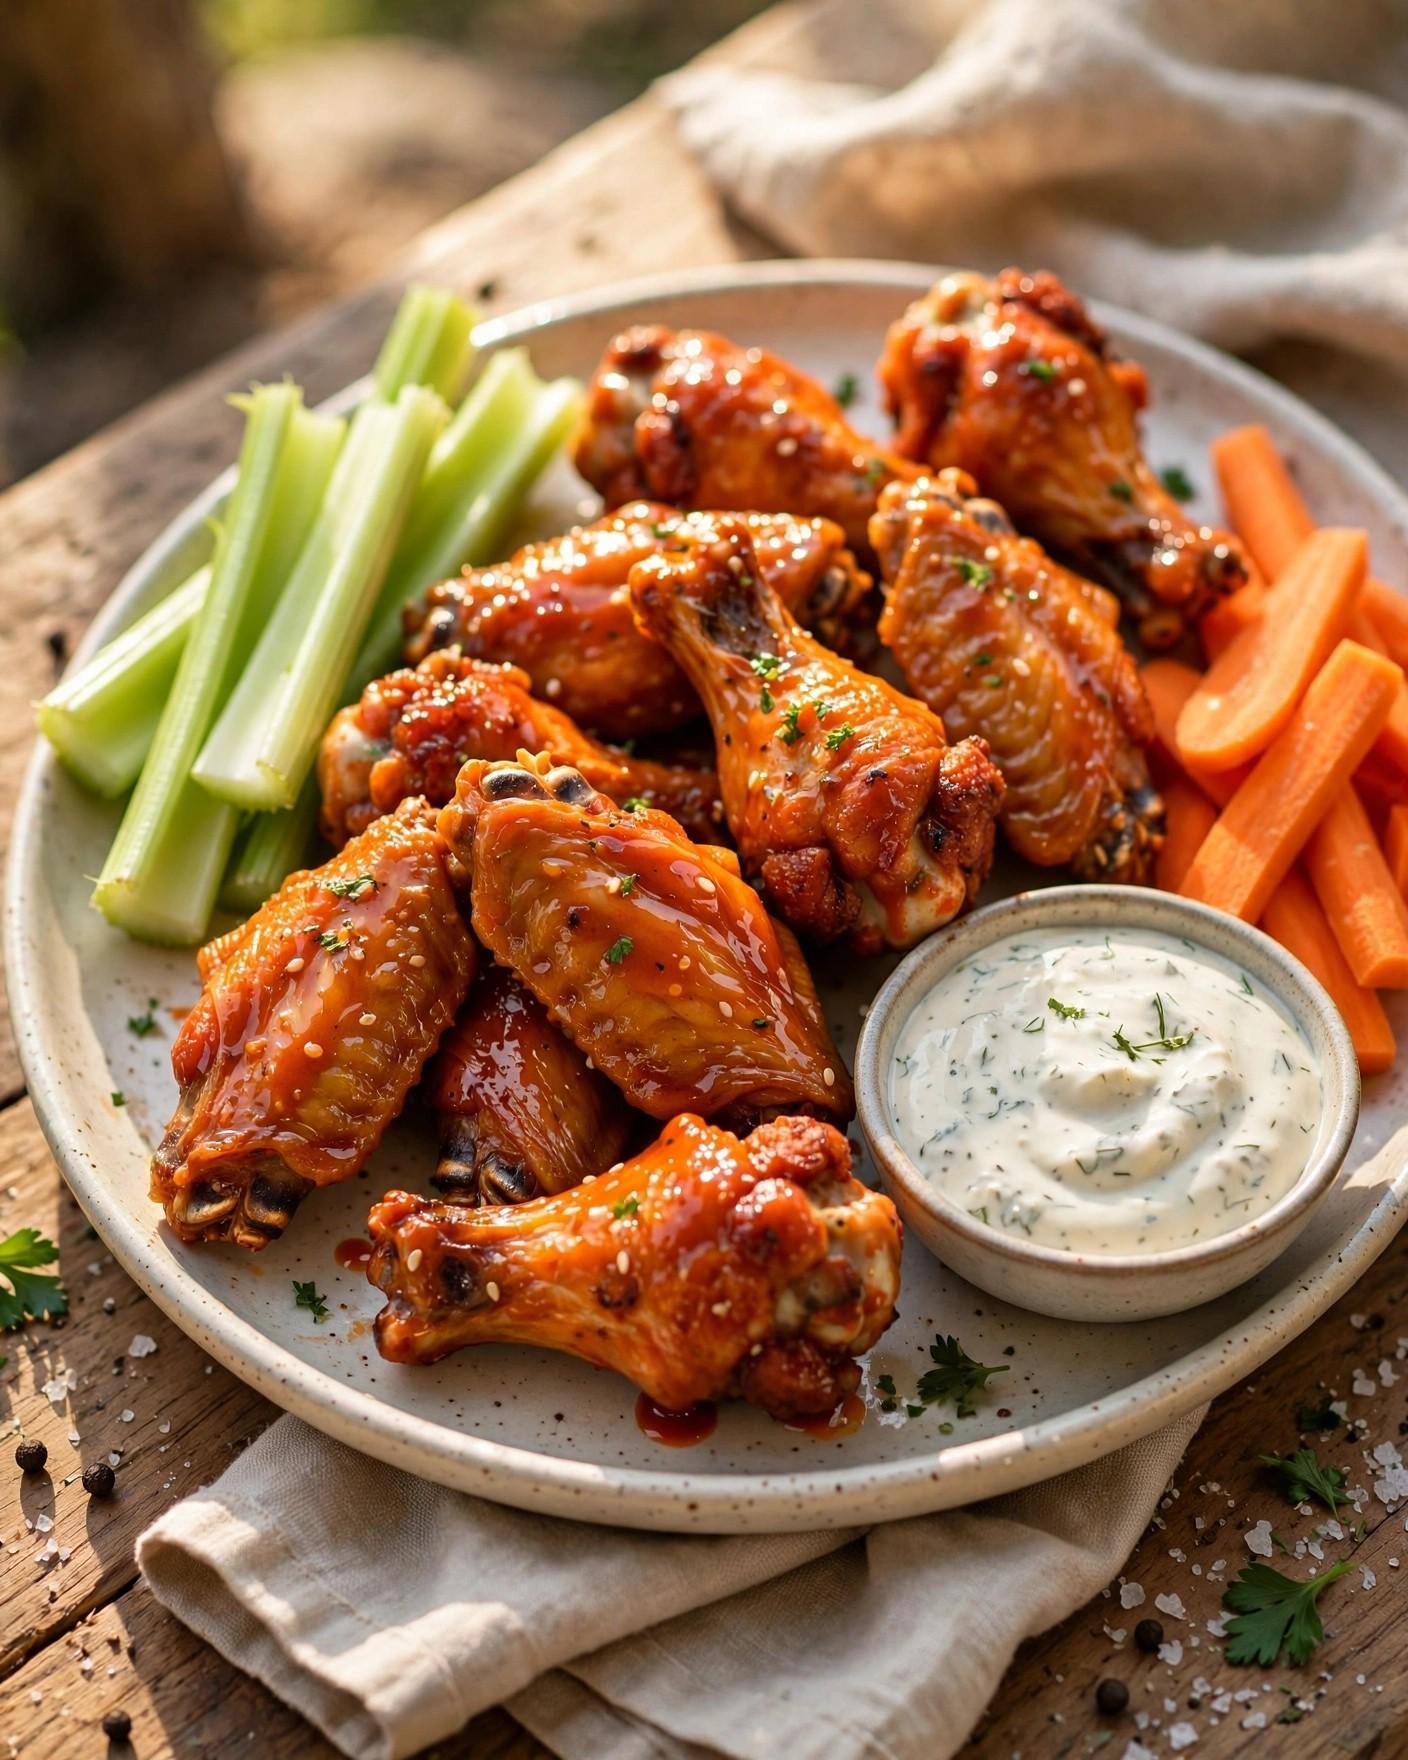
The sauce here is entirely optional, and it is kept separate on purpose. A quick buffalo sauce — hot sauce whisked with melted butter and a touch of honey — waits in a warm bowl for anyone who wants it. Serve half the batch plain and half tossed, put celery, carrot sticks, and a cool dip in the middle of the table, and you have covered everybody at once: the crisp-skin purists, the buffalo loyalists, and the people who quietly take one of each, every time.
Why You'll Love This Recipe
- Genuinely crisp skin, no deep frying. The baking powder trick plus very dry skin gives you blistered, crackly wings at 400 degrees F (200 degrees C) without a pot of oil, a splattering stovetop, or a lingering fry smell in the kitchen.
- A simple dry rub from pantry staples. Salt, black pepper, smoked paprika, and onion powder — nothing fancy, nothing to order, and nothing that covers up the chicken. This is the classic, clean wing flavor everything else builds on.
- Sauce is optional, never obligatory. The wings are fully seasoned and ready to eat plain. The buffalo sauce is a two-minute extra for the people at the table who want it, tossed on at the very end so the skin stays crisp underneath.
- One basket, about 25 minutes of cooking. Once the wings are seasoned, the air fryer does the work. A flip halfway through is the only attention they ask for.
- Game day, weeknight, or snack plate. Wings fit almost any table — a starter before dinner, the center of a game-day spread, or a casual Friday-night plate with dips and crunchy vegetables.
- Easy to scale and easy to season your way. Cook in batches for a crowd, hold finished wings warm in a low oven, and split the batch between plain, buffalo, and any other toss you like.
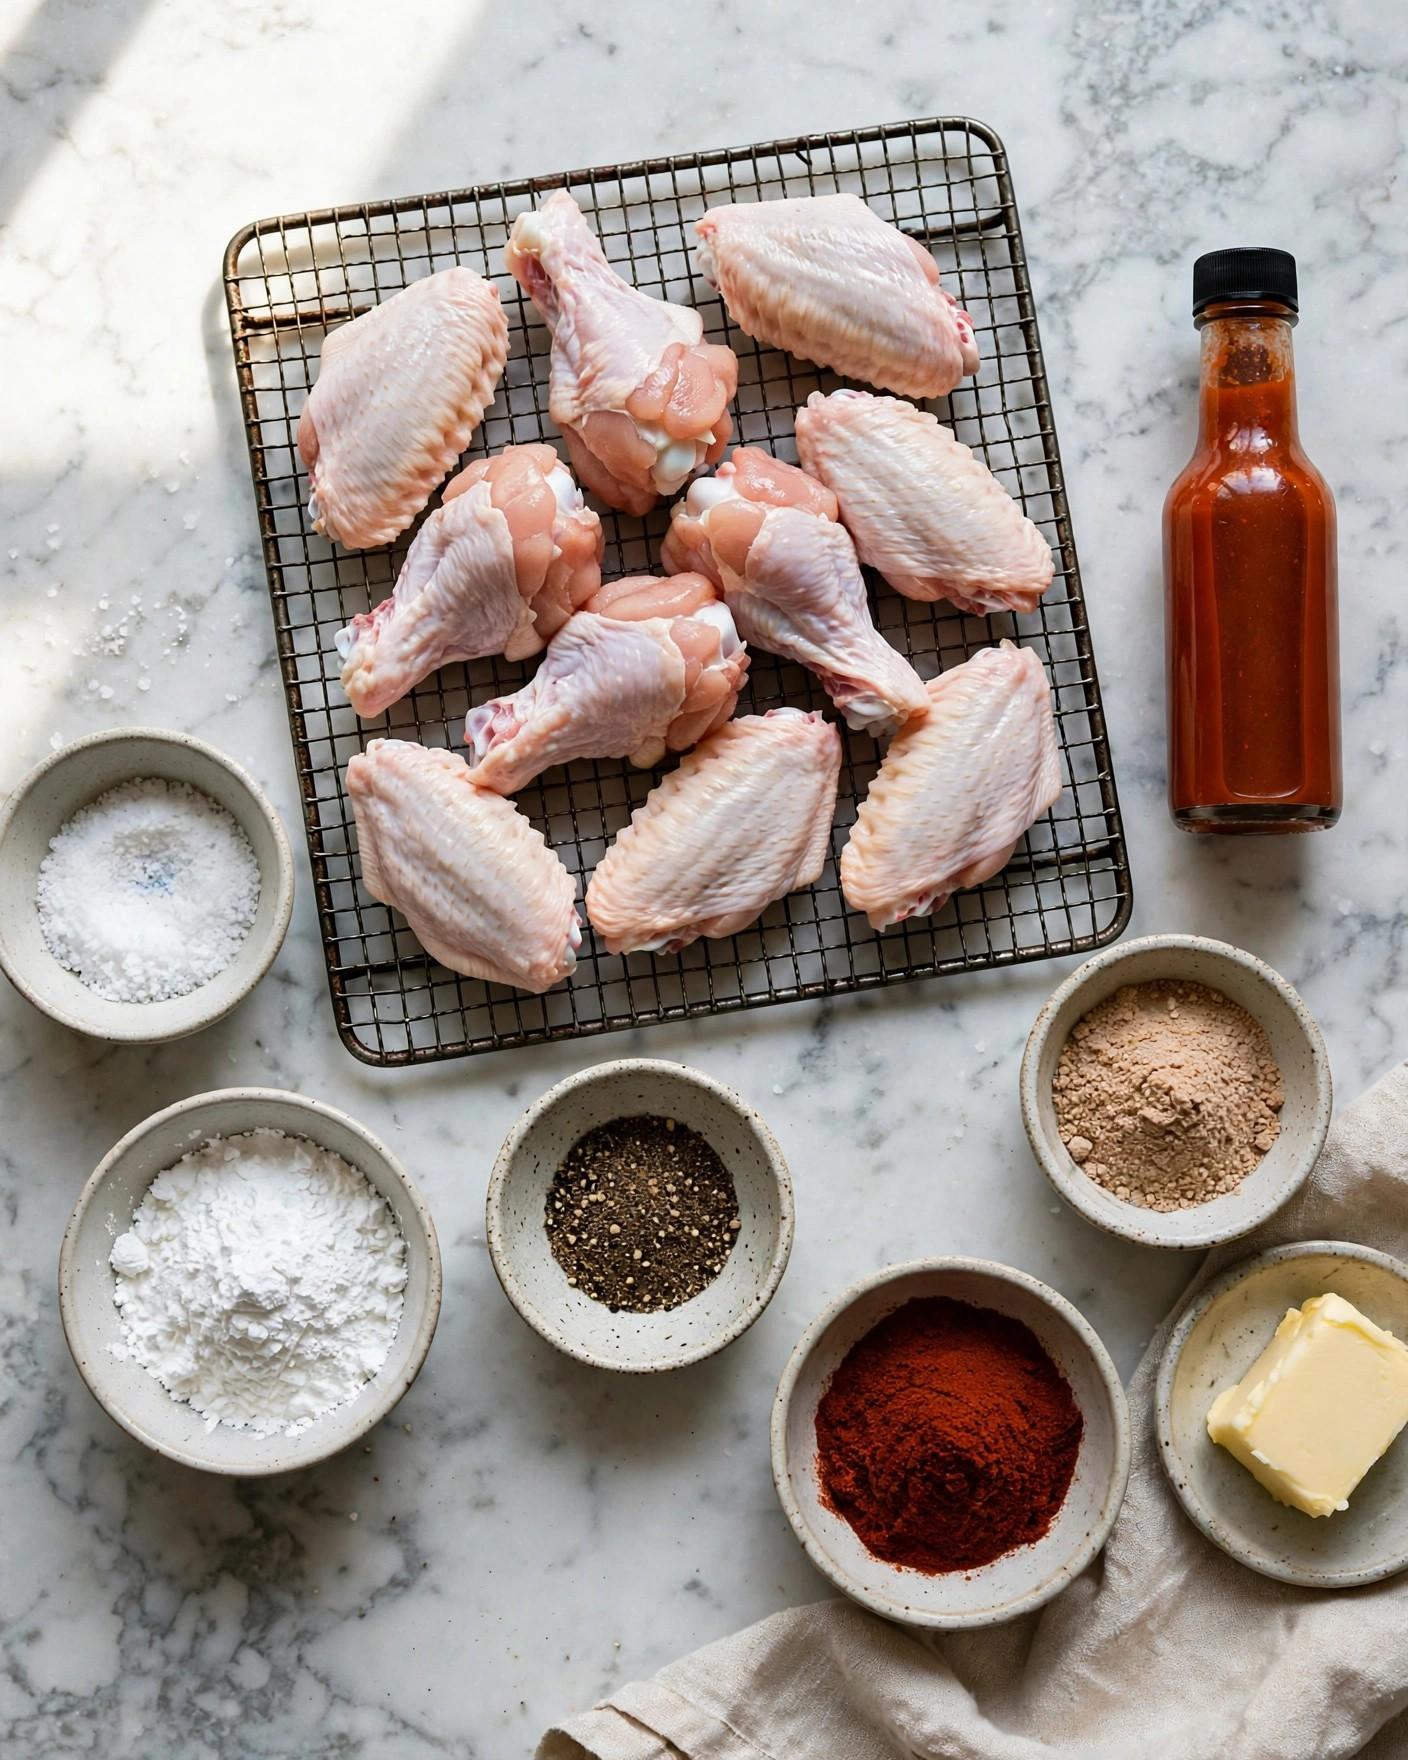
Ingredients
For the wings and dry seasoning
- 2 pounds (900 g) chicken wings, split into drumettes and flats, wing tips removed
- 1 tablespoon (12 g) baking powder (aluminum-free if you have it)
- 1 teaspoon fine sea salt
- 1/2 teaspoon freshly ground black pepper
- 1 teaspoon smoked paprika (or sweet paprika)
- 1/2 teaspoon onion powder
- 1/4 teaspoon cayenne pepper (optional, for gentle background heat)
- Neutral cooking spray or 1 teaspoon neutral oil, for the basket
For the optional buffalo sauce
- 1/3 cup (80 ml) cayenne pepper hot sauce, such as Frank's RedHot Original
- 2 tablespoons (28 g) unsalted butter, melted
- 1 teaspoon honey (optional, to round the edges)
- Pinch of fine sea salt, to taste
For serving (optional)
- Celery sticks
- Carrot sticks
- Ranch or blue cheese dip, for serving
Why these ingredients matter
Chicken wings. Wings are built for this kind of cooking. The skin-to-meat ratio is high, the meat stays juicy through a hot cook, and the bones give you something to hold onto. Split wings — drumettes and flats with the tips removed — cook at the same pace and fit the basket in a single layer. If you buy whole wings, split them at the joints yourself and save the tips for stock. Fresh or fully thawed wings both work; frozen wings do not, because the seasoning cannot cling to icy skin and the extra surface water fights the crisping from the start.
Baking powder. This is the crisping trick, and it is worth understanding rather than just following. Baking powder is alkaline, and a thin coating of it raises the pH on the surface of the skin. That helps the proteins break down more readily and encourages the skin to blister into lots of tiny, crisp bubbles as it cooks. It also helps draw moisture to the surface where the hot air can carry it away. Use baking powder, never baking soda on its own — soda alone is too strong, tastes metallic, and can turn the skin an unappetizing color. One tablespoon across two pounds is plenty; more is not better.
Fine sea salt. Salt seasons the meat, not just the surface, and it helps pull a little moisture from the skin before and during cooking. Fine salt disperses evenly through the dry rub so no wing comes out bland while its neighbor is oversalted. Because the wings are seasoned before cooking rather than after, the salt has time to do its quiet work while the basket heats.
Black pepper. Freshly ground black pepper brings the warm, low background heat that plain wings need. It is not there to make the wings spicy — it is there to make them taste complete. Grind it fresh if you can; pre-ground pepper that has sat open for months is mostly dust and aroma-free by comparison.
Smoked paprika. Paprika does two jobs: a gentle, rounded warmth and a deep golden-red color that makes plain wings look as good as they taste. Smoked paprika adds a faint woodsmoke note that suits wings especially well. Sweet paprika works in its place for pure color and mildness. Either way, it blooms in the rendered fat as the wings cook, which spreads its flavor across every bite.
Onion powder. Onion powder is the savory backbone of a simple rub. It dissolves into the surface as the wings cook and gives that rounded, cooked-all-day depth that salt and pepper alone cannot provide. It is also practical: unlike fresh onion, it coats evenly, never burns in little pieces, and disappears into the crust.
Cayenne pepper. Cayenne is optional and deliberately small. A quarter teaspoon across the whole batch will not make the wings hot — it adds a slow warmth you notice at the end of a bite. Leave it out for a fully mild batch, or double it if your table likes plain wings with a little kick before any sauce is involved.
Neutral oil or cooking spray. A light mist on the basket — not a heavy coating on the wings — simply keeps the skin from sticking as it renders and crisps. The wings carry plenty of their own fat, so this is about release, not richness. Keep the coat thin; pooled oil in the basket smokes and can soften the underside of the skin.
Cayenne pepper hot sauce. For the optional buffalo toss, a vinegar-based cayenne hot sauce is the classic choice. Its bright acidity is the point: it cuts through the rich, rendered skin and wakes up the whole bite. A sauce like Frank's RedHot Original is the traditional base. Thicker, sweeter hot sauces will work, but the result will taste less like classic buffalo.
Unsalted butter. Melted butter is what turns hot sauce into buffalo sauce. It rounds the vinegar's sharp edge, helps the sauce cling to the crisp skin instead of sliding off, and gives the finished wings their gentle gloss. Unsalted butter keeps the salt level in your hands, since the hot sauce and the rub are both already seasoned.
Honey. A teaspoon of honey is optional but quietly useful. It does not make the wings sweet; it softens the sauce's sharpest edges and helps it coat evenly. Leave it out for a straight, tangy buffalo, or keep it in when serving a mixed crowd that includes heat-cautious eaters.
Instructions
- Thaw and split the wings if needed. Start with fully thawed wings — seasoning will not cling to icy skin, and frozen wings steam instead of crisping. If your wings are whole, split them at the joints into drumettes and flats and remove the tips (save the tips for stock or discard them). Two pounds (900 g) of split wings is usually about 16 to 20 pieces, depending on their size.
- Pat the wings very dry. Spread the wings on a tray lined with paper towels and pat every surface dry, pressing firmly and swapping in fresh towels as they soak through. This is the single most important step for crisp skin: surface water has to evaporate before the skin can crisp, and every bit you remove with a towel is a bit the air fryer does not have to steam away. If you have time, set the uncovered tray in the refrigerator for 1 hour (or up to overnight) to dry the skin further — it helps, but the recipe works well without it.
- Mix the dry seasoning. In a small bowl, stir together the baking powder, fine sea salt, black pepper, smoked paprika, onion powder, and cayenne if using, until the color is even and there are no pale pockets of baking powder left. Breaking up any little clumps of baking powder with the back of the spoon matters — a clump landing on one wing will taste bitter and chalky on that one bite.
- Season the wings evenly. Put the dried wings in a large bowl, sprinkle the seasoning mixture over them, and toss thoroughly with tongs or clean hands until every wing is evenly coated on all sides. The coating should look thin and dry, almost dusty — not pasty or wet. If any wings look bare, keep tossing; the mixture is measured to cover the batch with a little persistence.
- Preheat the air fryer. Preheat the air fryer to 400 degrees F (200 degrees C) for 3 to 5 minutes. A fully hot basket starts the skin rendering and crisping on contact instead of slowly warming up with the wings inside it. Lightly mist the hot basket with cooking spray or brush it with the neutral oil just before the wings go in.
- Arrange the wings in a single layer. Place the wings in the basket in one layer with a little space between each piece, skin side up where the shape allows. Air needs to move around every surface; wings that touch or overlap steam at the contact points and stay pale and soft there. Depending on your basket size, this may mean cooking in two batches — that is normal, and far better than crowding one batch.
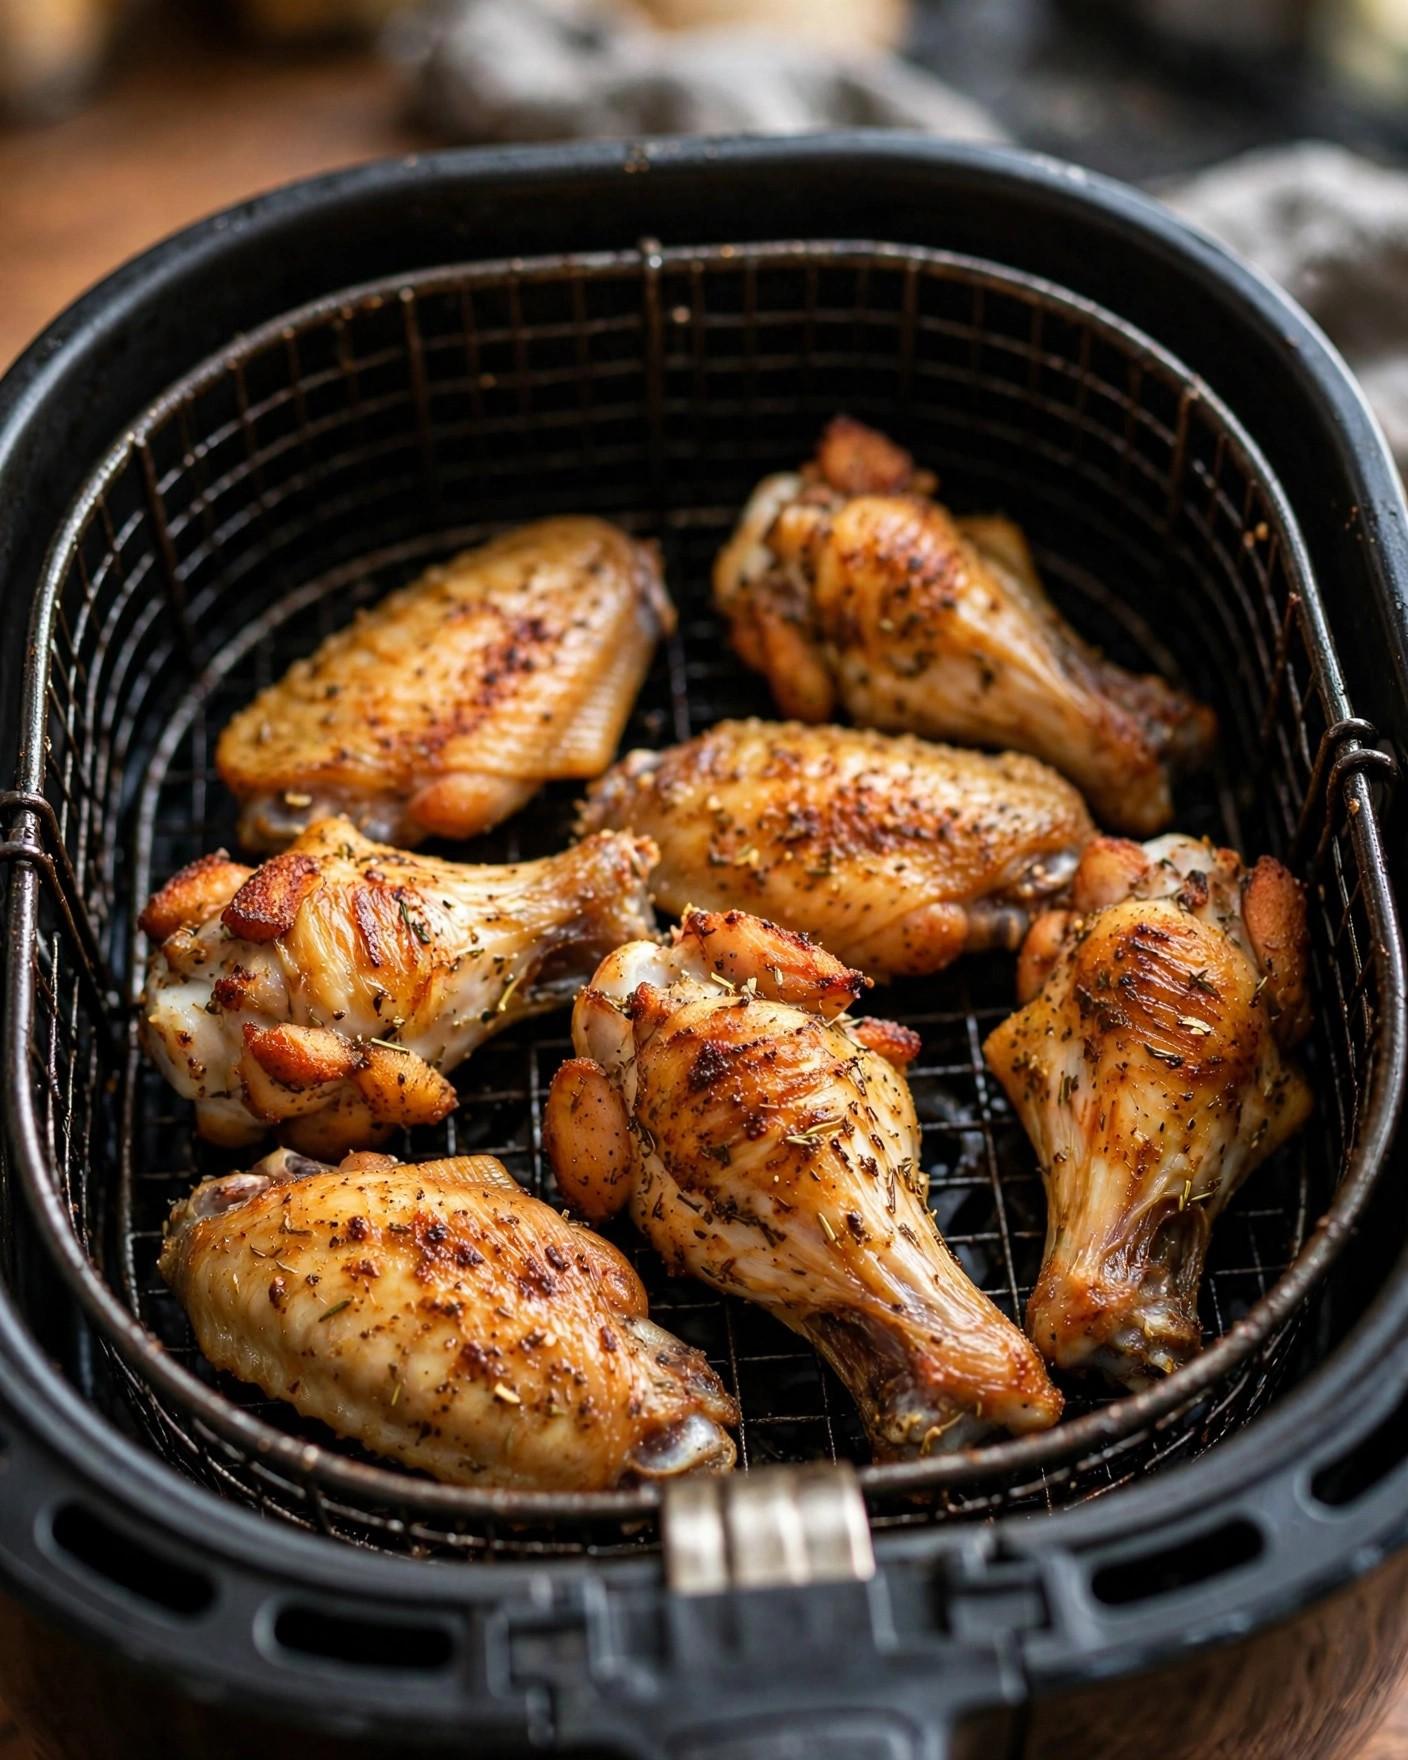
- Air fry the first side. Air fry at 400 degrees F (200 degrees C) for 12 minutes without opening the basket. The wings will render fat, the coating will set, and the skin will begin to turn golden and blistered. Let the heat do its work undisturbed for this first stretch.
- Flip and finish cooking. Open the basket, flip each wing with tongs, and air fry for 10 to 14 minutes more, until the skin is deep golden, crisp and blistered all over, and the meat is cooked through. The wings must reach an internal temperature of 165 degrees F (74 degrees C) measured with an instant-read thermometer in the thickest part of a drumette, without touching the bone. Many cooks let wings go a little beyond that minimum — the skin crisps further and the meat stays juicy thanks to the fat — but 165 degrees F (74 degrees C) is the floor, not a suggestion.
- Crisp a second batch the same way, if needed. If you are cooking in batches, transfer the finished wings to a plate or a low oven (200 degrees F / 95 degrees C) to keep warm, and repeat with the remaining wings. Give the second batch the same space and the same full cooking time — a crowded, rushed second batch is how half a spread ends up soft.
- Make the optional buffalo sauce. While the last batch cooks, whisk the hot sauce, melted butter, honey if using, and a pinch of salt together in a large, warm bowl until smooth and glossy. Warm the bowl first (a quick rinse with hot water, then dried) so the butter stays fluid and the sauce coats smoothly instead of seizing into droplets.
- Toss, or serve plain. For buffalo wings, add the hot, freshly cooked wings to the sauce bowl and toss until each wing is lightly and evenly coated, then serve immediately — sauced wings wait for no one, because the skin softens as it sits in sauce. For plain wings, skip the toss entirely and serve them straight from the basket, where their simple dry seasoning and crisp skin are the whole point. Many tables do both: half the batch tossed, half left plain.
- Serve right away. Pile the wings on a warm platter with celery sticks and carrot sticks alongside, and a small bowl of ranch or blue cheese dip for anyone who wants it. Serve while the skin is at its crispest, with plenty of napkins — wings are hands-on food, and that is part of their charm.


Tips for Success
- Dry skin is everything. Pat the wings drier than feels necessary, then pat them again. Surface moisture is the enemy of crisp skin, and no seasoning trick fully rescues a wet wing. The optional uncovered rest in the refrigerator is the easiest upgrade in the whole recipe.
- Do not confuse baking powder with baking soda. They are different products. Baking powder gives the blistered, crisp result; straight baking soda is too alkaline, tastes metallic, and can discolor the skin. Check the tin before you measure.
- Keep the coating thin and even. The seasoning should look like a light, dry dusting. Thick, pasty patches stay chalky. Toss longer than you think you need to, and break up any baking powder clumps in the bowl before the mixture ever touches the wings.
- Never crowd the basket. A single layer with gaps is non-negotiable. Overlapped wings steam each other and come out pale at every contact point. Two relaxed batches always beat one crowded one.
- Flip once, halfway. One confident flip at the halfway mark gives both sides direct heat and even color. Constant opening and fussing lets heat escape and stretches the cooking time.
- Trust the thermometer, not just the color. Golden skin can happen before the center of a thick drumette is done. Check for 165 degrees F (74 degrees C) in the thickest piece, away from the bone, before the batch leaves the basket.
- Sauce at the very end, and serve at once. Buffalo sauce belongs on hot wings seconds before they reach the table. Tossed wings held back while other food finishes will lose the crispness you worked for — when in doubt, hold the wings plain and sauce them last.
Variations
- Lemon pepper wings. Skip the paprika and cayenne, and toss the hot cooked wings with 1 teaspoon finely grated lemon zest, 1/2 teaspoon extra black pepper, and a squeeze of lemon juice. Bright, peppery, and completely sauce-free.
- Honey BBQ wings. Swap the buffalo sauce for 1/3 cup (about 95 g) of your favorite barbecue sauce warmed with 1 tablespoon honey and 1 tablespoon melted butter. Toss just before serving for a sweet, sticky finish.
- Dry Cajun wings. Replace the rub with 2 teaspoons Cajun seasoning plus the same 1 tablespoon baking powder and 1/2 teaspoon salt (most Cajun blends are already salty). Serve plain — the blend brings plenty of flavor and warmth on its own.
- Sweet chili wings. Toss the cooked wings in 1/3 cup (80 ml) sweet chili sauce loosened with 1 teaspoon lime juice. Sweet heat against crisp skin is an easy crowd-pleaser, and the glaze needs no cooking at all.
- Extra-hot buffalo wings. Keep the buffalo sauce and whisk in 1/2 teaspoon cayenne pepper or a few extra dashes of hot sauce. Warn the table, put the dip within reach, and let everyone choose their own adventure.
- Salt and vinegar wings. Toss the hot plain wings with 1 teaspoon malt vinegar and a pinch of flaky salt, then a second light teaspoon of vinegar just before serving. Tangy, simple, and surprisingly addictive.
Storage
Plain wings keep better than sauced ones, so if you expect leftovers, store them untossed and add sauce after reheating. Let leftover wings cool, then refrigerate them in an airtight container for up to 3 days. To reheat, air fry at 375 degrees F (190 degrees C) for 4 to 5 minutes, until the skin crisps again and the wings are heated through to 165 degrees F (74 degrees C). The microwave will warm them, but it softens the skin you worked for; the air fryer brings them back properly.
For longer storage, freeze cooked plain wings in a single layer until solid, then transfer to a freezer bag for up to 2 months. Reheat from frozen in the air fryer at 375 degrees F (190 degrees C) for 10 to 12 minutes, flipping once, until crisp and heated through. Leftover buffalo sauce keeps in a covered container in the refrigerator for up to 1 week; warm it gently and whisk well before using, as the butter will separate as it chills.
FAQ
Why do you use baking powder on chicken wings? Baking powder raises the pH on the surface of the skin, which helps the skin's proteins break down and blister into tiny crisp bubbles as the wings cook, and it helps draw moisture outward where the hot air can carry it away. The result is skin that crisps and browns more like deep-fried skin, without the oil. Use baking powder, not baking soda — soda alone is too strong, tastes metallic, and can discolor the skin. One tablespoon (12 g) across 2 pounds (900 g) of wings is enough; you should not taste it in the finished wings at all.
Do I have to flip the wings in the air fryer? Yes, one flip makes a real difference. Air fryers heat most intensely from above, so the side facing up crisps first. Flipping each wing at the halfway point gives the underside its own time in the direct heat, so both sides finish golden and blistered instead of one crisp side and one pale side. Use tongs, flip them in the order you laid them down so none get missed, and work reasonably quickly so the basket does not lose too much heat while it is open.
Can I make these wings from frozen? It is better not to. Frozen wings release a lot of water as they thaw in the basket, the dry seasoning slides off icy, wet skin, and the surface steams instead of crisping — you end up with cooked wings, but not crisp ones. Thaw the wings fully in the refrigerator first (a 2-pound / 900 g pack usually needs several hours or overnight), then pat them very dry and carry on with the recipe. If time is short, thaw them in a sealed bag under cold running water, changing the water every 30 minutes, and dry them especially thoroughly.
How do I keep buffalo wings crisp after tossing them in sauce? Sauce the wings at the absolute last moment, and serve them immediately. Use a large, warm bowl so the sauce coats in a few quick tosses rather than a long soak, and use just enough sauce to gloss each wing rather than drown it. Serving the sauce on the side for dipping keeps every wing fully crisp — a good compromise for a mixed table. If sauced wings must wait a few minutes, hold them on a rack over a tray rather than piled in a bowl, so air can still reach the skin.
Recipe Card
Crispy Air Fryer Chicken Wings
- Prep Time: 15 minutes (PT15M)
- Cook Time: 25 minutes (PT25M)
- Total Time: 45 minutes (PT45M)
- Servings: 4 servings (about 16 to 20 wing pieces)
- Calories: 330 kcal per serving (estimated)
Classic crispy chicken wings air fried at 400 degrees F (200 degrees C) with a simple dry rub of salt, pepper, smoked paprika, and onion powder, using a baking powder coating to blister the skin, with an optional buffalo sauce of hot sauce and melted butter for tossing at the end.
Nutrition (estimated): 330 kcal per serving (estimated), 2 g carbohydrates, 24 g protein, 25 g fat, 0 g fiber, 1 g sugar, 720 mg sodium. Nutrition is estimated for plain wings without sauce or dip and will vary with the size of the wings, how much skin and coating cling to each piece, and any variations or substitutions.
Why do you use baking powder on chicken wings?
Baking powder raises the pH on the surface of the skin, which helps the skin’s proteins break down and blister into tiny crisp bubbles as the wings cook, and it helps draw moisture outward where the hot air can carry it away. The result is skin that crisps and browns more like deep-fried skin, without the oil. Use baking powder, not baking soda — soda alone is too strong, tastes metallic, and can discolor the skin. One tablespoon (12 g) across 2 pounds (900 g) of wings is enough; you should not taste it in the finished wings at all.
Do I have to flip the wings in the air fryer?
Yes, one flip makes a real difference. Air fryers heat most intensely from above, so the side facing up crisps first. Flipping each wing at the halfway point gives the underside its own time in the direct heat, so both sides finish golden and blistered instead of one crisp side and one pale side. Use tongs, flip them in the order you laid them down so none get missed, and work reasonably quickly so the basket does not lose too much heat while it is open.
Can I make these wings from frozen?
It is better not to. Frozen wings release a lot of water as they thaw in the basket, the dry seasoning slides off icy, wet skin, and the surface steams instead of crisping — you end up with cooked wings, but not crisp ones. Thaw the wings fully in the refrigerator first (a 2-pound / 900 g pack usually needs several hours or overnight), then pat them very dry and carry on with the recipe. If time is short, thaw them in a sealed bag under cold running water, changing the water every 30 minutes, and dry them especially thoroughly.
How do I keep buffalo wings crisp after tossing them in sauce?
Sauce the wings at the absolute last moment, and serve them immediately. Use a large, warm bowl so the sauce coats in a few quick tosses rather than a long soak, and use just enough sauce to gloss each wing rather than drown it. Serving the sauce on the side for dipping keeps every wing fully crisp — a good compromise for a mixed table. If sauced wings must wait a few minutes, hold them on a rack over a tray rather than piled in a bowl, so air can still reach the skin.

Hi, I’m Emma! I’m the cook and recipe developer behind Sizzle & Sage. From my sunny home kitchen, I share easy, flavor-packed recipes for real life — quick breakfasts, cozy weeknight dinners, and simple bakes anyone can make. Pull up a chair and stay a while!