Flaky Homemade Apple Pie (Classic American Recipe)
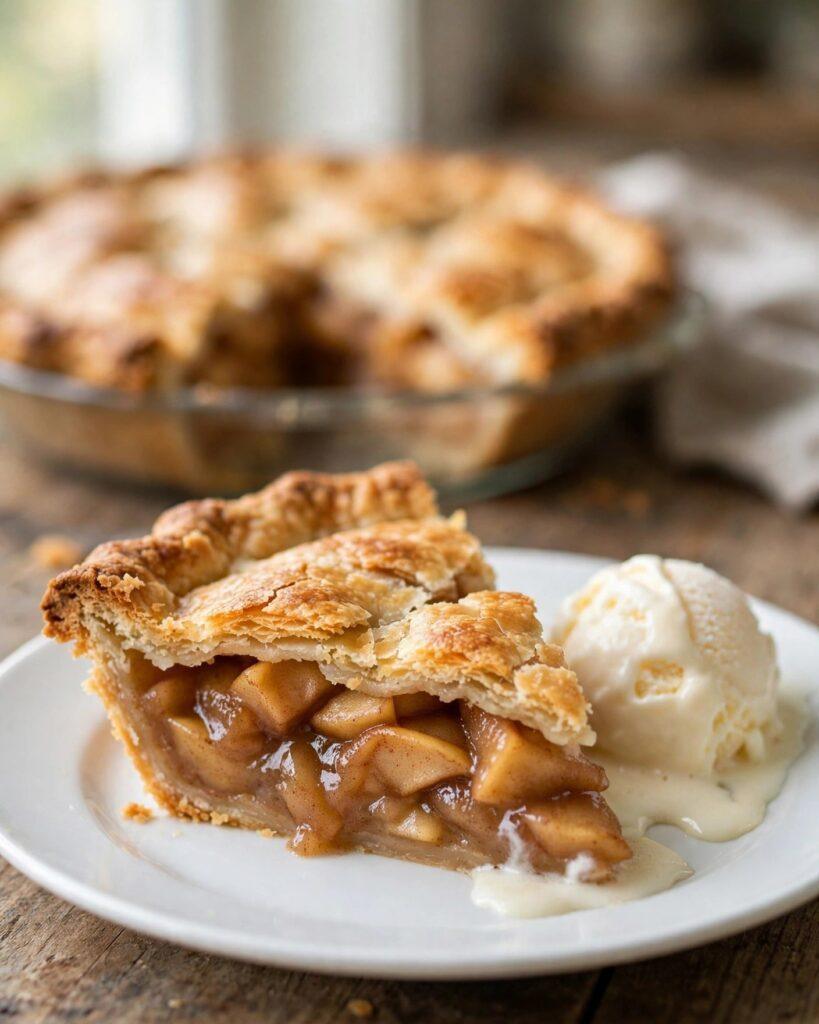
Few desserts carry the same quiet confidence as a classic apple pie. A golden, shatteringly flaky crust, a bubbling cinnamon-apple filling, and that smell that fills the kitchen while it bakes — this is the pie that belongs on every holiday table and every fall weekend. This flaky homemade apple pie recipe walks you through the whole process, from mixing a tender pie crust to layering spiced apples into a perfect, sliceable filling.
What makes this version reliable is attention to the details that matter: cold butter for flake, the right mix of apples so the filling holds its shape instead of turning mushy, and a baking method that keeps the bottom crust crisp instead of soggy. Whether this is your first pie or your fiftieth, the steps below give you a dependable framework for a bakery-worthy result at home.
Why You’ll Love This Recipe
- A genuinely flaky crust. The method uses cold cubed butter and ice water, worked just enough to leave visible flakes of butter in the dough. Those flakes are what become distinct, shattering layers in the oven.
- A filling that holds together. A blend of tart and sweet apples plus a short thickening step means slices that stand up instead of slumping, with no watery pool on the plate.
- Classic flavor, done simply. Cinnamon, a touch of nutmeg, lemon juice, and brown sugar — the seasoning stays familiar so the apples stay the star.
- Holiday-table ready. This is the Thanksgiving dessert, but it also freezes beautifully, so you can bake ahead and free up oven space on the big day.
- Fully from-scratch, but forgiving. The instructions are written for real home kitchens: clear visual cues at every step so you know exactly when the dough, filling, and bake are done.

Ingredients
For the flaky pie crust (makes one double crust)
- 2 1/2 cups (320 g) all-purpose flour, plus extra for rolling
- 1 teaspoon fine sea salt
- 1 tablespoon granulated sugar
- 1 cup (226 g) unsalted butter, very cold and cut into 1/2-inch cubes
- 6 to 8 tablespoons ice water
For the apple filling
- 3 1/2 pounds mixed apples (about 7 to 8 medium), peeled, cored, and sliced 1/4-inch thick
- 3/4 cup (150 g) granulated sugar
- 1/4 cup (50 g) packed light brown sugar
- 1/4 cup (30 g) all-purpose flour or cornstarch
- 2 tablespoons fresh lemon juice (from about 1 lemon)
- 1 1/2 teaspoons ground cinnamon
- 1/4 teaspoon ground nutmeg
- 1/4 teaspoon fine sea salt
- 2 tablespoons unsalted butter, cut into small pieces
For finishing
- 1 large egg, beaten with 1 tablespoon milk
- 1 tablespoon coarse or granulated sugar, for sprinkling
Choosing your apples
Use a mix of varieties for the best balance of flavor and texture. Tart, firm apples like Granny Smith hold their shape and add brightness; sweeter ones like Honeycrisp or Gala add natural sweetness and juiciness. A roughly half-and-half split gives you a filling with depth that does not cook down to applesauce. Avoid very soft varieties such as Red Delicious, which tend to break apart during the long bake.
Instructions
- Make the pie dough. In a large bowl, whisk together the flour, salt, and sugar. Add the cold butter cubes and cut them in with a pastry blender or your fingertips until the mixture resembles coarse crumbs with some pea-sized pieces of butter still visible. Drizzle in 6 tablespoons of ice water, a spoonful at a time, mixing gently with a fork until the dough just holds together when squeezed. Add up to 2 more tablespoons of water if dry spots remain. Divide the dough into two discs, one slightly larger than the other, wrap each tightly in plastic, and refrigerate for at least 1 hour (or up to 2 days).
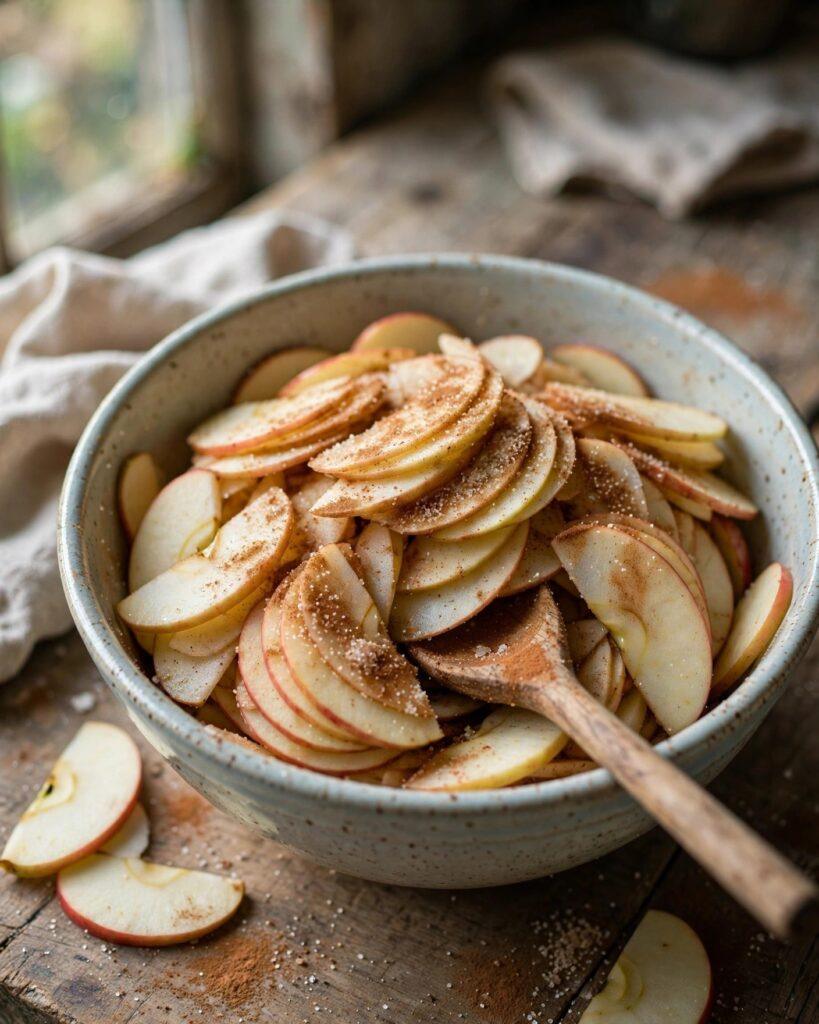
- Prepare the filling. In a very large bowl, toss the sliced apples with the lemon juice. Add both sugars, the flour or cornstarch, cinnamon, nutmeg, and salt, and toss until every slice is evenly coated. Let the mixture sit at room temperature for 30 minutes, stirring once halfway through, so the apples release some of their juices.
- Roll out the bottom crust. On a lightly floured surface, roll the larger dough disc into a 12-inch circle. Ease it into a 9-inch pie dish without stretching it — stretching causes the crust to shrink in the oven. Let the excess hang over the rim and refrigerate while you roll the top crust.
- Roll the top crust and build the pie. Roll the second disc into an 11-inch circle. If you want a lattice, cut it into twelve 1-inch-wide strips with a sharp knife or pastry wheel. Pour the apples and all their accumulated juices into the chilled bottom crust, mounding them slightly in the center. Dot the top of the apples with the small pieces of butter. Lay the lattice strips over the filling, weaving them over and under, or simply lay the whole top crust over and cut several vents. Trim both crusts to a 1-inch overhang, fold under, and crimp the edges with your fingers or a fork.
- Chill the assembled pie. Place the whole pie in the refrigerator for 20 to 30 minutes. This firms up the butter in the crust, which helps the lattice hold its definition and the edges stay crisp instead of slumping.
- Preheat and prepare for baking. Set the oven to 425°F (220°C) with a rack in the lower third — the bottom position helps the underside of the pie brown fully. Place a foil-lined baking sheet on the rack below to catch any drips. Brush the top crust with the egg wash and sprinkle evenly with the coarse sugar.
- Bake in two stages. Bake at 425°F for 20 minutes, then reduce the oven to 375°F (190°C) and continue baking for 40 to 50 minutes more, until the crust is deep golden brown and the filling is visibly bubbling through the vents or lattice. If the edges brown too quickly, shield them with a pie shield or strips of foil.
- Cool completely before slicing. Transfer the pie to a wire rack and let it cool for at least 4 hours. This is not optional: the filling thickens and sets as it cools, and slicing early will send hot juice running across the plate. The pie can be served at room temperature or gently warmed.


Tips for a Flaky Crust
- Keep everything cold. Cold butter, cold water, and even a chilled bowl in warm weather make flakier pastry. If the dough ever feels soft or greasy while you work, refrigerate it for 15 minutes before continuing.
- Leave visible butter pieces. Those pea-sized lumps of butter are the whole secret. As they melt in the hot oven, they release steam that pushes the dough apart into distinct flakes.
- Do not overwork the dough. Mix only until it holds together. Overmixing develops gluten, which turns flaky pastry tough. Small cracks in the rolled dough are fine — they patch easily.
- Use the flour or cornstarch as written. The thickener absorbs the juices the apples release. Flour gives the classic cloudy, home-style filling; cornstarch makes it glossier and a bit clearer. Either one prevents a watery bottom.
- Bake on the lower rack. The bottom crust needs direct heat to set before the filling soaks in. A glass or ceramic pie dish also helps, since you can check the color of the bottom.
- Let the filling macerate. Resting the sliced apples with sugar for 30 minutes draws out excess moisture so the filling thickens properly in the oven instead of flooding the crust.
Variations
- Dutch apple crumb topping. Skip the top crust and blanket the apples with a streusel made from 1 cup flour, 1/2 cup brown sugar, 1/2 cup cold cubed butter, 1/2 cup rolled oats, and 1/2 teaspoon cinnamon. It bakes up crisp and golden.
- Salted caramel apple pie. Drizzle 1/3 cup of thick caramel sauce over the apples before adding the top crust, and finish the baked pie with a pinch of flaky sea salt.
- Spiced cider apple pie. Reduce 1 cup of apple cider down to 1/4 cup of syrup and toss it with the apples for a deeper, orchard-style flavor.
- Cheddar crust. A New England tradition: stir 1 cup of finely shredded sharp cheddar into the flour before cutting in the butter. The savory edge pairs beautifully with sweet apples.
- Mini hand pies. Roll the dough into 5-inch rounds, fill with a few spoonfuls of the apple mixture, fold, crimp, and bake at 400°F for 20 to 25 minutes for portable individual pies.
Storage
Once completely cooled, apple pie keeps at room temperature, loosely covered, for up to 2 days. For longer keeping, refrigerate it for up to 5 days — rewarm individual slices in a 350°F oven for about 10 minutes to re-crisp the crust.
To freeze a baked pie, cool it fully, wrap it tightly in two layers of plastic wrap followed by a layer of foil, and freeze for up to 3 months. Thaw overnight in the refrigerator, then refresh in a 350°F oven for 20 to 25 minutes.
You can also freeze the pie unbaked: assemble it fully, wrap tightly, and freeze. Bake straight from frozen at 425°F for 20 minutes, then 375°F for 50 to 60 minutes, until deeply golden and bubbling.
Nutrition
Estimated per serving (1 slice, pie cut into 10 slices):
- Calories: 420
- Total Fat: 22 g
- Saturated Fat: 13 g
- Cholesterol: 75 mg
- Sodium: 300 mg
- Total Carbohydrates: 56 g
- Dietary Fiber: 4 g
- Total Sugars: 32 g
- Protein: 4 g
Nutrition values are estimates calculated from the listed ingredients and will vary with apple variety, exact slice size, and crust thickness.
Recipe Card
- Prep time: 30 minutes
- Cook time: 1 hour 10 minutes
- Total time: 1 hour 40 minutes (plus 4 hours cooling)
- Servings: 10
- Estimated calories per serving: 420
Can I make the pie dough ahead of time?
Yes. The dough discs keep well in the refrigerator for up to 2 days or in the freezer for up to 3 months. Thaw frozen dough overnight in the refrigerator before rolling.
Why is my apple pie filling watery?
Watery filling usually comes from very juicy apples, skipping the maceration rest, or not enough thickener. Tossing the apples with sugar and flour or cornstarch and letting them sit 30 minutes before filling the pie helps the juices thicken during baking, and a full 4-hour cool lets the filling set.
Should apple pie be served warm or cold?
Both work. Serve it at room temperature for the cleanest slices, or warm individual slices briefly in the oven. It pairs well with vanilla ice cream or a slice of sharp cheddar, a classic pairing.
Can I use store-bought pie crust instead of homemade?
Yes. The filling recipe works the same with refrigerated or frozen store-bought crusts — let them come to the temperature the package directs, fill, top, and bake as written. The homemade crust in this recipe gives a flakier result, but convenience crusts still make a good pie.

Hi, I’m Emma! I’m the cook and recipe developer behind Sizzle & Sage. From my sunny home kitchen, I share easy, flavor-packed recipes for real life — quick breakfasts, cozy weeknight dinners, and simple bakes anyone can make. Pull up a chair and stay a while!