No-Bake Chocolate Raspberry Tart with Oreo Crust and Silky Ganache
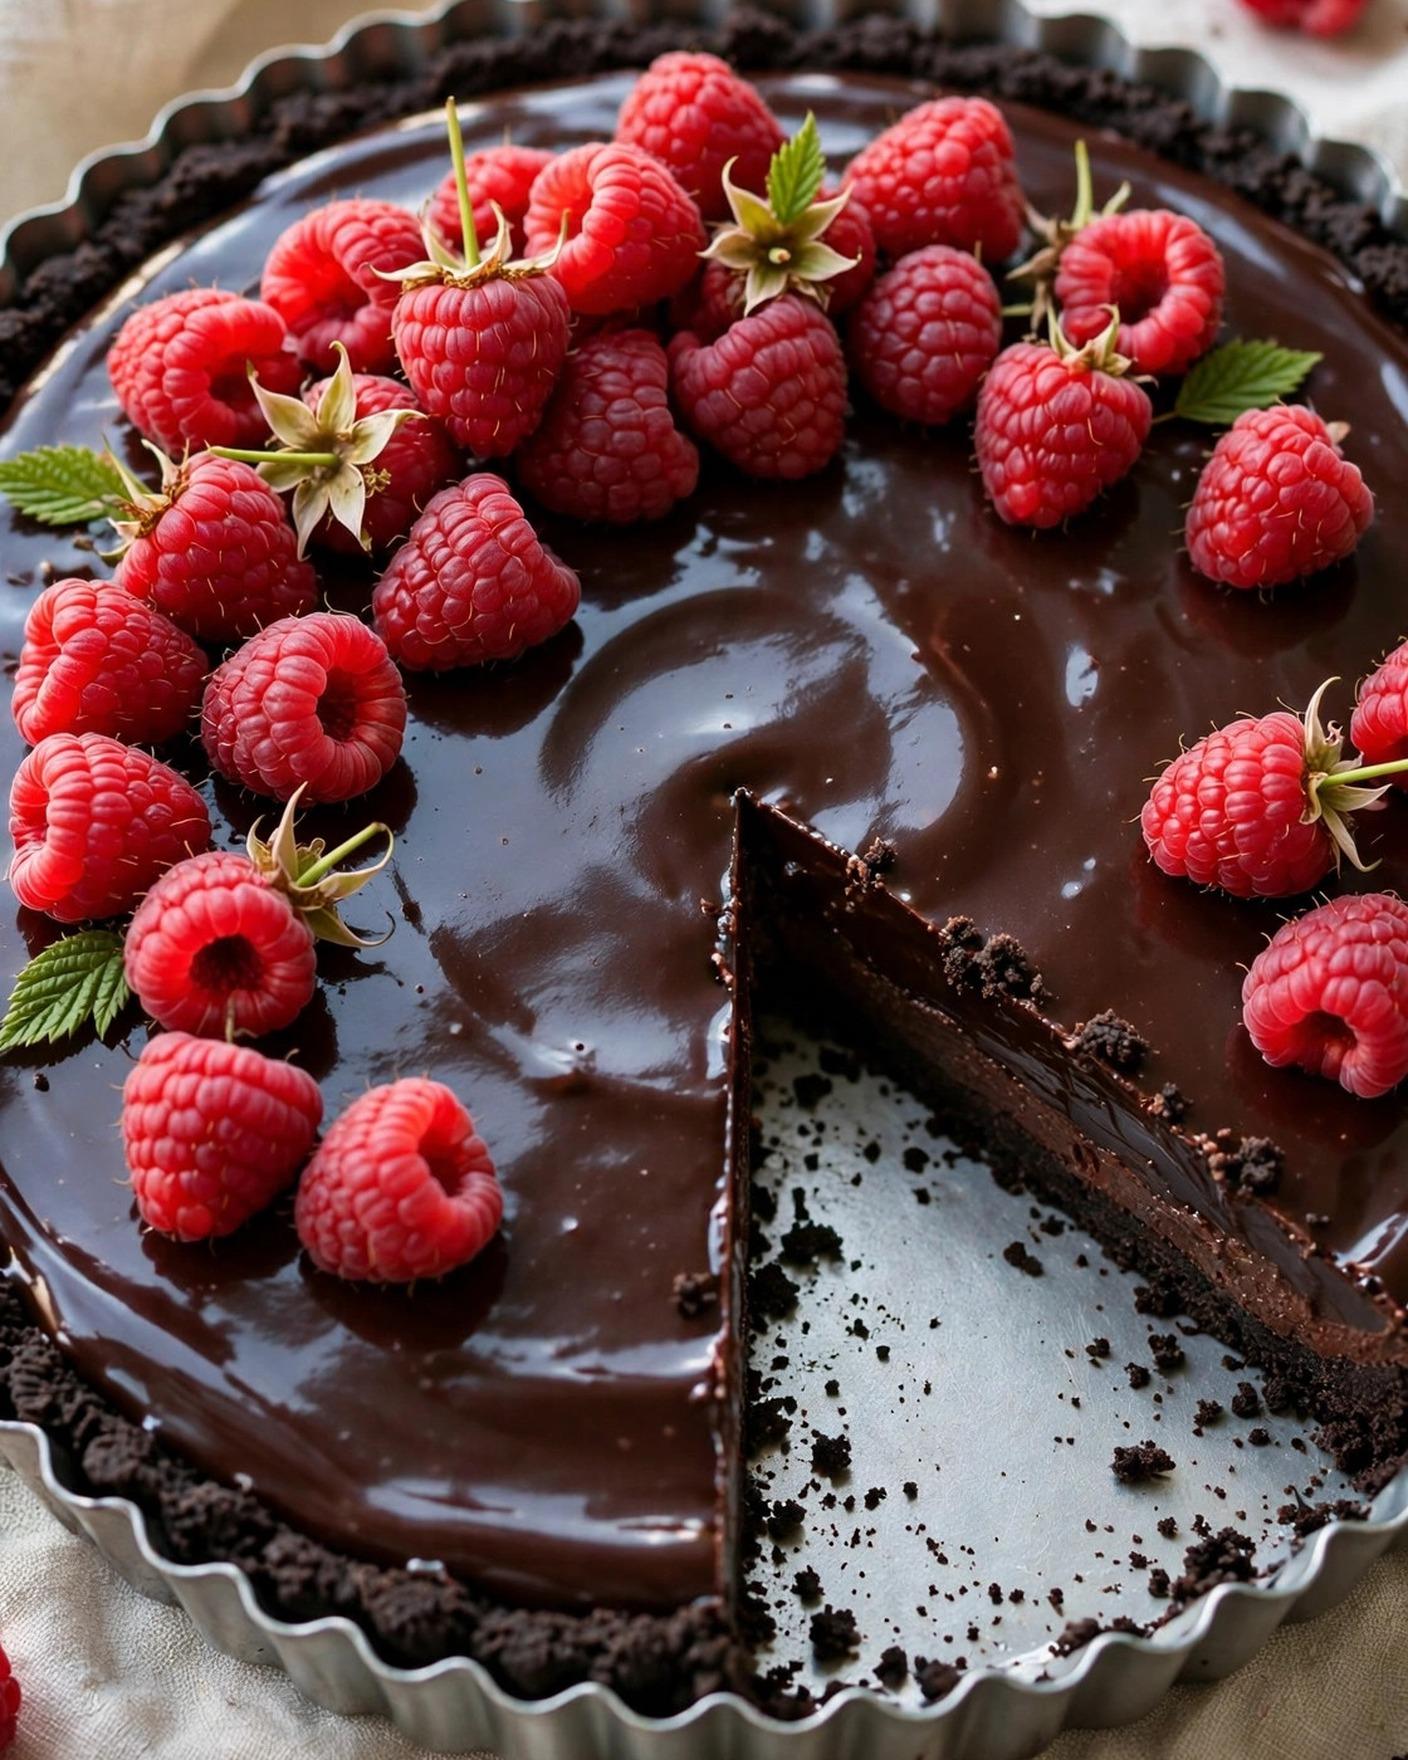
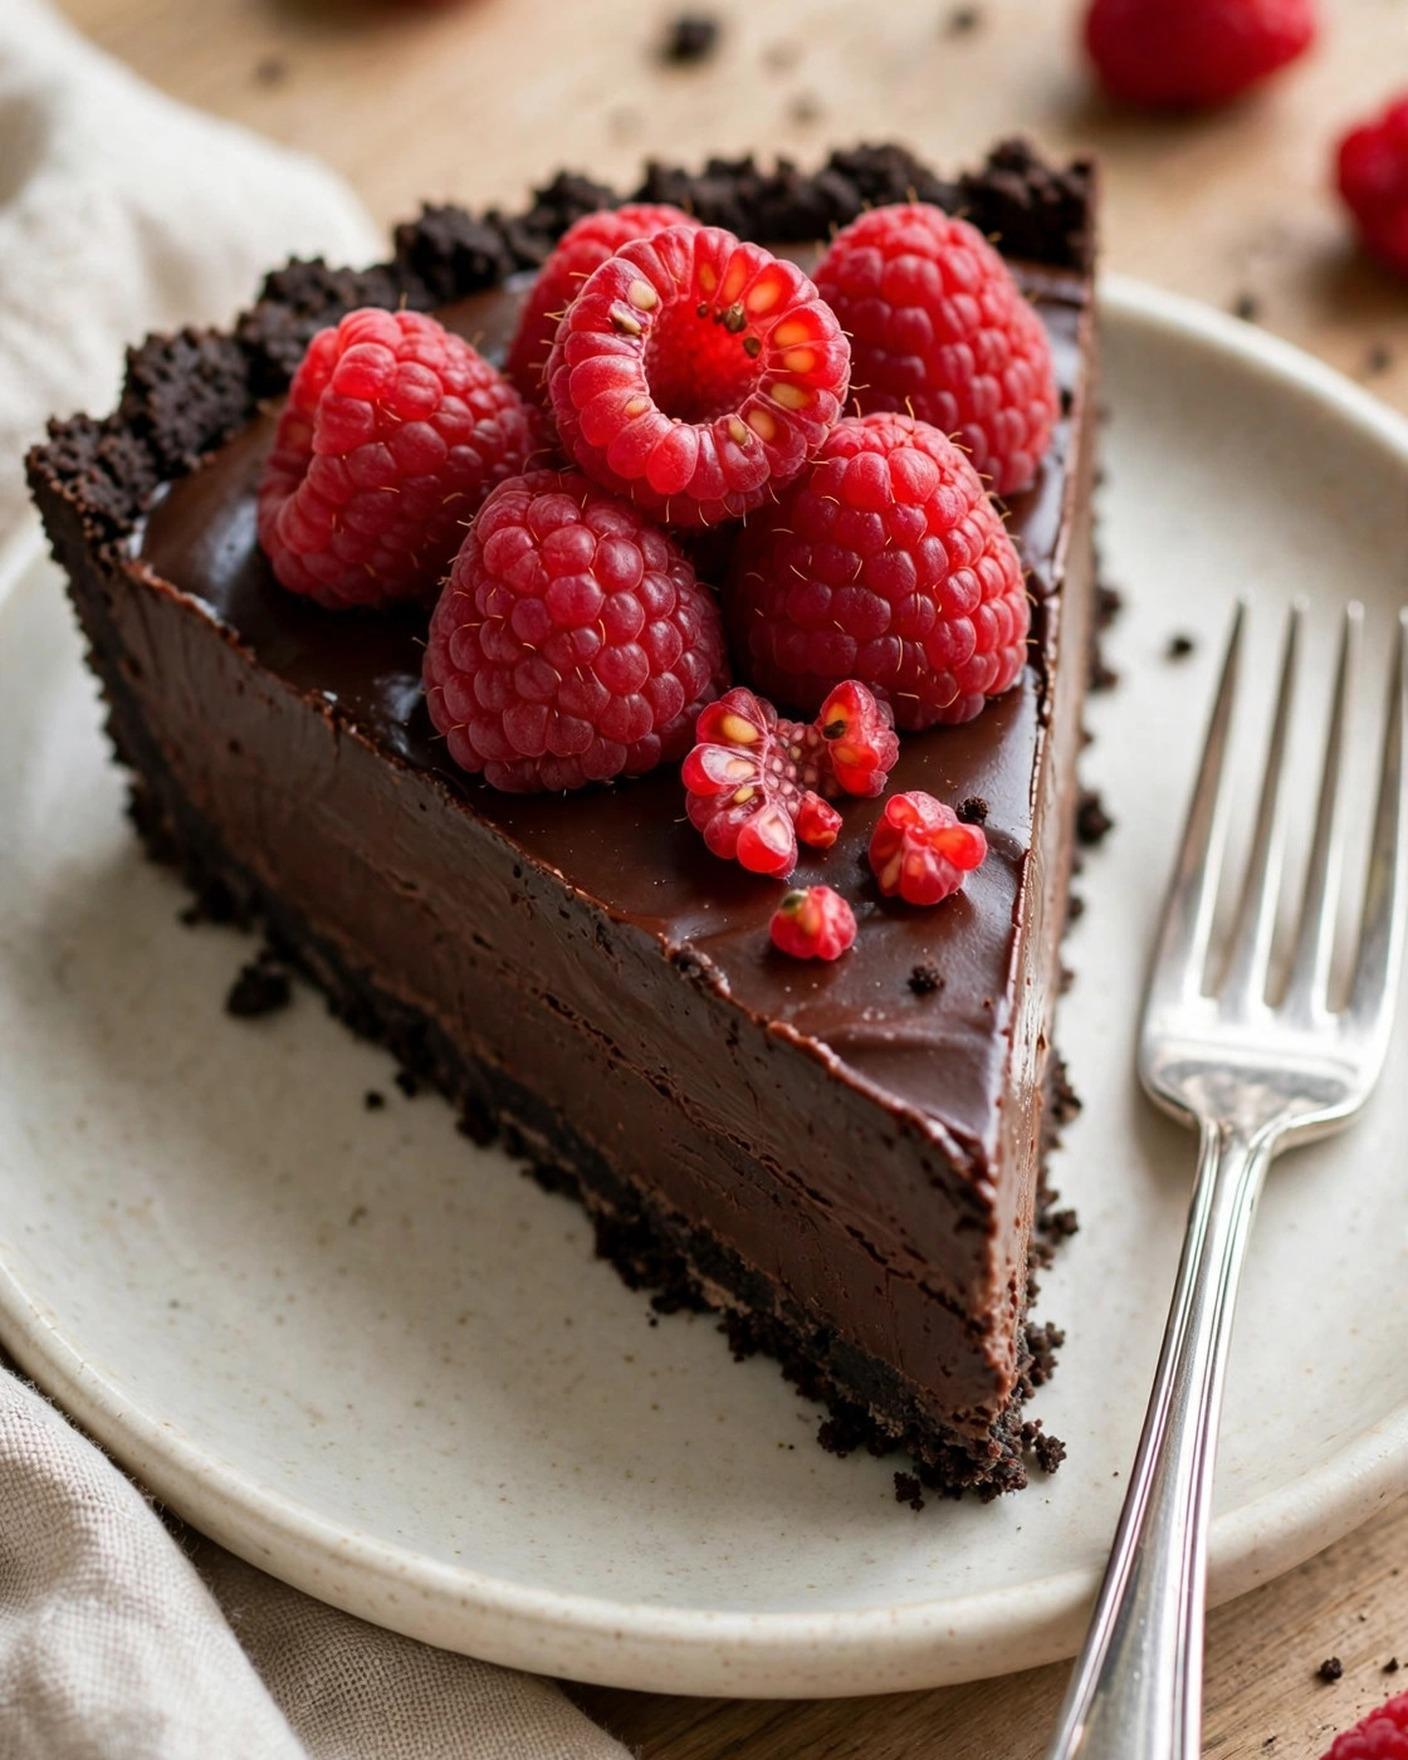
Some desserts look like they took all afternoon, and this No-Bake Chocolate Raspberry Tart is happily one of them — even though almost all of its time is quiet chilling in the refrigerator. A crisp, dark chocolate cookie crust, a thin bright layer of raspberry jam, and a deep, glossy ganache filling come together in clean, beautiful layers, and a crown of fresh raspberries on top makes the whole tart look finished the moment you set it down. There is no oven to preheat, no water bath to manage, and no fussy pastry to roll. You press, you spread, you melt, you pour, and then you let the cold do the rest of the work.
The flavor is what makes this tart worth keeping in your regular rotation, not just for Valentine's Day. Dark chocolate ganache on its own is rich and intense, and the Oreo-style crust leans into that richness with its own cocoa depth and a little crunch. The raspberry jam underneath is the quiet surprise — it keeps every bite from feeling heavy, adding a tart, fruity brightness that cuts straight through the chocolate. Then the fresh berries on top echo that same brightness in a juicier, fresher form, so you get raspberry in two different ways in a single slice: concentrated and jammy below, bright and bursting on top.
This is also a wonderfully practical make-ahead dessert. Because the tart needs several hours to set, it actually prefers to be made the day before you plan to serve it, which takes the pressure off the day itself. Make it in the morning for an evening dinner, or make it the night before a holiday gathering and wake up knowing dessert is already done. The ganache sets to a silky, truffle-like texture that slices cleanly when the tart is well chilled and the knife is warm, giving you those sharp, bakery-style edges that make a simple tart feel special.
The recipe below walks through every detail in a calm, unhurried way: how finely to crush the crumbs so the crust holds together, how warm the cream should be so the ganache stays glossy and never grainy, how thin to spread the jam so it flavors without making the crust soggy, and how to arrange the berries so the tart looks generous without toppling. Whether you are making it for a romantic dinner for two, a small celebration, or simply because chocolate and raspberries belong together, this tart delivers a lot of elegance for very little active effort.
Why You'll Love This Recipe
- No oven needed at all. The crust is pressed and chilled, the ganache melts gently on the stovetop, and the refrigerator does the setting. It is an ideal dessert for warm days, busy holidays, and small kitchens where oven space is already spoken for.
- Deep chocolate with real raspberry brightness. Dark chocolate ganache can be one-note on its own, but the hidden jam layer and the fresh berries on top keep every bite balanced — rich first, then bright, then rich again.
- Silky, truffle-like filling. Warm cream melted into chopped dark chocolate with a little butter and salt sets into a smooth, dense ganache that feels luxurious without being heavy or overly sweet.
- Made to be made ahead. This tart needs at least 4 hours of chilling and is even better after an overnight rest, so dessert is finished and waiting before your guests arrive or your evening begins.
- Clean, beautiful slices. A firm chilled crust, a thin jam layer, and a fully set ganache mean the tart cuts into neat wedges with distinct layers, especially with a warm, dry knife wiped between cuts.
- Flexible and forgiving to finish. Top it with a neat pattern of raspberries, a loose scattering, or raspberries plus a few chocolate shavings. The tart looks lovely with very little decorating skill required.

Ingredients
For the chocolate cookie crust
- 28 chocolate sandwich cookies (about 2 1/2 cups / 300 g fine crumbs, filling included)
- 5 tablespoons (70 g) unsalted butter, melted and slightly cooled
- Pinch of fine sea salt
For the raspberry layer and ganache filling
- 1/3 cup (105 g) seedless raspberry jam or preserves, stirred until smooth and spreadable
- 10 ounces (285 g) dark chocolate, 60% to 70% cacao, finely chopped (about 1 3/4 cups chopped)
- 1 cup (240 ml) heavy cream / double cream
- 3 tablespoons (42 g) unsalted butter, cut into small pieces, at room temperature
- 1/2 teaspoon vanilla extract
- 1/4 teaspoon fine sea salt
For the topping
- 2 cups (about 250 g / two 6-ounce containers) fresh raspberries, rinsed gently and patted completely dry
- 1 teaspoon powdered sugar, for a light dusting (optional)
- Dark chocolate shavings or curls, for garnish (optional)
Why these ingredients matter
Chocolate sandwich cookies. The cookies are both the structure and the flavor of the crust. Using them with their cream filling included helps the crumbs bind together and adds just enough sweetness to balance the dark filling. Crush them very finely — to the texture of damp sand with no large white flecks or chunky pieces — so the crust presses into an even, firm shell that slices without crumbling apart. A coarser crumb makes a fragile crust; a fine, even crumb makes a sturdy one.
Unsalted butter in the crust. Melted butter coats every crumb and firms again in the refrigerator, essentially gluing the crust together. Five tablespoons is enough to hold the shell firmly without making it greasy or leaving butter pooled in the corners of the pan. Unsalted butter keeps the salt level in your control, and that small pinch of salt in the crust quietly sharpens the cocoa flavor.
Seedless raspberry jam. The jam layer does more than add flavor — it creates a bright middle note between crust and ganache and helps the filling sit cleanly on the crust. Seedless jam spreads into the thinnest, smoothest layer and keeps the texture of each slice silky, with no seeds interrupting the ganache. Keep the layer thin, about 1/3 cup spread edge to edge. Too much jam can loosen the crust and make slices slide; just enough gives you that clear raspberry lift in every bite.
Dark chocolate, 60% to 70% cacao. The chocolate is the heart of the ganache, so its percentage matters. Below 60%, the filling tastes noticeably sweeter and sets softer; above 70%, it can taste bitter and set very firm. In the 60% to 70% range you get deep chocolate flavor, a balanced sweetness that lets the raspberries shine, and a set that is firm enough to slice yet soft enough to feel silky on the tongue. Chop it finely and evenly so it melts quickly and smoothly in the warm cream.
Heavy cream. Cream is what turns chopped chocolate into ganache. Heated just until steaming with small bubbles at the edges — never to a hard boil — it melts the chocolate into a glossy emulsion. The ratio here, 1 cup (240 ml) of cream to 10 ounces (285 g) of chocolate, is chosen for a tart filling: pourable when warm, sliceable when cold, and rich without feeling like solid fudge. Boiling the cream can break the emulsion and dull the shine, so gentle heat is essential.
Butter in the ganache. A few tablespoons of room-temperature butter stirred in at the end add shine, smoothness, and a softer bite to the set filling. Cold butter can cool the ganache too quickly and leave small unmelted flecks, while melted butter can make it look oily. Small, soft pieces melt in evenly and leave the surface with that beautiful, almost mirror-like gloss.
Vanilla extract and fine sea salt. Neither one announces itself, and both are doing important work. Vanilla rounds out the edges of the dark chocolate and makes it taste more fully like chocolate, while salt keeps the richness from tasting flat and helps the raspberry flavor register more clearly. In a recipe with so few ingredients, these small seasonings are the difference between a filling that tastes good and one that tastes complete.
Fresh raspberries. Fresh berries are the finish and the freshness. Their gentle tartness, juiciness, and soft texture contrast with the dense ganache in exactly the right way, and their color against dark chocolate is what makes this tart so striking with almost no decorating effort. They must be completely dry when they go on top — surface water can dull the ganache, leave spots, and shorten how well the tart keeps — so wash them gently, drain them well, and pat them dry on a clean towel or paper towels.
Instructions
- Prepare the tart pan. Lightly grease a 9-inch (23 cm) tart pan with a removable bottom on the base and sides. If you do not have a tart pan, a 9-inch (23 cm) springform pan or pie dish will work, though the fluted edges and clean release of a tart pan give the prettiest result. Set the pan on a small baking sheet or flat plate — this makes it far easier to move the filled tart in and out of the refrigerator without flexing the crust.
- Crush the cookies to fine crumbs. Place the chocolate sandwich cookies in a food processor and pulse until they become very fine, even crumbs with no large pieces remaining, about 30 to 45 seconds of pulsing. You should have about 2 1/2 cups (300 g) of crumbs. Without a food processor, seal the cookies in a sturdy zip-top bag, press out the air, and roll firmly with a rolling pin, turning the bag often, until the crumbs are equally fine. Take the extra minute here — fine crumbs are the foundation of a crust that holds.
- Mix and press the crust. In a medium bowl, stir the fine crumbs with the pinch of salt and the melted butter until every crumb looks evenly moistened, like wet sand, with no dry patches. Tip the mixture into the prepared tart pan. First press crumbs firmly up the sides of the pan with your fingers, then press the remaining crumbs evenly across the bottom. Use the flat bottom of a measuring cup or drinking glass to compact the bottom and the corners where the sides meet the base — those corners are where crusts most often come out too thin. The crust should feel firm and packed, not loose.
- Chill the crust until firm. Place the crust, still on its baking sheet, in the refrigerator for at least 30 minutes, or in the freezer for about 15 minutes, until it feels completely firm to the touch. This chilling step sets the butter and locks the crumbs in place, so the warm ganache poured in later does not soften and disturb the shell. Do not skip it and pour filling into a soft crust — the layers will mingle and the slices will not hold their shape.
- Spread the thin raspberry jam layer. Stir the seedless raspberry jam in a small bowl until it is smooth and easy to spread. If it is very stiff straight from the jar, warm it for just 10 to 15 seconds in the microwave or set the bowl briefly over warm water — you want it spreadable, not hot or runny. Spoon it over the chilled crust and spread it with the back of a spoon or a small offset spatula into a thin, even layer that reaches the edges. Return the pan to the refrigerator while you make the ganache, so the jam layer stays cool and distinct.
- Chop the chocolate and warm the cream. Place the finely chopped dark chocolate in a medium heatproof bowl. Pour the heavy cream into a small saucepan and warm it over medium heat just until it is steaming and small bubbles appear around the edges, about 3 to 4 minutes. Do not let it come to a rolling boil. If you see it starting to bubble vigorously, pull it off the heat immediately. Correctly warmed cream is hot enough to melt chocolate smoothly; boiled cream risks a grainy, split ganache.
- Melt the chocolate into a smooth ganache. Pour the hot cream over the chopped chocolate, making sure the chocolate is mostly covered. Let the bowl sit undisturbed for 2 full minutes — this pause softens the chocolate all the way through. Then stir slowly from the center outward with a spatula or whisk in small circles, gradually widening, until the mixture comes together into a thick, glossy, completely smooth ganache with no streaks or lumps. Stir gently rather than whipping; vigorous whisking adds air bubbles that will show on the finished surface.
- Finish the ganache with butter, vanilla, and salt. Add the small pieces of room-temperature butter, the vanilla extract, and the fine sea salt to the warm ganache. Stir slowly until the butter has melted in completely and the ganache looks shiny and uniform. Let it cool at room temperature for about 10 minutes, stirring once or twice, until it has thickened slightly and is warm rather than hot. It should still pour in a thick ribbon. Cooling it briefly protects the jam layer and the crust from excess heat and helps the filling set with an especially smooth texture.
- Pour the ganache and smooth the top. Remove the chilled crust from the refrigerator. Pour the ganache evenly over the jam layer, starting in the center and letting it flow toward the edges. Gently tilt the pan or nudge the ganache with a spatula so it covers the jam completely and reaches the sides, then smooth the top with an offset spatula or the back of a spoon. Tap the pan lightly on the counter two or three times to release any trapped air bubbles, and pop any surface bubbles you can see with the tip of a toothpick for the cleanest finish.
- Chill until fully set. Carefully transfer the tart, still on its baking sheet, to the refrigerator and chill for at least 4 hours, and preferably overnight, until the ganache is completely set. It should feel firm when you press it very lightly in the center, look glossy and smooth, and not leave a fingerprint. A full overnight chill gives the cleanest slices and the most developed flavor, as the chocolate, cream, and raspberry settle together. Keep the tart uncovered for the first hour so condensation does not form on the surface, then cover it loosely if you are chilling it longer.
- Top with fresh raspberries. Once the ganache is fully set, arrange the completely dry fresh raspberries over the top. You can stand them upright in neat concentric circles starting from the outside edge, set them in straight rows, or scatter them in a looser, generous pile in the center — all three look lovely. Press each berry only very lightly into the surface so it stays in place without sinking. If you like, finish with a few dark chocolate shavings scattered between the berries and the faintest dusting of powdered sugar just before serving. Add the powdered sugar at the last moment, as it melts into the berries and ganache within minutes.
- Unmold, slice cleanly, and serve. To unmold, set the tart pan on a sturdy can or small bowl and let the outer ring drop away, then carefully slide the tart off the metal base onto a serving plate using a large flat spatula — or simply serve it on the base set on the plate, which is the safest option for a first attempt. For the cleanest slices, dip a long sharp knife in hot water, wipe it completely dry, and make one smooth cut; repeat the dip-and-wipe for every slice. Serve the tart chilled or after about 15 minutes at room temperature, when the ganache softens just enough to feel extra silky. The slices are rich, so modest wedges — 10 to 12 from a 9-inch tart — are satisfying.


Tips for Success
- Crumb texture decides crust success. If the crust crumbles when you slice, the crumbs were almost certainly too coarse or not pressed firmly enough. Process until truly fine, press especially firmly into the corners and up the sides, and give the crust its full chill before filling.
- Keep the jam layer genuinely thin. It should read as a bright ribbon in each slice, not a thick jelly layer. Measure the 1/3 cup (105 g), spread it edge to edge, and resist adding extra — too much jam makes the filling slide and the crust soften underneath.
- Never boil the cream. Steaming with bubbles at the edges is the target. Boiled cream can cause the ganache to look dull, feel grainy, or separate into an oily layer. If your ganache ever looks split, stir in a tablespoon of warm milk at a time until it comes back together.
- Dry berries are non-negotiable. Wet raspberries spot the glossy ganache, weep juice into the surface, and soften quickly in the refrigerator. Wash them well ahead of time if you can, drain them in a single layer, and pat them completely dry before arranging.
- Use the warm-knife method for every slice. A hot, dry knife glides through cold ganache instead of dragging it, and wiping the blade clean between cuts keeps each new slice as sharp as the first. Rushing this step is the most common reason an otherwise perfect tart looks messy on the plate.
- Plan for the full chill. Four hours is the minimum; overnight is better. A tart cut too early will have a soft center that slumps on the plate, no matter how well everything else was made. When in doubt, give it more time, not less.
Variations
- White chocolate and raspberry version. Swap the dark chocolate for 10 ounces (285 g) of good-quality white chocolate, finely chopped, and reduce the cream slightly to 3/4 cup (180 ml), since white chocolate sets softer. Keep the jam layer and fresh raspberries exactly the same. The result is sweeter and creamier, with a pretty pale filling that makes the red berries stand out even more.
- Chocolate orange tart. Omit the raspberry jam and spread the crust instead with 1/3 cup (105 g) of orange marmalade, and add 1 teaspoon of finely grated orange zest to the warm ganache. Top with a few candied orange peel strips instead of raspberries. Dark chocolate and orange is a classic pairing, and the method stays identical.
- Salted caramel layer. Replace the raspberry jam with 1/3 cup (about 100 g) of thick salted caramel sauce, spread thin, and finish the set tart with a light sprinkle of flaky sea salt instead of fresh berries. The ganache stays the same, and the caramel adds a buttery, salty depth that makes very small slices deeply satisfying.
- Mixed berry topping. Keep the recipe exactly as written but top the set tart with a mixture of fresh raspberries, halved strawberries, blueberries, and blackberries — about 2 cups (300 g) of mixed fruit in total, all patted dry. It is a beautiful option for summer gatherings and uses the same jam layer underneath for a double hit of berry flavor.
- Mint chocolate raspberry tart. Add 1/4 teaspoon of peppermint extract to the ganache along with the vanilla, and garnish the finished tart with small fresh mint leaves tucked between the raspberries. The mint stays a background note that lifts the chocolate rather than taking over, much like a favorite after-dinner mint in tart form.
- Individual mini tarts. Divide the crust mixture among six 4-inch (10 cm) mini tart pans with removable bottoms, pressing firmly and chilling as directed, then divide the jam and ganache evenly among them. Chill until set and top each mini tart with a small cluster of raspberries. Mini tarts need about 2 to 3 hours to set and make elegant single servings for a dinner party.
Storage
Store the finished tart in the refrigerator, covered loosely with plastic wrap or set inside a large airtight container or cake carrier so the raspberries are not crushed. It keeps well for up to 3 days. The ganache stays silky, the crust stays firm, and the jam layer continues to flavor the filling. The fresh raspberries will look their absolute best on the first day and will soften slightly by the third day, though the tart will still taste lovely. For the prettiest presentation when making the tart further ahead, chill the plain ganache tart and add the fresh berries within a few hours of serving.
Freezing works well for the untopped tart. Wrap the fully set, unmolded tart — or individual slices — tightly in plastic wrap and then in foil, and freeze for up to 1 month. Thaw overnight in the refrigerator, still wrapped, so condensation forms on the wrapping rather than on the glossy surface, then unwrap, top with fresh raspberries, and serve. Avoid freezing the tart with fresh berries already on top; raspberries turn soft and watery as they thaw and will bleed juice across the ganache.
Leftover slices keep best in a single layer in an airtight container in the refrigerator, with a small piece of parchment between slices if you need to stack them. Bring a slice out about 15 minutes before eating if you prefer the ganache at its silkiest, or enjoy it straight from the refrigerator for a firmer, truffle-like bite. Do not leave the tart at room temperature for more than about 2 hours at a time, since the ganache filling contains cream and softens as it warms.
FAQ
Can I use frozen raspberries on top of the tart? Fresh raspberries are strongly recommended for the topping. Frozen raspberries release a lot of juice as they thaw, which will pool on the glossy ganache, stain the surface pink, and turn soft and collapsed rather than holding their shape. If frozen berries are all you have, a better plan is to skip a berry topping, finish the tart with chocolate shavings and a dusting of cocoa or powdered sugar, and serve thawed berries — or a simple warm raspberry sauce — alongside each slice instead.
My ganache looks grainy or split. What went wrong, and can I fix it? Graininess usually means the cream was too hot and boiled, the chocolate was overheated, or the mixture was stirred too vigorously before the chocolate had fully softened. A dull or oily, split look points to a broken emulsion. To rescue it, whisk in warm milk or warm cream a tablespoon at a time while stirring gently until the ganache turns smooth and glossy again, or briefly blend it with an immersion blender held below the surface so you do not add air. Next time, heat the cream only until steaming, rest the chocolate in it for the full 2 minutes, and stir slowly from the center outward.
Do I have to use a tart pan with a removable bottom? No, though it does make the prettiest presentation. A 9-inch (23 cm) springform pan is the next best choice, since the sides release cleanly. A regular 9-inch (23 cm) pie dish also works well — simply serve the tart directly from the dish and accept slightly softer-looking slices. Whichever pan you use, press the crust firmly and chill it thoroughly, since a well-made crust is what keeps slices intact even without a removable bottom to help you.
How far ahead can I make this tart, and when should I add the berries? The crust, jam, and ganache tart — without the fresh berry topping — can be made up to 2 days ahead and kept covered in the refrigerator, and its flavor is arguably at its best on the second day. Add the fresh raspberries within about 4 to 6 hours of serving for the brightest look and firmest berries, though topping it the night before is fine if you need to. Just know the berries will soften a little and the powdered sugar dusting, if you use it, should always wait until the moment you serve.
Recipe Card
No-Bake Chocolate Raspberry Tart
- Prep Time: 30 minutes (PT30M)
- Cook Time: 5 minutes (PT5M)
- Total Time: 5 hours 5 minutes (PT5H5M)
- Servings: 10 servings (10 slices)
- Calories: 480 kcal per serving (estimated)
A no-bake chocolate raspberry tart with a pressed chocolate cookie crumb crust, a thin layer of seedless raspberry jam, and a silky dark chocolate ganache filling made with heavy cream, butter, vanilla, and a pinch of salt. The tart chills until firm, is topped with fresh raspberries, and slices cleanly into elegant wedges.
Nutrition (estimated): 480 kcal per serving (estimated), 48 g carbohydrates, 5 g protein, 32 g fat, 5 g fiber, 36 g sugar, 210 mg sodium. Nutrition is estimated and will vary with the exact cookie brand, chocolate percentage, jam, berry quantity, and any variations or substitutions.
Can I use frozen raspberries on top of the tart?
Fresh raspberries are strongly recommended for the topping. Frozen raspberries release a lot of juice as they thaw, which will pool on the glossy ganache, stain the surface pink, and turn soft and collapsed rather than holding their shape. If frozen berries are all you have, a better plan is to skip a berry topping, finish the tart with chocolate shavings and a dusting of cocoa or powdered sugar, and serve thawed berries — or a simple warm raspberry sauce — alongside each slice instead.
My ganache looks grainy or split. What went wrong, and can I fix it?
Graininess usually means the cream was too hot and boiled, the chocolate was overheated, or the mixture was stirred too vigorously before the chocolate had fully softened. A dull or oily, split look points to a broken emulsion. To rescue it, whisk in warm milk or warm cream a tablespoon at a time while stirring gently until the ganache turns smooth and glossy again, or briefly blend it with an immersion blender held below the surface so you do not add air. Next time, heat the cream only until steaming, rest the chocolate in it for the full 2 minutes, and stir slowly from the center outward.
Do I have to use a tart pan with a removable bottom?
No, though it does make the prettiest presentation. A 9-inch (23 cm) springform pan is the next best choice, since the sides release cleanly. A regular 9-inch (23 cm) pie dish also works well — simply serve the tart directly from the dish and accept slightly softer-looking slices. Whichever pan you use, press the crust firmly and chill it thoroughly, since a well-made crust is what keeps slices intact even without a removable bottom to help you.
How far ahead can I make this tart, and when should I add the berries?
The crust, jam, and ganache tart — without the fresh berry topping — can be made up to 2 days ahead and kept covered in the refrigerator, and its flavor is arguably at its best on the second day. Add the fresh raspberries within about 4 to 6 hours of serving for the brightest look and firmest berries, though topping it the night before is fine if you need to. Just know the berries will soften a little and the powdered sugar dusting, if you use it, should always wait until the moment you serve.

Hi, I’m Emma! I’m the cook and recipe developer behind Sizzle & Sage. From my sunny home kitchen, I share easy, flavor-packed recipes for real life — quick breakfasts, cozy weeknight dinners, and simple bakes anyone can make. Pull up a chair and stay a while!