Dark Chocolate Raspberry Mousse Cups
There is a particular kind of quiet that falls over the table when a really good chocolate dessert arrives in its own little cup. No slicing, no passing a big dish around, no negotiating over who got the larger piece — just a spoon, a chilled glass, and layers of dark chocolate mousse and raspberries waiting underneath. These dark chocolate raspberry mousse cups are built for exactly that moment. The mousse is deep and silky without being heavy, the raspberry layer is bright and just tart enough to cut through the richness, and the whole thing is served cold, which makes every spoonful taste clean and fresh.
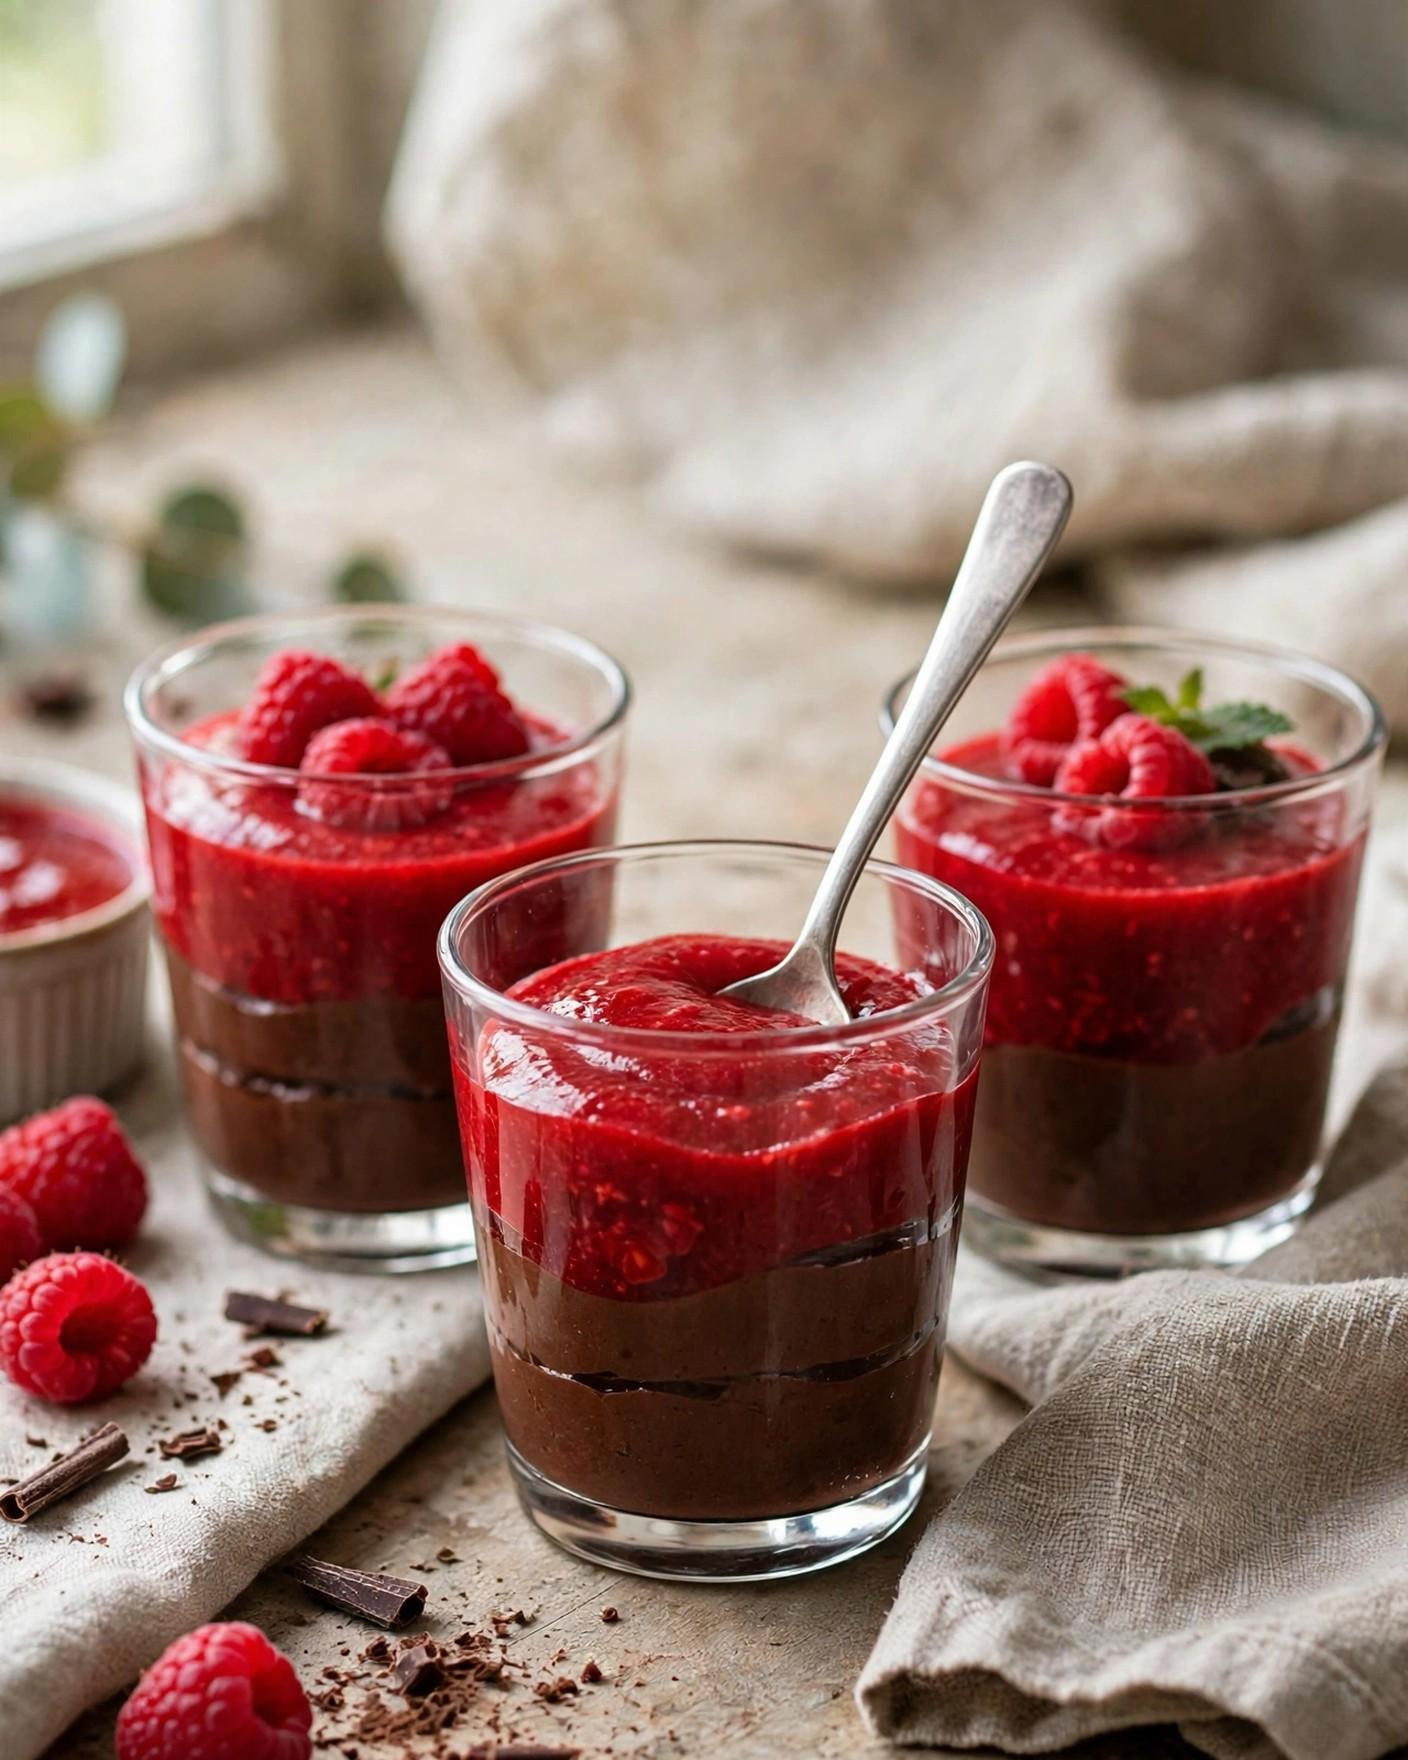
What makes this version work so well at home is the balance between the two main elements. Dark chocolate mousse on its own can be wonderful but one-note, especially after a full dinner. Raspberries change that completely. Cooked briefly into a simple sauce, they keep their vivid color and natural tang, and when you spoon that sauce between layers of mousse, you get a little burst of fruit in almost every bite instead of only on top as decoration. A few fresh berries and a soft cloud of whipped cream at the end are all the finishing touch the cups need.
This is also a genuinely kind recipe to make when you are cooking for other people. There is no baking, no water bath, and no last-minute oven timing to manage. The sauce takes about five minutes on the stove, the mousse comes together with melted chocolate and whipped cream, and then the refrigerator does the rest of the work. You can assemble the cups in the morning, or even the day before, and pull them out when you are ready for dessert. That make-ahead ease, combined with how pretty the layers look through clear glasses, is why these cups suit Valentine's Day and anniversary dinners so naturally — and why they are just as welcome on an ordinary weekend when you want something that feels a little special without asking much of you.
A note on texture, because it is the heart of this recipe: the goal is a mousse that holds a soft shape on the spoon but melts almost immediately in your mouth. That comes from two simple habits — letting the melted chocolate cool until warm rather than hot before folding, and whipping the cream only to soft peaks.
Why You'll Love This Recipe
- Light texture, deep chocolate flavor. Whipped cream folded into real dark chocolate gives you a mousse that feels airy on the spoon but tastes rich and properly chocolatey, not sweet and milky.
- Raspberries in every layer. A quick homemade raspberry sauce is layered through the cups, not just scattered on top, so the bright, tart fruit balances the chocolate from the first spoonful to the last.
- Completely no-bake. Apart from a few minutes simmering the sauce and melting the chocolate, everything is assembly and chilling. It is an ideal dessert for warm evenings and busy dinner days alike.
- Made to be made ahead. The cups need at least 2 hours and 30 minutes to chill, and they hold beautifully overnight, which means dessert is finished long before your guests sit down.
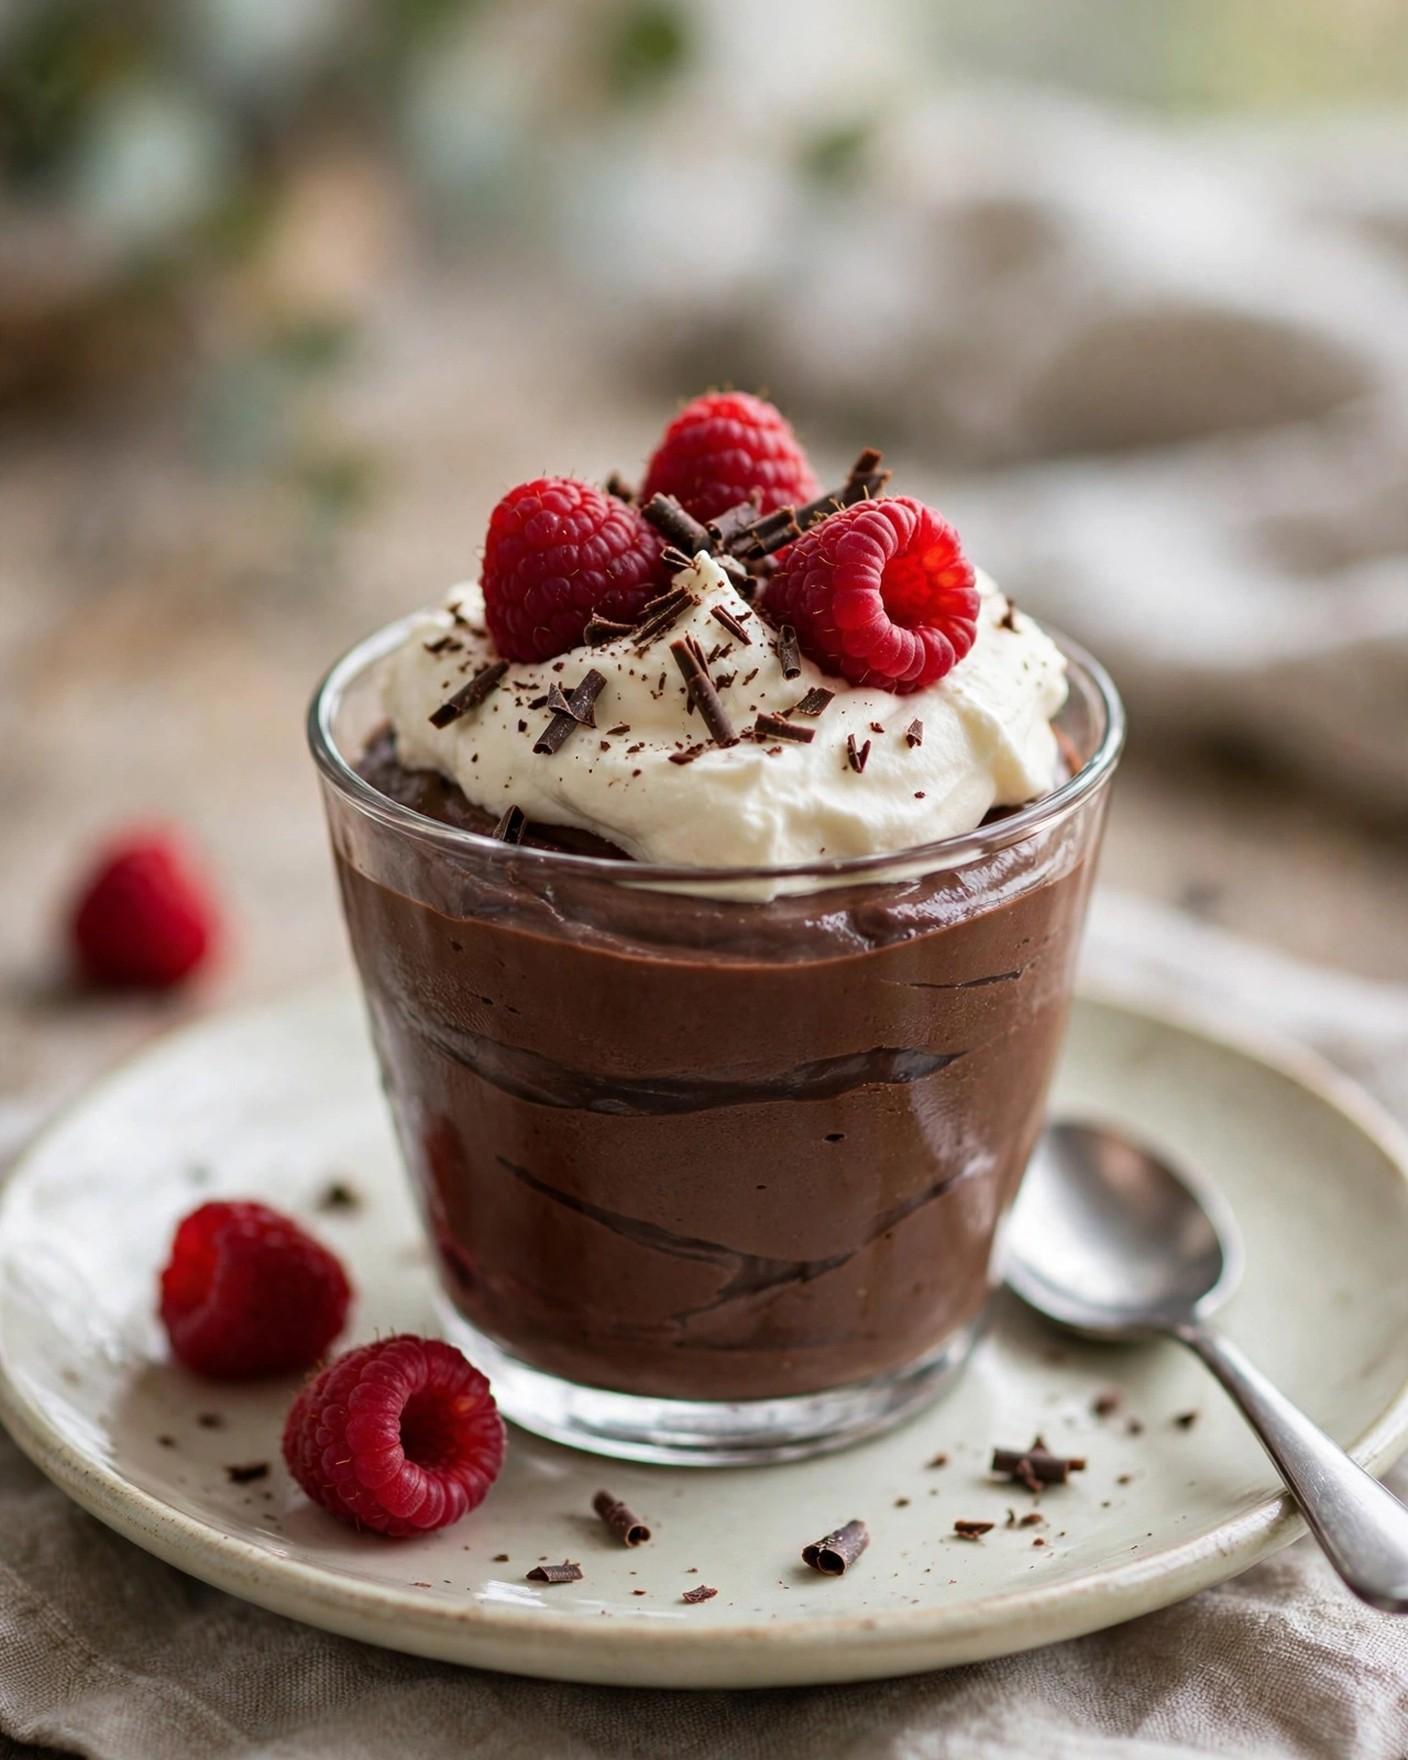
- Individual servings that look elegant with very little effort. Clear glasses or small jars show off the layers for you. A dollop of cream, three fresh raspberries, and a few chocolate shavings are all the decoration required.
- Easy to scale and adapt. The recipe makes six satisfying cups. Double it for a crowd, swap the berries, or add a cookie-crumb base.

Ingredients
For the raspberry sauce
- 2 cups (250 g) fresh raspberries, plus a few extra for the sauce if you like it fruitier
- 3 tablespoons (38 g) granulated sugar
- 1 teaspoon fresh lemon juice
- 1 teaspoon cornstarch
- 1 teaspoon cold water
For the dark chocolate mousse
- 6 ounces (170 g) dark chocolate (60 to 70 percent cacao), finely chopped
- 2 tablespoons (28 g) unsalted butter, cut into small pieces
- 1 1/2 cups (360 ml) heavy cream, very cold, divided
- 2 tablespoons (15 g) powdered sugar
- 1 teaspoon vanilla extract
- 1/4 teaspoon fine sea salt
For serving
- 1/2 cup (120 ml) heavy cream, very cold, or the reserved whipped cream from the mousse
- 1 tablespoon (8 g) powdered sugar (optional, if whipping fresh cream)
- 18 to 24 fresh raspberries (about 3/4 cup / 95 g), for topping
- Dark chocolate shavings or a light dusting of cocoa powder
- Small fresh mint leaves (optional)
Why these ingredients matter
Dark chocolate. This is the flavor of the whole dessert, so it is worth using chocolate you would happily eat on its own. A bar in the 60 to 70 percent range gives a deep, slightly bittersweet taste that stands up to the cream and pairs beautifully with tart raspberries. Below 60 percent, the mousse can taste a little sweet and flat once the cream is folded in; much above 70 percent, it can turn firm and intense in a way that overwhelms the fruit. Chop the bar finely and evenly so it melts smoothly — large chunks melt slowly and can leave the mixture sitting over heat longer than it should. Bar chocolate is strongly preferred over chips here, because chips contain stabilizers that help them hold their shape and can make a mousse feel slightly waxy or grainy.
Heavy cream. Cream does two jobs in this recipe: a small amount is warmed and stirred into the melted chocolate to keep it fluid and glossy, and the rest is whipped and folded in to create the mousse's light, airy structure. It needs to be very cold to whip well, so keep it in the refrigerator until the moment you need it, and chill your mixing bowl too if your kitchen is warm. There is no good low-fat substitute for this role — milk and half-and-half simply do not whip, and without whipped cream there is no mousse, only ganache.
Fresh raspberries. Raspberries bring color, acidity, and that unmistakable berry perfume that makes chocolate taste even more like itself. For the sauce, the berries are cooked just long enough to break down and thicken slightly, which concentrates their flavor and softens their seeds into the background. Fresh berries give the brightest result, but the sauce is forgiving — see the FAQ for using frozen raspberries, which work very well here because they release their juice readily as they heat. Save your prettiest, firmest berries for the topping, where they are eaten raw and their shape matters.
Granulated sugar. Three tablespoons in the sauce is a light hand on purpose. Raspberries vary a lot in sweetness depending on the season and the punnet, and the goal is a sauce that still tastes like fruit — tart first, sweet second. Sugar also helps the sauce look glossy and encourages the berries to release their juice in the pan. Taste the sauce once it has cooled slightly and add another teaspoon if your berries were especially sharp; it is much easier to add sweetness at the end than to rescue a sauce that has gone jammy and dull.
Lemon juice. A single teaspoon will not make the sauce taste lemony. What it does is lift the raspberry flavor, keep the color vivid and red rather than purple-brown, and add a clean acidity that balances the sugar. Bottled juice works in a pinch, but fresh lemon juice has a brighter, less flat taste in a small quantity like this.
Cornstarch. One teaspoon, mixed with cold water into a slurry, gives the sauce just enough body to sit in distinct layers instead of bleeding into the mousse. It is a subtle thickener, not a setting agent — the sauce should still spoon easily and look soft, not gelled. For a looser coulis-style sauce, leave it out and layer more gently.
Unsalted butter. Two tablespoons stirred into the warm chocolate add gloss, a little richness, and insurance against the chocolate seizing or turning matte as it cools. Butter also rounds off the sharper edges of high-percentage dark chocolate. Unsalted is preferred so the salt level stays entirely under your control, which matters in a recipe where a small pinch of salt is used deliberately to sharpen flavor.
Powdered sugar. A couple of tablespoons sweeten the whipped cream very lightly and help it hold soft peaks, because powdered sugar contains a small amount of cornstarch. The mousse itself should taste of chocolate first, so this is seasoning rather than real sweetness — the dark chocolate and the sauce already bring sugar of their own. Sift it if it looks lumpy, so it disappears into the cream without leaving specks.
Vanilla extract. Vanilla does not make the mousse taste like vanilla; it makes the chocolate taste deeper and more complete, the same way it does in brownies and hot chocolate. One teaspoon is enough. It also bridges the gap between the chocolate and the fruit, softening the contrast so the layers taste like one dessert rather than two separate things sharing a glass.
Fine sea salt. A quarter teaspoon sounds small, and it is, but chocolate without any salt tastes muted and oddly flat. Salt sharpens the cacao flavor and keeps the sweetness in check. Fine salt dissolves evenly into warm chocolate; if you use flaky salt, save it for a tiny pinch on top at serving instead, where its texture can be appreciated.
Instructions
- Wash and sort the raspberries. Put the raspberries for the sauce in a colander and rinse them gently under cool water, then spread them on a clean kitchen towel or paper towels to drain. Pick through them and set aside any that are moldy or completely crushed. Keep the berries for topping separate and unwashed until just before serving if you can — raspberries soften quickly once wet. Wet sauce berries are fine, since they are going straight into a pan.
- Make the raspberry sauce. Put the 2 cups (250 g) raspberries, granulated sugar, and lemon juice in a small saucepan over medium heat. Cook, stirring often and lightly pressing the berries with the back of a spoon, for 3 to 4 minutes, until the berries have broken down, the mixture is juicy, and small bubbles are rising across the surface. In a tiny bowl, stir the cornstarch and cold water together until smooth, then stir the slurry into the sauce. Cook for 30 to 60 seconds more, stirring constantly, until the sauce thickens just enough to coat the back of a spoon and looks glossy. It will still seem a little loose — it firms up as it cools.
- Strain the sauce if you like, then chill it. For a smooth sauce, pour it through a fine-mesh strainer set over a bowl and press with a spoon to extract as much liquid as possible, discarding the seeds. For a more rustic, fruitier layer, skip straining and leave the seeds in — the flavor is the same and the texture is pleasantly jammy. Either way, let the sauce cool to room temperature, then refrigerate it while you make the mousse. It must be cool before layering; warm sauce will melt the mousse on contact and blur the layers. The sauce can be made up to 3 days ahead and kept covered in the refrigerator.
- Melt the chocolate and butter. Put the finely chopped dark chocolate and the butter in a medium heatproof bowl set over a saucepan of barely simmering water, making sure the bottom of the bowl does not touch the water. Stir occasionally until the chocolate is about three-quarters melted, then remove the bowl from the heat and stir continuously until everything is completely smooth and glossy — the residual heat will finish the job and keeps the chocolate from overheating. Alternatively, microwave in a microwave-safe bowl in 20-second bursts, stirring well between each, until just melted. Stir in the salt.
- Loosen the chocolate with warm cream. Pour 1/4 cup (60 ml) of the heavy cream into a small saucepan and warm it over low heat until steaming, about 1 to 2 minutes, or microwave it for about 30 seconds until warm to the touch. Stir the warm cream into the melted chocolate a little at a time until the mixture is smooth, shiny, and pourable — this is a loose ganache, and it is the base of your mousse. Set it aside to cool for 10 to 15 minutes, stirring now and then, until it feels just barely warm when you touch a dab to the inside of your wrist. This cooling step matters: hot chocolate will melt the whipped cream on contact and collapse the mousse.
- Whip the remaining cream. Pour the remaining 1 1/4 cups (300 ml) cold heavy cream into a large, chilled mixing bowl. Add the powdered sugar and vanilla extract. Whip with a hand mixer or a whisk, starting slowly and increasing the speed, until soft peaks form — when you lift the beaters, the cream should form a peak that curls gently over at the tip. Stop there. Cream whipped to stiff peaks folds in with difficulty, leaves white streaks, and can turn the mousse dense and slightly grainy instead of silky.
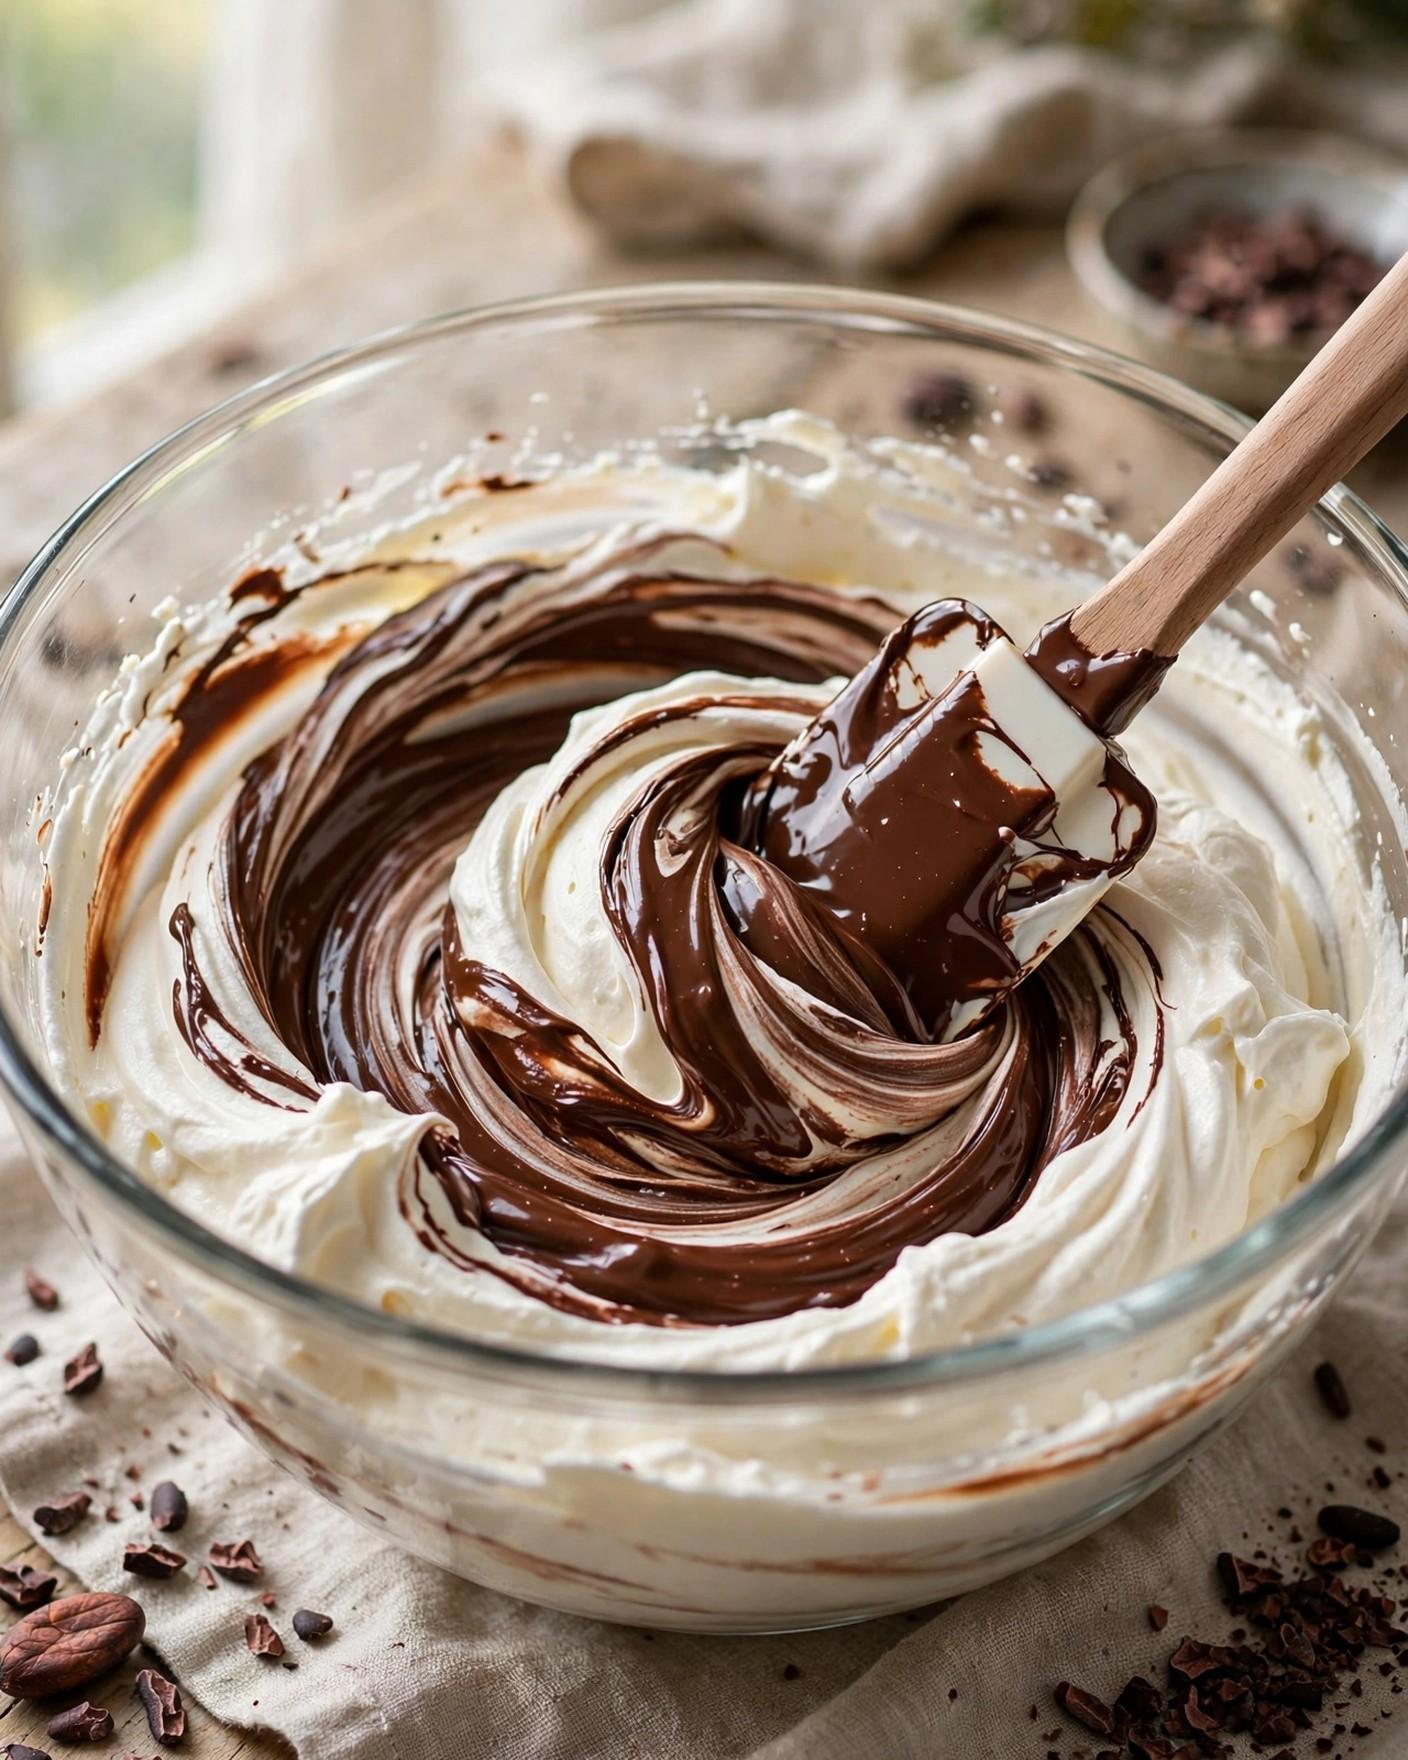
- Fold the mousse together in stages. Spoon about one-third of the whipped cream into the cooled chocolate and stir it in fairly briskly with a spatula. This first addition lightens the dense chocolate so the rest of the cream can go in gently. Add the remaining whipped cream in two additions, folding with a large spatula: cut down through the center, sweep along the bottom of the bowl, and lift the mixture up and over, turning the bowl a quarter turn each time. Fold only until no white streaks remain, usually 12 to 18 turns. A few faint wisps are better than overfolding — every extra stroke knocks out air you worked to put in.
- Layer the cups. Set out six small glasses, ramekins, or jars of about 6 to 8 ounces (180 to 240 ml) each. Spoon or pipe a layer of mousse into each cup, using roughly one-third of the mousse. Add a spoonful of cooled raspberry sauce — about 1 tablespoon per cup — and spread it gently to the edges. Add a second layer of mousse, another spoonful of sauce, and finish with the remaining mousse. A piping bag or a zip-top bag with the corner snipped off makes the layers noticeably neater, especially in narrow glasses, but a spoon and a little patience work fine. Reserve any leftover sauce for serving.
- Chill until set. Cover each cup loosely with plastic wrap, taking care not to press the wrap onto the surface of the mousse, and refrigerate for at least 2 hours and 30 minutes, until the mousse feels set and cool all the way through and holds its shape when the cup is tilted slightly. Overnight chilling is even better: the chocolate flavor deepens, the layers settle, and the texture becomes silkier. Do not freeze the cups to speed this up — freezing changes the whipped texture and makes the mousse watery as it thaws.
- Whip the topping cream, if making it fresh. Shortly before serving, whip the 1/2 cup (120 ml) cold heavy cream with the powdered sugar, if using, to soft peaks, exactly as before. If you reserved whipped cream from Step 6, give it a few gentle folds to refresh it. Keep the topping simple and soft — billowy, spooned-on cream looks and tastes better here than stiff, piped peaks, and it echoes the lightness of the mousse underneath.
- Garnish and serve cold. Spoon or pipe a generous dollop of whipped cream onto each chilled cup. Top with 3 or 4 fresh raspberries per cup, a scattering of dark chocolate shavings or a whisper of cocoa powder, and a small mint leaf if you like. Add a drizzle of any leftover raspberry sauce around the cream if you saved some. Serve straight from the refrigerator with small spoons, while the mousse is cold, set, and at its silkiest.

Tips for Success
- Cool the chocolate before folding — this is the single most important step. If the melted chocolate is still hot when it meets the whipped cream, the cream melts, the air disappears, and you end up with a dense chocolate pudding instead of a mousse. It should feel barely warm, close to body temperature. If you are unsure, wait another five minutes; slightly cool chocolate folds in beautifully, while hot chocolate cannot be rescued.
- Whip to soft peaks only. Soft peaks fold smoothly and keep the mousse light. Stiffly whipped cream resists folding, which tempts you to stir harder, which knocks out even more air — and overwhipped cream can give the finished mousse a faintly buttery, grainy feel. Stop as soon as the peaks curl over when you lift the beaters.
- Chop the chocolate small and even. Fine, even pieces melt quickly and gently. Big chunks force you to keep the bowl over heat longer, and overheated chocolate can turn thick and dull. A serrated knife makes chopping a chocolate bar much easier and less likely to send shards across the counter.
- Layer with cool sauce and cold cups. Cold serving glasses help the layers stay distinct and start the chilling process the moment the mousse goes in. If your sauce is still warm, or your kitchen is hot, build the cups and return them to the refrigerator for 10 minutes between the sauce layer and the final mousse layer.
- Taste and adjust the sauce. Raspberry sweetness changes with the season. Taste the cooled sauce: it should be bright and clearly tart, because the rich mousse will soften it in the finished dessert. Add a teaspoon of sugar if it makes you pucker, or a few drops more lemon if it tastes flat.
- Use clear cups when you can. Half the pleasure of this dessert is seeing the dark and red layers through the glass. Small juice glasses, stemless wine glasses, and clean jam jars all work beautifully. If you only have opaque ramekins, the dessert will taste exactly the same — just add an extra raspberry and a drizzle of sauce on top so the fruit is visible.
Variations
- Raspberry cookie-crumb cups. Crush 8 chocolate sandwich cookies or chocolate wafers (about 90 g) into fine crumbs and divide them between the cups before the first mousse layer, pressing lightly. The crumb base adds a gentle crunch and makes the cups feel a little like a deconstructed chocolate tart. No butter is needed, since the cups are eaten with a spoon.
- Strawberry or mixed-berry version. Replace the raspberries in the sauce with the same weight of hulled, chopped strawberries, or use a mixture of raspberries, blueberries, and chopped strawberries for a mixed-berry sauce. Strawberry sauce is a little sweeter and softer in flavor, so add an extra squeeze of lemon juice to keep it bright.
- White chocolate raspberry cups. Swap the dark chocolate for 6 ounces (170 g) white chocolate and reduce the powdered sugar in the cream to 1 tablespoon, since white chocolate is much sweeter. Melt it even more gently — white chocolate scorches easily — and keep the raspberry sauce exactly the same; its tartness is essential with the sweeter mousse.
- Espresso dark chocolate mousse. Stir 1 teaspoon instant espresso powder into the warm cream in Step 5 before adding it to the chocolate. The mousse will not taste like coffee; the espresso simply deepens the chocolate flavor and makes it taste more intense. This version is particularly good with the sauce left slightly tarter.
- Chocolate orange raspberry cups. Add 1 teaspoon finely grated orange zest to the melted chocolate along with the salt, and replace the vanilla with 1/2 teaspoon vanilla plus a few drops of orange extract if you have it. Orange and dark chocolate are a classic pairing, and the zest adds a fragrant lift that works surprisingly well alongside the raspberries.
Storage
These mousse cups are designed to be stored — in fact, they improve with a night in the refrigerator. Covered loosely with plastic wrap or with lids if your jars have them, finished cups (without the fresh topping) will keep in the refrigerator for up to 3 days. The mousse stays silky, the sauce settles into the layers, and the chocolate flavor becomes a little deeper on the second day. Add the whipped cream topping, fresh raspberries, and chocolate shavings only just before serving, because whipped cream softens and fresh berries weep if they sit on the cups for more than a few hours.
The components also store well on their own. The raspberry sauce keeps, covered and refrigerated, for up to 4 days. Extra mousse can be refrigerated for up to 2 days; let it sit at room temperature for 10 minutes before serving.
Freezing is not recommended for the assembled cups. Whipped-cream mousses lose their airy structure in the freezer and turn watery as they thaw. If you need to work further ahead, freeze only the sauce — up to 1 month — and make the mousse fresh.
FAQ
Can I use frozen raspberries for the sauce? Yes, and they work very well. Frozen raspberries release their juice quickly as they heat, so the sauce comes together just as fast — use the same weight, 2 cups (250 g), and add them to the pan straight from frozen with the sugar and lemon juice, giving them an extra minute or two to thaw and break down. Frozen berries are often picked ripe and can be a little tarter than fresh, so taste the cooled sauce and add a teaspoon of sugar if needed. Reserve fresh berries for the topping if you can, since thawed berries are too soft and juicy to sit neatly on top of the cream.
Why did my mousse turn out dense instead of light and airy? Almost always, one of two things happened: the chocolate was too warm when the cream was folded in, which melted the whipped cream and collapsed its air, or the cream was overwhipped and then overfolded, which has the same effect from the other direction. The fix next time is patience on both sides — let the chocolate cool until it feels barely warm, whip the cream only to soft, curling peaks, lighten the chocolate with the first third of cream, and then fold the rest in gently, stopping the moment the streaks disappear. A mousse that looks slightly undermixed will settle into a smoother texture in the refrigerator than one that was folded a dozen turns too far.
Can I make these mousse cups ahead of time for a dinner party? That is exactly what they are designed for. Assemble the cups completely — mousse and sauce layers — cover them, and refrigerate for up to 24 hours before serving; they will also keep well for a second day, though the layers soften very slightly into each other. Hold off on the whipped cream, fresh raspberries, and chocolate shavings until shortly before you serve, so the topping looks fresh and the berries stay firm. Because there is no baking and no last-minute cooking, this is one of the calmest dinner-party desserts you can make: pull the cups from the refrigerator, add the toppings, and carry them to the table.
Do these mousse cups contain raw eggs? No. This version is made without eggs at all — the light texture comes entirely from whipped cream folded into melted dark chocolate, and the mousse sets in the refrigerator as the chocolate firms up. That makes the cups a good choice for anyone who prefers to avoid raw or lightly cooked eggs in desserts, and it also keeps the method simple, with no yolks to temper and no egg whites to whip separately. The trade-off is that the mousse is a little softer and more delicate than a classic egg-based mousse, which is precisely why the chilling time matters and why the cups should be served cold, straight from the refrigerator.
Recipe Card
Dark Chocolate Raspberry Mousse Cups
- Prep Time: 25 minutes (PT25M)
- Cook Time: 5 minutes (PT5M)
- Total Time: 3 hours (PT3H)
- Servings: 6 servings (6 individual cups)
- Calories: 385 kcal per serving (estimated)
Silky dark chocolate mousse layered with a bright homemade raspberry sauce in individual cups, chilled until set and served with softly whipped cream, fresh raspberries, and dark chocolate shavings.
Nutrition (estimated): 385 kcal per serving (estimated), 28 g carbohydrates, 4 g protein, 29 g fat, 4 g fiber, 22 g sugar, 65 mg sodium. Nutrition is estimated and will vary with the chocolate used, the sweetness of the berries, and any variations or substitutions.
Can I use frozen raspberries for the sauce?
Yes, and they work very well. Frozen raspberries release their juice quickly as they heat, so the sauce comes together just as fast — use the same weight, 2 cups (250 g), and add them to the pan straight from frozen with the sugar and lemon juice, giving them an extra minute or two to thaw and break down. Frozen berries are often picked ripe and can be a little tarter than fresh, so taste the cooled sauce and add a teaspoon of sugar if needed. Reserve fresh berries for the topping if you can, since thawed berries are too soft and juicy to sit neatly on top of the cream.
Why did my mousse turn out dense instead of light and airy?
Almost always, one of two things happened: the chocolate was too warm when the cream was folded in, which melted the whipped cream and collapsed its air, or the cream was overwhipped and then overfolded, which has the same effect from the other direction. The fix next time is patience on both sides — let the chocolate cool until it feels barely warm, whip the cream only to soft, curling peaks, lighten the chocolate with the first third of cream, and then fold the rest in gently, stopping the moment the streaks disappear. A mousse that looks slightly undermixed will settle into a smoother texture in the refrigerator than one that was folded a dozen turns too far.
Can I make these mousse cups ahead of time for a dinner party?
That is exactly what they are designed for. Assemble the cups completely — mousse and sauce layers — cover them, and refrigerate for up to 24 hours before serving; they will also keep well for a second day, though the layers soften very slightly into each other. Hold off on the whipped cream, fresh raspberries, and chocolate shavings until shortly before you serve, so the topping looks fresh and the berries stay firm. Because there is no baking and no last-minute cooking, this is one of the calmest dinner-party desserts you can make: pull the cups from the refrigerator, add the toppings, and carry them to the table.
Do these mousse cups contain raw eggs?
No. This version is made without eggs at all — the light texture comes entirely from whipped cream folded into melted dark chocolate, and the mousse sets in the refrigerator as the chocolate firms up. That makes the cups a good choice for anyone who prefers to avoid raw or lightly cooked eggs in desserts, and it also keeps the method simple, with no yolks to temper and no egg whites to whip separately. The trade-off is that the mousse is a little softer and more delicate than a classic egg-based mousse, which is precisely why the chilling time matters and why the cups should be served cold, straight from the refrigerator.

Hi, I’m Emma! I’m the cook and recipe developer behind Sizzle & Sage. From my sunny home kitchen, I share easy, flavor-packed recipes for real life — quick breakfasts, cozy weeknight dinners, and simple bakes anyone can make. Pull up a chair and stay a while!