Heart-Shaped Sugar Cookies with Soft Centers and Simple Icing
There is something quietly cheerful about a tray of heart-shaped sugar cookies cooling on the counter. The shapes are simple, the edges are neat, and even before any icing goes on, the cookies already feel like a small celebration. A heart says plenty without needing a long message attached to it, which is why these cookies work for Valentine's Day, anniversaries, classroom treats, bake sales, bridal showers, and all the ordinary afternoons when you simply want to bake something sweet for people you like.
These heart-shaped sugar cookies are built around the two things a good cut-out cookie needs most: a soft center and an edge that stays where you cut it. Nobody wants a heart that spreads in the oven until it looks like a round blob, and nobody wants a pretty cookie that eats dry and crisp all the way through. This dough finds the middle path. It rolls out smoothly, cuts cleanly, chills without fuss, and bakes at 350 degrees F (175 degrees C) just until the edges are set and the tops look pale and matte. The centers stay tender, the bottoms stay light, and the heart shape you cut is the heart shape you get.
The icing here is deliberately simple. It is not a complicated decorating project with a long supply list, and it does not ask you to master piping bags before you can finish a cookie. It is a smooth, easy icing made from powdered sugar, milk, vanilla, and a pinch of salt, tinted pink or left white, spread or spooned over cooled cookies and allowed to set into a soft, pretty finish. You can keep the cookies plain and elegant, add sprinkles while the icing is wet, or draw a second color over the first once you feel like playing a little. The recipe gives you a reliable base — what you do on top of it can be as calm or as colorful as the day calls for.
Plan on a little chilling time, because that pause does real work in this recipe. The dough rests for at least an hour so the butter firms up, the flour hydrates, and the cut shapes hold their lines in the heat of the oven. After that, the rhythm is relaxed: roll, cut, chill the tray briefly, bake, cool, and ice. It is a lovely project to share with another pair of hands, but it is just as satisfying done solo with music on and a cup of tea nearby.
Why You'll Love This Recipe
- Soft centers, neat edges. A balanced dough with just enough baking powder bakes up tender in the middle while the heart outlines stay clear and recognizable, with no spreading into shapeless rounds.
- A dough that is easy to handle. The dough rolls out evenly, lifts cleanly after chilling, and re-rolls well, so you can use nearly every bit of it without fighting sticky patches or cracking corners.
- Simple icing, no special skills needed. Powdered sugar, milk, vanilla, and salt make a smooth icing you can spread with a small spoon or offset spatula. It sets with a gentle sheen and a soft bite, not a hard shell.
- Clear chilling steps that protect the shape. Chilling the dough before rolling and chilling the cut hearts before baking are the quiet secrets behind clean points, smooth curves, and even baking.
- Made for sharing and gifting. The recipe makes about 24 cookies with a 3-inch (7.5 cm) cutter — a generous tray for a party, a cookie box, or a small stack tied up for a neighbor.
- Flexible for any occasion. Pink and white for Valentine's Day, red for anniversaries, pastel shades for showers, or plain and sparkling for winter — the same dependable dough carries every color.
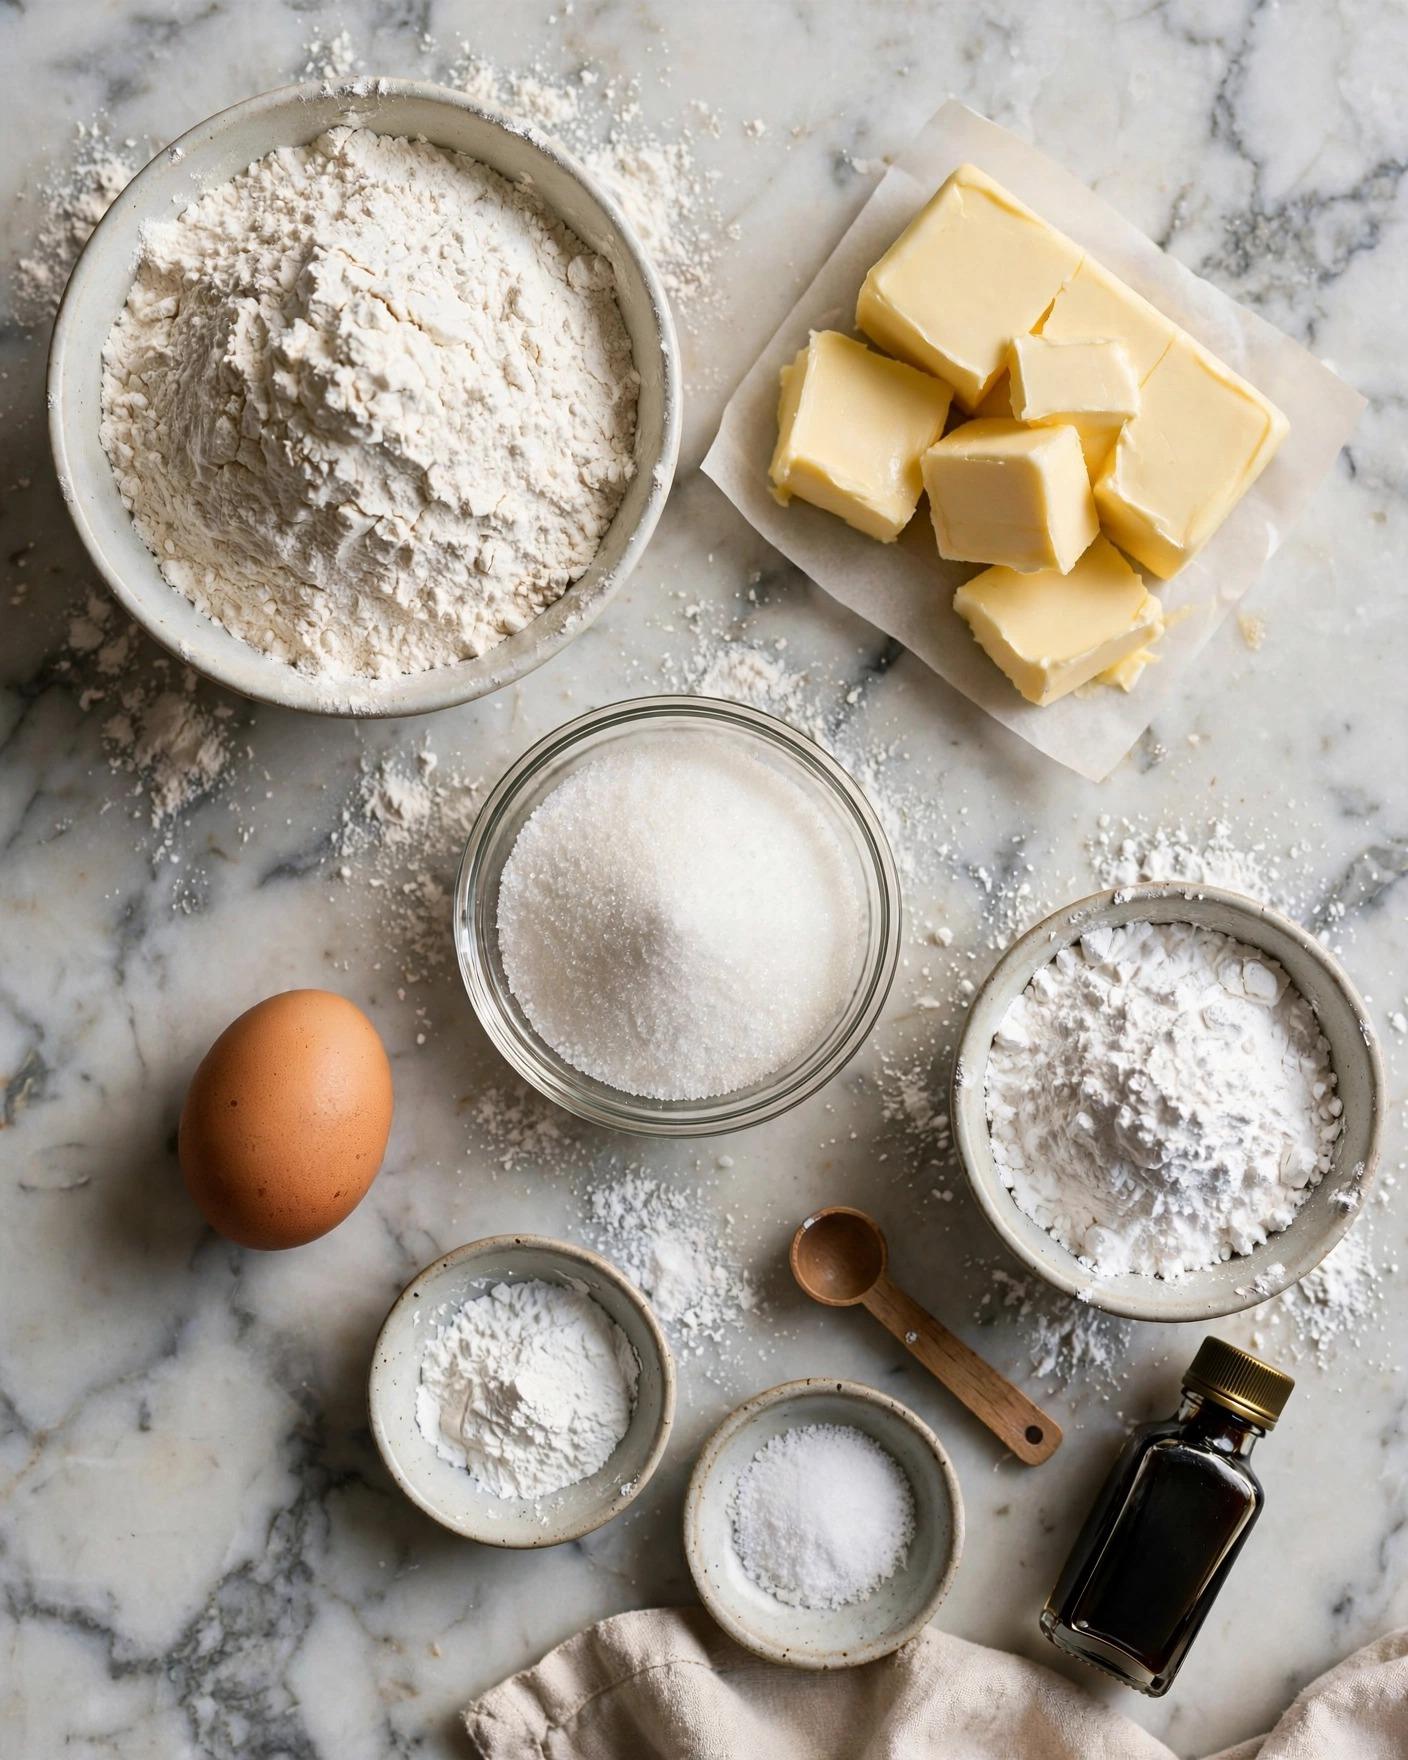
Ingredients
For the sugar cookie dough
- 2 3/4 cups (345 g) all-purpose flour, spooned and leveled, plus more for rolling
- 3/4 teaspoon baking powder
- 1/2 teaspoon fine sea salt
- 1 cup (226 g) unsalted butter, softened to room temperature
- 1 cup (200 g) granulated sugar
- 1 large egg, at room temperature
- 2 teaspoons vanilla extract
- 1/4 teaspoon almond extract (optional, for a gentle bakery-style flavor)
- 1 tablespoon milk, only if the dough feels dry or crumbly
For the simple icing
- 2 cups (240 g) powdered sugar, sifted
- 3 to 4 tablespoons milk, plus more by the teaspoon as needed
- 1 tablespoon light corn syrup (optional, for a little shine and a softer set)
- 1/2 teaspoon vanilla extract
- Pinch of fine sea salt
- Pink or red gel food coloring, a drop at a time
- Sprinkles, for decorating (optional)
Why these ingredients matter
All-purpose flour. Flour gives the cookies their structure and their tender, cake-like crumb. Measuring it well matters more here than in many recipes: too much flour makes a dry, tough cookie that cracks as you roll, while too little makes a soft dough that spreads. Spoon flour into the cup and level it off, or weigh out 345 g for the most reliable result. That accuracy pays you back in clean edges.
Baking powder. Three-quarters of a teaspoon is a careful amount. It lifts the cookies just enough to keep them soft and light, without puffing them so much that the heart points round off and the curves swell. Older recipes with a full teaspoon or more often rise and spread more than a cut-out wants. This smaller measure keeps the shape honest.
Unsalted butter. Butter is the flavor and the tenderness in a sugar cookie. Softened butter creams smoothly with sugar, trapping a little air for a lighter texture, and it firms up again during chilling, which is exactly what holds the cut shapes. Unsalted butter lets you control the salt yourself. It should be soft enough to leave a clear dent when pressed, but not shiny, melty, or greasy — overly soft butter is a common cause of spread.
Granulated sugar. Sugar sweetens, of course, but it also helps the edges set and gives the cookies their delicate, fine crumb. Creaming it well with the butter matters: the mixture should look pale and fluffy before the egg goes in. That step builds the soft texture you feel in the finished cookie, even though these are rolled rather than dropped.
Egg. One large egg binds the dough, adds richness, and helps the cookies set in the oven. A room-temperature egg blends into the creamed butter without making the mixture look curdled or streaky. If you forget to set it out, place the whole egg in warm water for about 10 minutes before you start.
Vanilla extract. Vanilla is the main flavor note in a classic sugar cookie, so use a full 2 teaspoons. It warms the buttery base, rounds out the sweetness, and shows up again in the icing, tying cookie and topping together. Without enough vanilla, sugar cookies can taste flat and floury; with it, they taste like the bakery version you remember.
Almond extract (optional). Just a quarter teaspoon adds a subtle, almost cherry-like bakery flavor that many people recognize without being able to name. It is optional because the cookies are lovely with vanilla alone, and it should stay small — almond extract is strong, and too much will take over the whole batch.
Fine sea salt. Salt appears in both the dough and the icing because sweetness without salt tastes one-note. Half a teaspoon in the dough sharpens the butter and vanilla, and a pinch in the icing keeps it from tasting purely sugary. It is a quiet ingredient doing essential work in every bite.
Powdered sugar. Powdered sugar is the base of the simple icing. Sifting it first removes the little lumps that would otherwise show up as bumps under an otherwise smooth surface. It dissolves instantly into milk, which is why this icing comes together in minutes with nothing more than a whisk and a bowl.
Milk. Milk thins the powdered sugar into a spreadable icing and gives it a soft, creamy finish. Add it gradually: a teaspoon too much can turn a thick, controllable icing into a runny glaze that slides off the edges. You are looking for an icing that falls from the spoon in a slow ribbon and settles smooth within about 10 seconds.
Light corn syrup (optional). A tablespoon of corn syrup gives the icing a gentle shine and helps it set with a slightly softer bite rather than a chalky finish. The icing works without it, so leave it out if you do not keep it on hand — the difference is polish, not success.
Gel food coloring. Gel coloring tints icing a clear pink or red with a drop or two, without thinning it the way liquid coloring can. Add it a drop at a time and stir well before adding more. The color looks a shade deeper as the icing sits and sets, so stop a touch lighter than your final goal.
Instructions
- Whisk the dry ingredients. In a medium bowl, whisk together the flour, baking powder, and fine sea salt until evenly combined and free of lumps. Whisking here distributes the baking powder through the flour so every cookie rises the same small amount, which helps the whole tray bake evenly. Set the bowl aside while you cream the butter.
- Cream the butter and sugar. In a large bowl, beat the softened butter and granulated sugar with a hand mixer or a stand mixer fitted with the paddle on medium speed for 2 to 3 minutes, until the mixture is pale, fluffy, and noticeably lighter in texture. Scrape down the sides and bottom of the bowl once halfway through. Do not rush this step into a brief stir — properly creamed butter and sugar are the foundation of the cookies' soft crumb.
- Add the egg and extracts. Beat in the room-temperature egg, vanilla extract, and almond extract, if using, until the mixture looks smooth and fully combined, about 30 seconds to 1 minute. It may look slightly loose at first; keep mixing until it comes back together. Scrape the bowl again so no streaks of plain butter hide at the bottom. If the dough later feels dry, the milk will be added in the next step — not now.
- Bring the dough together. Add the dry ingredients to the butter mixture in two additions, mixing on low speed just until the flour disappears after each one. Stop as soon as no dry streaks remain. If the dough looks crumbly in the bowl, add the tablespoon of milk and mix briefly until it holds together when pressed. Overmixing at this stage develops gluten and can make rolled cookies tough, so a few small floury flecks worked in by hand at the end are better than extra beating.
- Divide, wrap, and chill the dough. Turn the dough out onto a clean surface and press it together gently into a smooth mass. Divide it in half and shape each half into a flat disk about 1 inch (2.5 cm) thick — flat disks chill faster and roll out more evenly than balls. Wrap each disk tightly and refrigerate for at least 1 hour and up to 2 days. If the dough chills longer than 2 hours, let it sit at room temperature for 10 to 15 minutes before rolling so it softens just enough to roll without cracking.
- Roll out the dough. Place a rack in the center of the oven and preheat to 350 degrees F (175 degrees C). Line two baking sheets with parchment paper. Working with one disk at a time and keeping the other chilled, roll the dough on a lightly floured surface to an even 1/4 inch (6 mm) thickness. Roll from the center outward, turning the dough a quarter turn now and then, and lift it gently once to be sure it is not sticking. Even thickness is the secret to even baking: thin spots brown and crisp, thick spots stay doughy, and a heart with both is hard to ice neatly.
- Cut the hearts and chill the tray. Dip a 3-inch (7.5 cm) heart-shaped cutter in flour, press it straight down into the dough, and lift straight up without twisting — twisting seals the edges and can blur the shape. Place the hearts on a prepared baking sheet about 1 inch (2.5 cm) apart; they spread only slightly, but they still need a little air between them. Gather the scraps, press them together gently, re-roll once, and cut more hearts. Set the filled tray in the refrigerator for 15 minutes, or the freezer for 8 to 10 minutes, until the hearts feel firm to the touch. This second chill is what locks in the points and curves.
- Bake until just set. Bake the chilled hearts at 350 degrees F (175 degrees C) for 9 to 11 minutes, one tray at a time, until the edges look set and very lightly golden at the very bottom edge, the centers look pale and matte, and the tops no longer look wet or shiny. The cookies will look slightly underdone in the middle, and that is correct — they finish setting as they cool, and pulling them at this point is how the centers stay soft. If you wait for golden tops, the finished cookies will be crisp rather than tender.
- Cool completely before icing. Let the cookies rest on the hot baking sheet for 5 minutes, where they will firm up enough to move without bending, then transfer them carefully to a wire rack to cool completely, at least 30 minutes. Icing warm cookies is tempting and always disappointing: the icing melts, thins, and slides, and the colors bleed. While the cookies cool, roll and bake the remaining dough the same way, chilling each tray of cut hearts before it goes into the oven.
- Make the simple icing. Whisk the sifted powdered sugar, 3 tablespoons of milk, corn syrup if using, vanilla, and a pinch of salt in a medium bowl until completely smooth. Lift the whisk and watch how the icing falls: it should ribbon back into the bowl and settle smooth in about 10 seconds. If it is too thick to spread, add milk a teaspoon at a time; if it is too thin, whisk in powdered sugar a tablespoon at a time. Divide the icing between bowls if you want more than one color, and tint each with gel coloring a drop at a time, stirring well between drops.
- Ice the cooled cookies. Working with a few cookies at a time, spoon or spread a layer of icing over the top of each heart with a small spoon, the back of a teaspoon, or a small offset spatula, guiding it gently toward the edges and letting it settle. For a cleaner outline, trace the edge of the heart first, then fill the middle and nudge the icing into place. Add sprinkles right away while the icing is still wet if you are using them. If you want a second color on top — a smaller heart, dots, or simple lines — wait until the first layer has set to a dull, touch-dry finish, about 30 to 45 minutes, so the colors stay separate.
- Let the icing set, then serve or pack. Leave the iced cookies in a single layer at room temperature for 2 to 3 hours, until the icing feels dry to a light touch and the cookies can be handled without smudging. The set will be gentle rather than rock-hard, which suits the soft cookie underneath. Serve them the same day for the prettiest finish, or pack them carefully for sharing once fully set, with parchment between layers if you need to stack them.


Tips for Success
- Chill twice, and do not skip either chill. The first chill firms the dough for clean rolling and cutting. The second chill, after the hearts are cut and on the tray, is the one that protects the shape in the oven. Warm cut-outs going into a hot oven spread at the edges before they set, and the points of the hearts are the first detail to disappear.
- Roll to an honest 1/4 inch (6 mm). Cookies rolled thinner bake crisp and brown faster; cookies rolled thicker stay pale and soft but can look puffy and lose definition. If you bake often, rolling guides or a rolling pin with thickness rings help. At home, simply check a few spots with a ruler the first time — your eye learns the thickness quickly.
- Keep the flour on the surface light. A dusting prevents sticking, but heavy flouring toughens the outside of the cookies and dulls their flavor, and extra flour worked in during re-rolling can make later cookies drier than the first tray. Brush excess flour off the cut hearts with a soft pastry brush before baking if you see patches.
- Watch the bake, not just the timer. Ovens run differently, and a small cookie can move from perfect to overbaked in a minute. Pull the tray when the tops look matte and the edges are just set, even if the centers look a touch soft. Pale is the goal here; golden-brown sugar cookies are crisp sugar cookies.
- Let the icing find its own level. After spreading, give the cookie a gentle shake or tap on the counter and let the icing settle smooth on its own. Chasing every small line with a spatula usually creates more marks. A toothpick popped through any tiny air bubble while the icing is wet leaves a clean, smooth surface.
- Color gently and wait. Gel coloring deepens as icing sets, and red especially can go from pretty to startling if you add it all at once. Tint to a shade lighter than you want, wait 10 minutes, and look again before adding another drop.
Variations
- Lemon hearts. Replace the almond extract with 1 teaspoon finely grated lemon zest in the dough and swap the vanilla in the icing for fresh lemon juice, added a teaspoon at a time in place of some of the milk. The cookies stay soft and sweet, with a bright, clean finish that suits spring as well as Valentine's Day.
- Chocolate-dipped hearts. Skip the icing on half the batch and dip one side of each cooled cookie into melted semisweet or white chocolate. Set them on parchment until the chocolate firms. The plain cookie, dark dip, and clean heart outline make a simple, striking contrast on a plate.
- Jam sandwich hearts. Cut a small heart window from the center of half the cookies before baking. Spread the solid cookies with a thin layer of raspberry or strawberry jam, dust the windowed cookies lightly with powdered sugar, and press one gently on top of each jam layer. Fill them shortly before serving so the cookies stay at their softest.
- Cinnamon-sugar hearts. For a no-icing version, brush the baked, still-warm cookies very lightly with melted butter and sprinkle with a mixture of granulated sugar and ground cinnamon, or toss the warm cookies gently in the mixture. They keep the soft center and gain a warm, sparkling finish.
- Sprinkle-edged hearts. Ice the cookies in white, let the tops set until touch-dry, then brush the edges very lightly with a little extra thin icing and dip the edges into fine sprinkles. It takes a few extra minutes and gives a neat, festive border without covering the whole cookie.
- Smaller and larger hearts. Use a 2-inch (5 cm) cutter for about 36 smaller cookies and bake 7 to 9 minutes, or a 4-inch (10 cm) cutter for about 16 larger cookies and bake 11 to 13 minutes. Keep the thickness at 1/4 inch (6 mm) either way, and judge doneness by the same matte top and just-set edge.
Storage
Store un-iced cookies in an airtight container at room temperature for up to 5 days. Keep them in layers separated by parchment so the surfaces do not scuff, and keep the container away from heat and direct sunlight. A small piece of plain bread tucked into the container is a traditional home trick some bakers use to help soft cookies stay soft; replace it if it dries out, and keep strongly flavored foods away, since butter cookies pick up nearby odors easily.
Iced cookies keep best once the icing has fully set. Store them in a single layer, or in layers separated by parchment, in an airtight container at room temperature for up to 4 days. Colors can bleed very slightly if the container is warm or humid, so a cool, dry spot is best. Avoid refrigerating the finished cookies unless your kitchen is very warm — refrigeration can dry the crumb and dull the icing.
To freeze, unbaked cut hearts freeze beautifully. Freeze them in a single layer on a parchment-lined tray until solid, then transfer to a freezer container with parchment between layers for up to 2 months. Bake from frozen at 350 degrees F (175 degrees C), adding 1 to 2 minutes and watching for the usual matte, just-set finish. Baked, un-iced cookies also freeze well for up to 2 months; thaw them in their container at room temperature so condensation stays on the packaging rather than the cookies, then ice them fresh for the prettiest result. The icing itself is best made the day you use it.
FAQ
Why did my heart-shaped cookies spread and lose their shape? Spread usually comes from one of three places: butter that was too soft or even partly melted when the dough was made, dough that did not chill long enough before rolling, or cut hearts that went into the oven warm. Measure the flour carefully as well, since a light hand with flour leaves the dough looser than intended. Chill the disks for a full hour, chill the cut tray for 15 minutes, and bake one tray at a time in a fully preheated 350 degrees F (175 degrees C) oven. With those steps in place, the points and curves of the hearts should hold clearly.
Can I make the dough ahead of time? Yes, and many bakers prefer it that way. The wrapped dough disks keep in the refrigerator for up to 2 days, and the flavor settles nicely overnight. If the dough has chilled for many hours, let a disk sit at room temperature for 10 to 15 minutes before rolling so it rolls evenly without cracking at the edges; if it cracks, let it rest a few minutes longer rather than forcing the rolling pin. You can also freeze the disks, well wrapped, for up to 2 months and thaw them overnight in the refrigerator before rolling and cutting as usual.
How do I keep the icing smooth without it running off the cookie? Consistency is everything. The icing should fall from the spoon in a slow ribbon and settle smooth in about 10 seconds. If it pours in a thin stream, whisk in powdered sugar a tablespoon at a time; if it sits in stiff peaks, add milk a teaspoon at a time. Ice only completely cooled cookies, work with a modest amount on each cookie, and guide it to the edges rather than flooding the top all at once. Letting a traced outline set for a few minutes before filling the center gives you an extra measure of control on days when the icing feels lively.
Can I bake these cookies without chilling the dough? You can, but the results will not match what this recipe promises. Without chilling, the dough is softer to roll, sticks more readily, and must be handled with extra flour, and the cut hearts are far more likely to spread and blur in the oven. The chill is not a decorative step — it firms the butter, hydrates the flour, and relaxes the dough so it rolls cleanly and holds its shape. If time is very short, even 30 minutes for the disks and 10 minutes for the cut tray is far better than none, though the full times give the neatest hearts and the softest, most even bake.

Recipe Card
Heart-Shaped Sugar Cookies
- Prep Time: 30 minutes (PT30M)
- Cook Time: 10 minutes (PT10M)
- Total Time: 2 hours 30 minutes (PT2H30M)
- Servings: 24 servings (24 cookies, about 3 inches / 7.5 cm each)
- Calories: 210 kcal per serving (estimated)
Soft heart-shaped cut-out sugar cookies baked at 350 degrees F (175 degrees C) with tender centers, neat edges, and a simple pink and white powdered sugar icing. The dough chills before rolling and again after cutting, so the hearts keep their shape from cutter to cooling rack.
Nutrition (estimated): 210 kcal per serving (estimated), 29 g carbohydrates, 2 g protein, 10 g fat, 0 g fiber, 18 g sugar, 85 mg sodium. Nutrition is estimated and will vary with the exact cutter size, icing thickness, coloring, sprinkles, and any variations or substitutions.
Why did my heart-shaped cookies spread and lose their shape?
Spread usually comes from one of three places: butter that was too soft or even partly melted when the dough was made, dough that did not chill long enough before rolling, or cut hearts that went into the oven warm. Measure the flour carefully as well, since a light hand with flour leaves the dough looser than intended. Chill the disks for a full hour, chill the cut tray for 15 minutes, and bake one tray at a time in a fully preheated 350 degrees F (175 degrees C) oven. With those steps in place, the points and curves of the hearts should hold clearly.
Can I make the dough ahead of time?
Yes, and many bakers prefer it that way. The wrapped dough disks keep in the refrigerator for up to 2 days, and the flavor settles nicely overnight. If the dough has chilled for many hours, let a disk sit at room temperature for 10 to 15 minutes before rolling so it rolls evenly without cracking at the edges; if it cracks, let it rest a few minutes longer rather than forcing the rolling pin. You can also freeze the disks, well wrapped, for up to 2 months and thaw them overnight in the refrigerator before rolling and cutting as usual.
How do I keep the icing smooth without it running off the cookie?
Consistency is everything. The icing should fall from the spoon in a slow ribbon and settle smooth in about 10 seconds. If it pours in a thin stream, whisk in powdered sugar a tablespoon at a time; if it sits in stiff peaks, add milk a teaspoon at a time. Ice only completely cooled cookies, work with a modest amount on each cookie, and guide it to the edges rather than flooding the top all at once. Letting a traced outline set for a few minutes before filling the center gives you an extra measure of control on days when the icing feels lively.
Can I bake these cookies without chilling the dough?
You can, but the results will not match what this recipe promises. Without chilling, the dough is softer to roll, sticks more readily, and must be handled with extra flour, and the cut hearts are far more likely to spread and blur in the oven. The chill is not a decorative step — it firms the butter, hydrates the flour, and relaxes the dough so it rolls cleanly and holds its shape. If time is very short, even 30 minutes for the disks and 10 minutes for the cut tray is far better than none, though the full times give the neatest hearts and the softest, most even bake.

Hi, I’m Emma! I’m the cook and recipe developer behind Sizzle & Sage. From my sunny home kitchen, I share easy, flavor-packed recipes for real life — quick breakfasts, cozy weeknight dinners, and simple bakes anyone can make. Pull up a chair and stay a while!