Red Velvet Cheesecake Bars with Creamy Cheesecake Swirl
Some desserts look like a special occasion and eat like a cozy afternoon treat, and these bars are exactly that kind of happy middle ground. Red Velvet Cheesecake Bars start with a fudgy red velvet brownie base — deep red, gently chocolatey, with the soft chew you want from a good brownie — and finish with a creamy cheesecake layer swirled right over the top. You bake it all in one pan, chill it until it is firm and sliceable, and then cut it into neat bars where every piece shows that pretty red-and-white marble.
The swirl is more than decoration. The tangy, vanilla-scented cheesecake softens the sweetness of the brownie base, and the brownie gives the cheesecake something sturdy and chocolatey to sit on. Together they taste like classic red velvet cake and its cream cheese frosting, reimagined in bar form: no layers to stack, no frosting to pipe, and no individual servings to fuss over. A knife dragged lightly through the two batters before baking does all the visual work for you.
There is a little patience involved, and it is mostly hands-off. The batter and cheesecake filling come together in about 25 minutes with bowls, a whisk, and a spatula. The pan bakes in under an hour at 325 degrees F (165 degrees C), cools on the counter, and then needs a good chill — at least 4 hours, and overnight is even better — so the cheesecake sets into clean, sharp slices. That make-ahead nature is part of the charm. Bake them the evening before a gathering, a holiday cookie tray, or a Valentine's Day dinner, and the next day all that is left to do is lift the slab out by its parchment handles, warm your knife, and cut.
Why You'll Love This Recipe
- Two desserts in one bar. A chewy red velvet brownie on the bottom and a smooth, tangy cheesecake on top give you the best parts of both bakes in a single bite, with no separate crust to make.
- One pan, no water bath. Everything bakes together in a 9-inch square pan at a gentle temperature, so there is no springform pan to wrap, no water bath to manage, and no fussy cheesecake routine.
- That marbled swirl, made simply. Dollops of reserved red batter dragged through the cheesecake with a knife create a bakery-style pattern in about a minute — no piping bags or special tools needed.
- Classic red velvet flavor. A gentle measure of cocoa, real vanilla, red gel coloring for the deep red crumb, and a small splash of vinegar for the traditional tang that makes red velvet taste like red velvet.
- Made for making ahead. The bars actually improve with an overnight chill: the cheesecake firms, the brownie turns fudgier, the flavors settle together, and the slices cut beautifully clean.
- Easy to share and portion. One pan makes 16 bars that travel well, stack neatly on a plate, and suit everything from lunchbox treats to a dressed-up dessert spread.
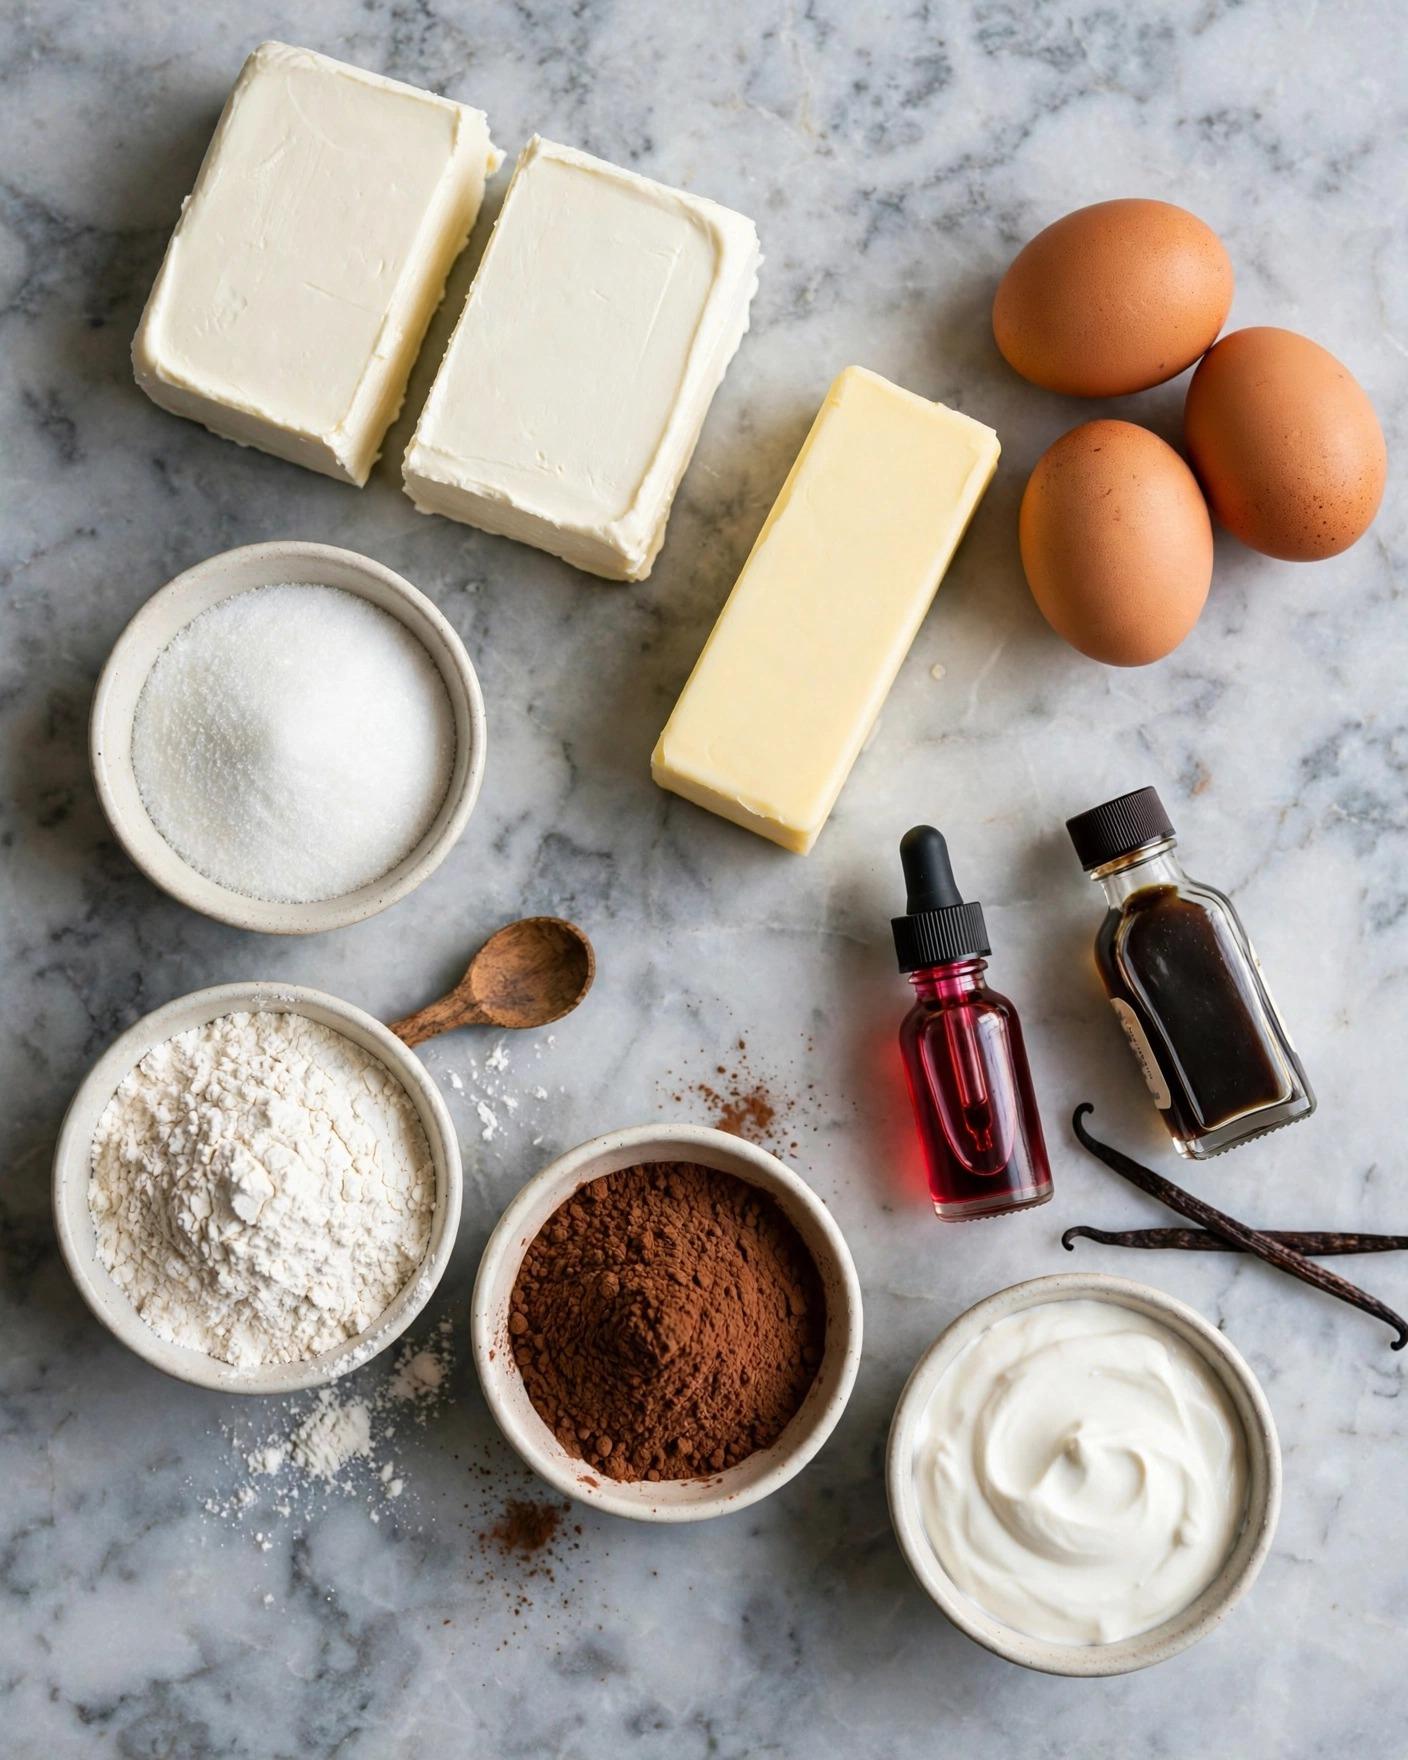
Ingredients
For the red velvet brownie base
- 1/2 cup (113 g) unsalted butter, melted and slightly cooled, plus more for the pan if needed
- 1 cup (200 g) granulated sugar
- 1/4 cup (50 g) light brown sugar, packed
- 2 large eggs, at room temperature
- 2 teaspoons vanilla extract
- 1 1/2 teaspoons red gel food coloring (see Tips for liquid coloring)
- 1 teaspoon white vinegar or apple cider vinegar
- 3/4 cup (94 g) all-purpose flour, spooned and leveled
- 1/4 cup (20 g) unsweetened cocoa powder
- 1/2 teaspoon fine sea salt
- 1/4 teaspoon baking powder
For the cheesecake swirl
- 16 ounces (454 g) full-fat cream cheese (two 8-ounce blocks), softened to room temperature
- 1/2 cup (100 g) granulated sugar
- 1 large egg, at room temperature
- 1 large egg yolk, at room temperature
- 2 tablespoons (30 g) sour cream, at room temperature
- 1 teaspoon vanilla extract
- 1 tablespoon (8 g) all-purpose flour
- Pinch of fine sea salt
Why these ingredients matter
Cream cheese. This is the heart of the top layer, so use full-fat block cream cheese, not the whipped kind in a tub and not a low-fat version. Blocks set into a smooth, sliceable cheesecake; tubs contain extra air and stabilizers that bake up soft and spongy. It must be truly softened — cold cream cheese beats into stubborn lumps that no amount of whisking will smooth out, and those lumps stay visible in the finished swirl.
Unsalted butter. Butter is melted for the brownie base, which is what gives brownies their dense, fudgy chew rather than a cakey rise. It carries the cocoa flavor and keeps the crumb tender under the cheesecake. Unsalted butter lets you control the salt yourself, which matters when the same pan holds both a sweet base and a tangy filling.
Granulated and brown sugar. The base uses both on purpose. Granulated sugar sweetens and helps the brownie set with a fine, slightly glossy surface, while a smaller amount of brown sugar adds moisture and a faint caramel depth that rounds out the cocoa. In the cheesecake, granulated sugar alone keeps the color clean and the sweetness bright against the tang.
Eggs and an extra yolk. Two eggs bind the brownie batter and give it structure without making it fluffy. In the cheesecake, one egg plus one yolk is a deliberate balance: the yolk adds richness and helps the filling set silky and firm, while skipping a second white keeps the cheesecake from turning rubbery or puffing too much in the oven. Room-temperature eggs blend smoothly into both batters and are less likely to curdle the cheesecake.
Cocoa powder. Red velvet is a light-handed cocoa dessert, and the quarter cup here is enough to taste clearly chocolate without overpowering the red or turning the bars into plain chocolate brownies. Use regular unsweetened cocoa for the brightest red; Dutch-processed cocoa also works and gives a slightly darker, deeper-toned crumb.
Red gel food coloring. Gel coloring is concentrated, so a teaspoon and a half delivers a deep, confident red without adding liquid a brownie batter cannot spare. The color will look vivid before baking and settle a shade deeper in the oven, toward classic burgundy-red. Liquid coloring can be used with adjustments (see Tips), but expect a softer red.
White vinegar. A teaspoon is the quiet signature of red velvet. You will not taste vinegar in the finished bars; what you will notice is a gentle tang that keeps the sweetness from tasting flat, echoing the tang in the cheesecake above it. It is a small ingredient doing traditional work in both flavor and character.
Vanilla extract. Vanilla appears in both layers for a reason. In the brownie it rounds out the cocoa, and in the cheesecake it gives the filling a warm, bakery-style scent that makes simple ingredients taste complete. Using it twice ties the two layers together so the bar tastes like one dessert, not two stacked by accident.
All-purpose flour. Three quarters of a cup in the base is a light frame — enough for the brownie to hold a clean slice under a creamy topping, not so much that it turns cakey. A single tablespoon in the cheesecake is insurance: it helps the filling set firmly for neat cutting and makes small cracks far less likely, without making the texture heavy.
Sour cream. Two tablespoons loosen the cream cheese just enough to swirl and pour smoothly, and they add a soft tang that keeps the cheesecake tasting fresh rather than simply sweet. Full-fat sour cream blends best; bring it to room temperature with the cream cheese so the filling stays lump-free.
Fine sea salt. Salt shows up in both layers because both need it. In the brownie it sharpens the cocoa, and in the cheesecake it balances the sugar and lifts the tang. A pinch sounds negligible until you taste a cheesecake made without it — the difference is a filling that tastes finished versus one that tastes merely sweet.
Baking powder. Just a quarter teaspoon gives the dense brownie base the slightest lift so it stays fudgy but not heavy or gummy under the cheesecake. It is a whisper of leavening, not enough to make the base rise like cake, and that restraint is exactly right for bars.
Instructions
- Prepare the pan and oven. Place a rack in the center of the oven and preheat to 325 degrees F (165 degrees C). Lightly grease a 9-inch (23 cm) square metal baking pan, then line it with parchment paper, leaving an overhang of about 2 inches (5 cm) on two opposite sides to act as handles. Smooth the parchment into the corners as well as you can. Those handles are how the chilled slab will come out in one piece, so do not skip the lining even if your pan is nonstick.
- Whisk the butter and sugars for the base. In a large bowl, whisk the melted butter, granulated sugar, and brown sugar together for about 30 seconds, until the mixture looks glossy and the sugars are evenly moistened. It will still look a little grainy, and that is fine. Let the mixture sit for 2 minutes if your butter was very warm — the batter should be warm at most when the eggs go in, never hot.
- Add the eggs, vanilla, coloring, and vinegar. Whisk in the eggs one at a time until each is fully incorporated, then whisk in the vanilla, red gel food coloring, and vinegar until the batter is an even, striking red with no streaks. Whisk for a final 20 to 30 seconds until the batter looks slightly thickened and shiny. This brief whisking helps dissolve the sugar a little and gives the baked base its delicate, papery top under the cheesecake.
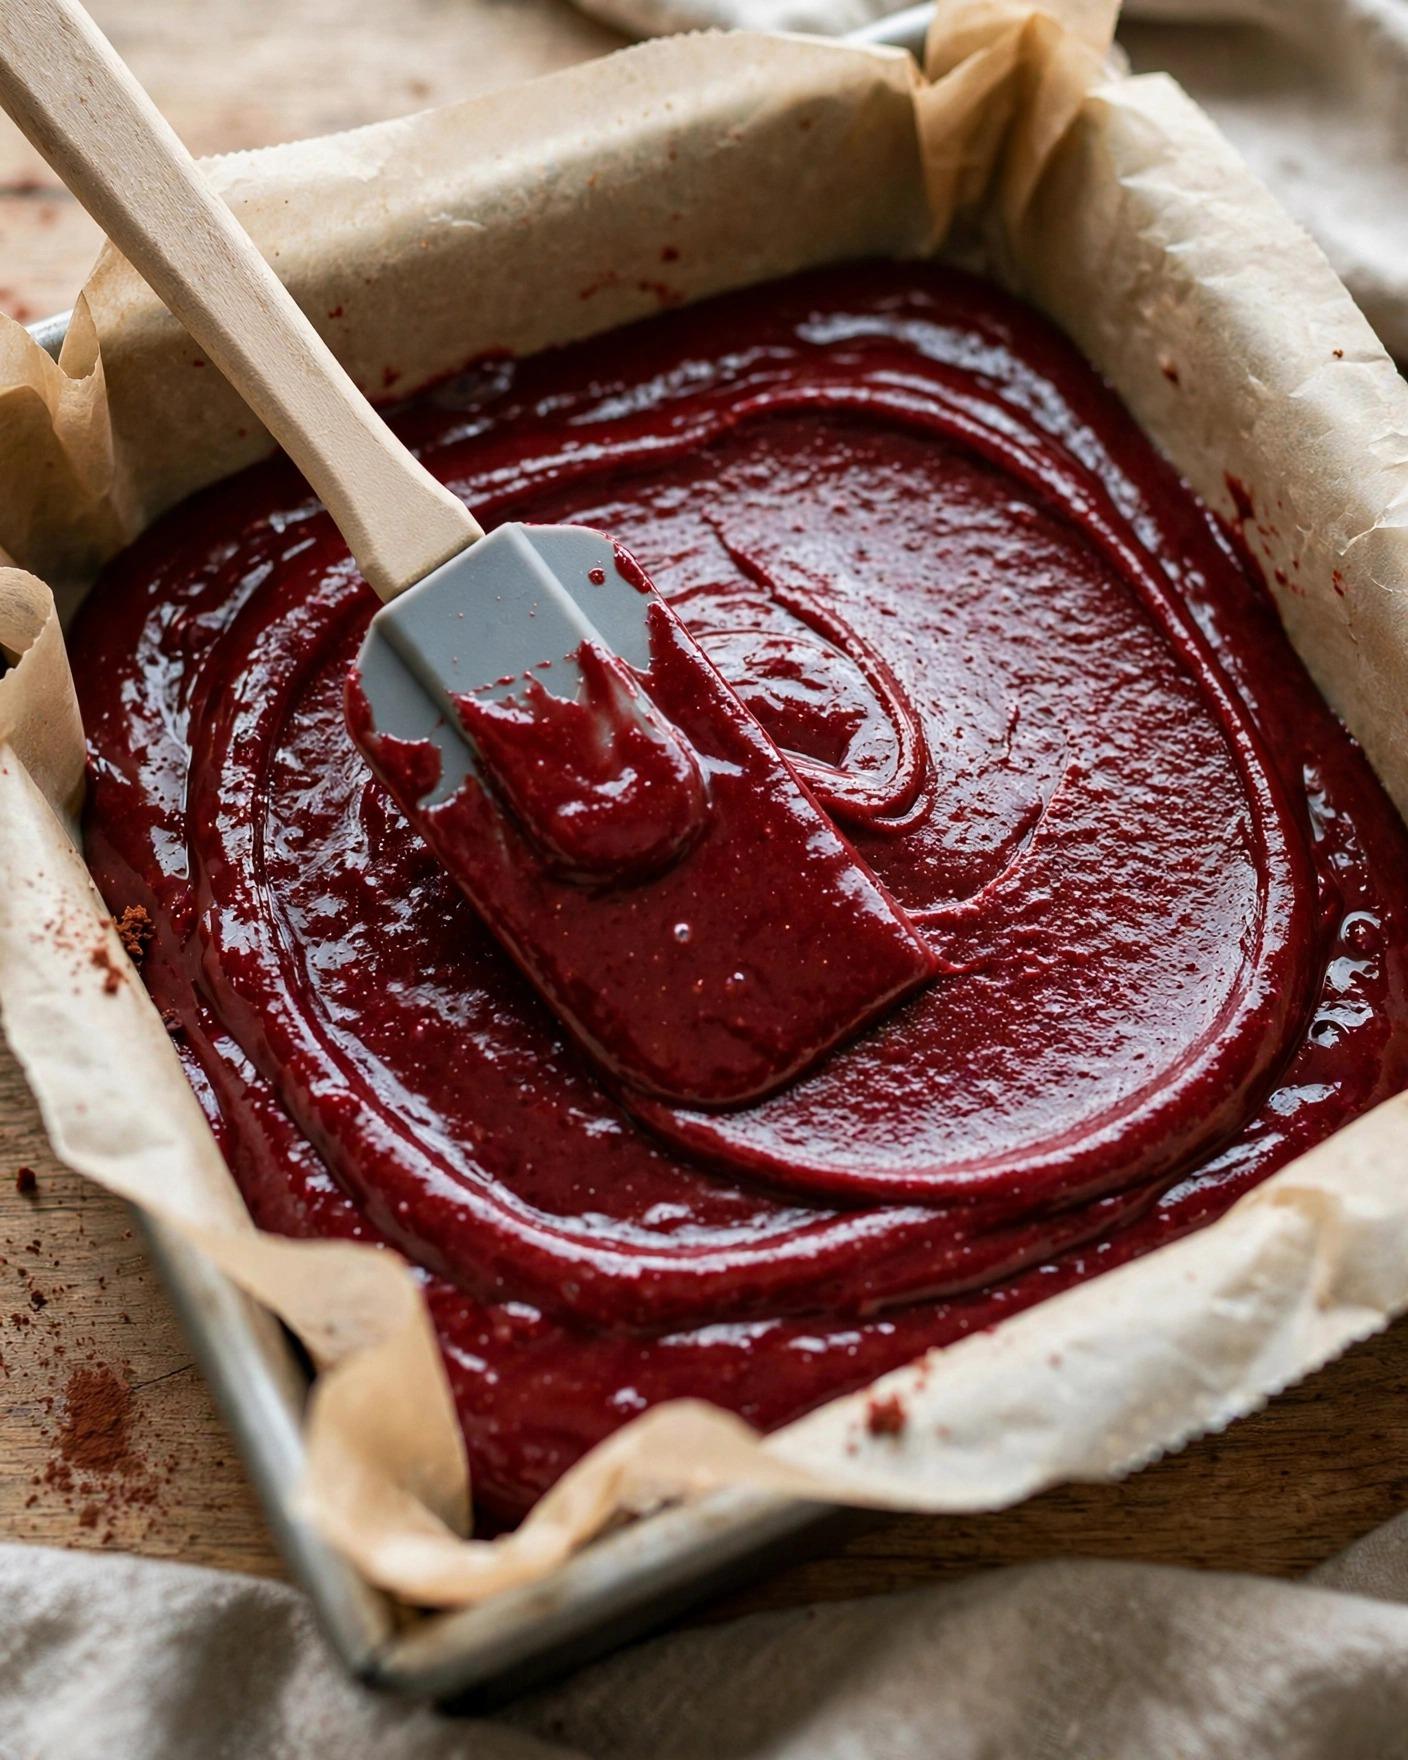
- Fold in the dry ingredients. Sprinkle the flour, cocoa powder, salt, and baking powder over the batter. Fold with a spatula just until no dry streaks remain and the color is uniform, scraping the bottom and sides of the bowl. Stop as soon as the batter comes together — overmixing develops the flour and pushes a fudgy brownie toward cake. The finished batter should be thick, glossy, and slow to fall from the spatula.
- Reserve some batter and spread the base. Measure out about 1/3 cup of the red batter and set it aside in a small bowl; this is what will make the swirl on top, so do not forget it before the base goes into the pan. Scrape the remaining batter into the prepared pan and spread it into an even layer with an offset spatula or the back of a spoon, pushing it gently into the corners. An even base means even bars, so take an extra few seconds here.
- Beat the cream cheese and sugar. In a separate large bowl, beat the softened cream cheese with a hand mixer on medium speed — or by hand with a sturdy whisk and patience — for 1 to 2 minutes, until completely smooth and fluffy with no lumps. Add the granulated sugar and the pinch of salt and beat for another 30 seconds, scraping down the bowl once. Smoothness at this stage is everything: once the eggs go in, you will mix as little as possible, so any lump present now will stay.
- Finish the cheesecake filling. Add the egg, egg yolk, sour cream, vanilla, and flour to the cream cheese mixture. Mix on low speed, or stir gently with the whisk, just until everything is combined and the filling looks smooth and pourable, about 20 to 30 seconds. Scrape the bowl well, including the bottom. Avoid whipping in air from here on — extra air is what makes cheesecake puff, crack, and sink, and a dense, creamy filling is the goal.
- Pour and swirl. Pour the cheesecake filling over the brownie base in the pan and spread it gently into an even layer, keeping it off the very edges if you can. Drop the reserved red batter by small spoonfuls over the top — about 10 to 12 little dollops scattered across the surface. Drag a butter knife or a skewer slowly through the dollops in a loose figure-eight or S pattern, once across and once back, turning red streaks through the white. Stop while the pattern still looks bold. Every extra pass muddies the marble toward pink, and two passes are almost always enough.
- Bake until just set. Bake at 325 degrees F (165 degrees C) for 40 to 45 minutes. The bars are done when the edges look set and very slightly puffed, the cheesecake surface looks mostly matte, and the center 2 inches (5 cm) still jiggle gently — like set gelatin — when you nudge the pan. A toothpick inserted near the edge should come out with a few moist crumbs from the brownie layer. If the whole surface ripples like liquid, give the pan 3 to 5 more minutes and check again. The top may show the faintest golden tint at the edges; that is fine, but pull the pan before the cheesecake colors more than that.

- Cool slowly, then chill thoroughly. Set the pan on a wire rack and let the bars cool at room temperature for 1 hour. The cheesecake will settle and firm as it cools, and a slow cool helps prevent cracks. Then cover the pan loosely and refrigerate for at least 4 hours, and preferably overnight. This chill is not optional waiting time — it is what sets the cheesecake into a clean-slicing layer and turns the brownie base properly fudgy.
- Lift out and slice cleanly. Run a thin knife around any edges where the bars meet the pan, then lift the whole chilled slab out using the parchment handles and set it on a cutting board. For the cleanest cuts, dip a large sharp knife in hot water and wipe it dry between every slice. Cut the slab into 16 bars — four cuts in each direction — or into 12 larger bars if you prefer. The first slice reveals the layers: red brownie below, creamy swirled cheesecake above.

- Serve chilled or at cool room temperature. Serve the bars straight from the refrigerator for the firmest, fudgiest bite, or let slices sit at room temperature for 15 to 20 minutes for a softer, creamier cheesecake texture. Arrange them swirl-side up so the marble shows. They need nothing on top, though a small dollop of lightly sweetened whipped cream is a pleasant, simple addition for a plated dessert.
Tips for Success
- Start with genuinely soft cream cheese. Leave the blocks on the counter for about an hour before you begin. Pressed with a finger, the cream cheese should give easily. If you are short on time, unwrap the blocks, cut them into cubes, and spread the cubes on a plate — they soften in about 20 minutes. Do not melt cream cheese in the microwave; melted spots re-firm into grainy flecks in the filling.
- Judge doneness by the jiggle, not the clock alone. Cheesecake continues to set as it cools and chills, so a center that looks slightly underdone in the oven becomes perfectly creamy later. A center baked until completely firm in the oven will chill into something dry and dense. Set edges plus a gentle central jiggle is the target every time.
- Swirl less than you think you need. Two slow passes with a knife give bold red ribbons. A third or fourth pass blends the colors into a uniform pink and loses the contrast that makes these bars so striking. If a dollop lands awkwardly, leave it — the pattern is supposed to look handmade.
- Use gel coloring for the deepest red. Liquid food coloring takes roughly 1 to 2 tablespoons to approach the same shade and adds liquid the brownie base was not built for, which can soften its chew. If liquid is all you have, use about 1 tablespoon, accept a gentler red, and know the flavor will be exactly the same.
- Keep the knife hot and clean for slicing. Warm water, a quick wipe, one cut, repeat. It sounds fussy, but it is the entire difference between smeared layers and the sharp red-and-white edges that make these bars look bakery-made. Chill the slab fully first; warm or under-chilled bars will not cut cleanly no matter how good the knife routine is.
- Choose a metal pan if you can. Metal heats evenly and sets the brownie edges nicely. A glass or ceramic pan holds heat longer and can overbake the edges while the center catches up — if that is what you have, start checking 5 minutes early and rely on the jiggle test.
Variations
- Oreo-crust bottom. For a cookies-and-cream twist, press a simple crust of finely crushed chocolate sandwich cookies and melted butter into the pan under a half batch of the red batter — or skip the swirl dollops and scatter a handful of coarsely crushed cookies over the cheesecake before swirling lightly. The dark cookie pieces look striking against the red and white.
- White chocolate drizzle. Melt 2 ounces (57 g) white chocolate with 1 teaspoon neutral oil until pourable, let it cool slightly, and drizzle thin lines over the chilled, sliced bars. It adds a sweet, creamy finish and echoes the cheesecake layer. Drizzle after slicing so the lines stay neat and the knife does not drag chocolate through the cuts.
- Raspberry red velvet bars. Dot the cheesecake with a few spoonfuls of seedless raspberry jam alongside the reserved red batter and swirl both through together. The jam deepens the red tones and adds a bright, fruity tang that sits naturally beside the vinegar and cream cheese. Keep the jam to about 3 tablespoons so the filling still sets firmly.
- Mini cheesecake bites. Divide the base and filling among a parchment-lined muffin tin — about 12 cups — reducing the bake to 22 to 26 minutes at the same temperature, until the centers still jiggle slightly. Chill and unmold the same way. These are tidy two-bite servings for parties, and they freeze especially well.
- Gluten-free bars. Replace the flour in the base with the same amount (94 g) of a measure-for-measure gluten-free flour blend, and use a gluten-free blend or a teaspoon of cornstarch in place of the tablespoon of flour in the cheesecake. The base is flour-light and the filling is nearly flourless, so the swap changes the texture very little; keep times and the jiggle test the same.
Storage
These bars are built for the refrigerator. Store them in a single layer, or stacked with parchment between layers, in an airtight container and refrigerate for up to 5 days. The cheesecake layer must stay chilled for both texture and food safety, so do not leave the container on the counter for more than about 2 hours at a gathering — set the plate over a tray of ice if they will sit out, or put out a few bars at a time and keep the rest cold. The flavor holds beautifully across those days, and many home bakers find the bars at their fudgiest on day two.
For longer storage, the bars freeze well for up to 2 months. Freeze the sliced bars on a parchment-lined sheet until firm, about 1 hour, then wrap them individually or transfer them to a freezer container with parchment between layers. Thaw overnight in the refrigerator, still wrapped, so condensation forms on the wrapping rather than on the swirl. The cheesecake may soften very slightly after freezing, but the taste and the marbled look survive the trip remarkably well, which makes a spare batch in the freezer a genuinely useful thing to have.
FAQ
Why did my cheesecake layer crack or sink in the middle? The most common causes are air and heat. Beating the filling vigorously after the eggs go in whips in air, which puffs the cheesecake in the oven and lets it fall and crack as it cools — mix gently and only until combined from that point on. Baking too long has a similar effect, so pull the pan while the center still jiggles. Starting with cold ingredients can also stress the filling; room-temperature cream cheese, egg, and sour cream blend into a batter that bakes evenly. Small cracks, if they appear, are purely cosmetic here — the swirl disguises most of them, and the bars taste exactly the same.
Can I make red velvet cheesecake bars ahead of time? Yes, and they are better for it. The bars need at least 4 hours of chilling to set, and an overnight chill gives the firmest filling, the fudgiest base, and the cleanest slices, so baking the day before you plan to serve them is the ideal schedule rather than a compromise. Keep the slab uncut and covered in the refrigerator, then lift, slice, and plate shortly before serving. Sliced bars keep for up to 5 days refrigerated and freeze for up to 2 months, so a batch made on the weekend can cover treats all week and a stash for later besides.
How do I know the bars are done if the brownie and cheesecake set at different rates? Trust the cheesecake's jiggle and let the brownie take care of itself. At 325 degrees F (165 degrees C) for 40 to 45 minutes, the edges of the pan should look set and just slightly puffed while the center 2 inches (5 cm) still move gently as one piece when you nudge the pan — like set gelatin, not like liquid. The brownie base, being thin and baked from below, will be fully cooked by the time the cheesecake reaches that point; a toothpick near the edge should show moist crumbs, not raw batter. Remember that both layers firm considerably during the hour of cooling and the long chill, so err on the side of slightly underdone in the oven.
Can I use liquid food coloring or leave the coloring out entirely? Both work, with expectations adjusted. Liquid coloring is much weaker than gel, so use about 1 tablespoon and accept a softer, lighter red — adding more than that risks thinning the brownie batter and dulling its chew. With no coloring at all, the bars bake up as a handsome reddish-brown chocolate cheesecake bar: the cocoa and vinegar give a faint rust tone, but not true red velvet red, and the swirl will read as chocolate against cream rather than red against white. The flavor in both cases is unchanged, because the color never carried the flavor in the first place. Beet powder can give a muted natural tint, though it leans pink-brown rather than classic red.

Recipe Card
Red Velvet Cheesecake Bars
- Prep Time: 25 minutes (PT25M)
- Cook Time: 45 minutes (PT45M)
- Total Time: 5 hours 40 minutes (PT5H40M)
- Servings: 16 servings (16 bars)
- Calories: 320 kcal per serving (estimated)
Red velvet brownie bars baked in a 9-inch pan at 325 degrees F (165 degrees C) under a creamy vanilla cheesecake layer, swirled with reserved red batter, then chilled until firm and cut into clean, marbled bars.
Nutrition (estimated): 320 kcal per serving (estimated), 32 g carbohydrates, 5 g protein, 19 g fat, 1 g fiber, 25 g sugar, 180 mg sodium. Nutrition is estimated and will vary with the coloring used, the exact cream cheese and sour cream, and any variations or substitutions.
Why did my cheesecake layer crack or sink in the middle?
The most common causes are air and heat. Beating the filling vigorously after the eggs go in whips in air, which puffs the cheesecake in the oven and lets it fall and crack as it cools — mix gently and only until combined from that point on. Baking too long has a similar effect, so pull the pan while the center still jiggles. Starting with cold ingredients can also stress the filling; room-temperature cream cheese, egg, and sour cream blend into a batter that bakes evenly. Small cracks, if they appear, are purely cosmetic here — the swirl disguises most of them, and the bars taste exactly the same.
Can I make red velvet cheesecake bars ahead of time?
Yes, and they are better for it. The bars need at least 4 hours of chilling to set, and an overnight chill gives the firmest filling, the fudgiest base, and the cleanest slices, so baking the day before you plan to serve them is the ideal schedule rather than a compromise. Keep the slab uncut and covered in the refrigerator, then lift, slice, and plate shortly before serving. Sliced bars keep for up to 5 days refrigerated and freeze for up to 2 months, so a batch made on the weekend can cover treats all week and a stash for later besides.
How do I know the bars are done if the brownie and cheesecake set at different rates?
Trust the cheesecake’s jiggle and let the brownie take care of itself. At 325 degrees F (165 degrees C) for 40 to 45 minutes, the edges of the pan should look set and just slightly puffed while the center 2 inches (5 cm) still move gently as one piece when you nudge the pan — like set gelatin, not like liquid. The brownie base, being thin and baked from below, will be fully cooked by the time the cheesecake reaches that point; a toothpick near the edge should show moist crumbs, not raw batter. Remember that both layers firm considerably during the hour of cooling and the long chill, so err on the side of slightly underdone in the oven.
Can I use liquid food coloring or leave the coloring out entirely?
Both work, with expectations adjusted. Liquid coloring is much weaker than gel, so use about 1 tablespoon and accept a softer, lighter red — adding more than that risks thinning the brownie batter and dulling its chew. With no coloring at all, the bars bake up as a handsome reddish-brown chocolate cheesecake bar: the cocoa and vinegar give a faint rust tone, but not true red velvet red, and the swirl will read as chocolate against cream rather than red against white. The flavor in both cases is unchanged, because the color never carried the flavor in the first place. Beet powder can give a muted natural tint, though it leans pink-brown rather than classic red.

Hi, I’m Emma! I’m the cook and recipe developer behind Sizzle & Sage. From my sunny home kitchen, I share easy, flavor-packed recipes for real life — quick breakfasts, cozy weeknight dinners, and simple bakes anyone can make. Pull up a chair and stay a while!