Chocolate-Covered Strawberry Brownies
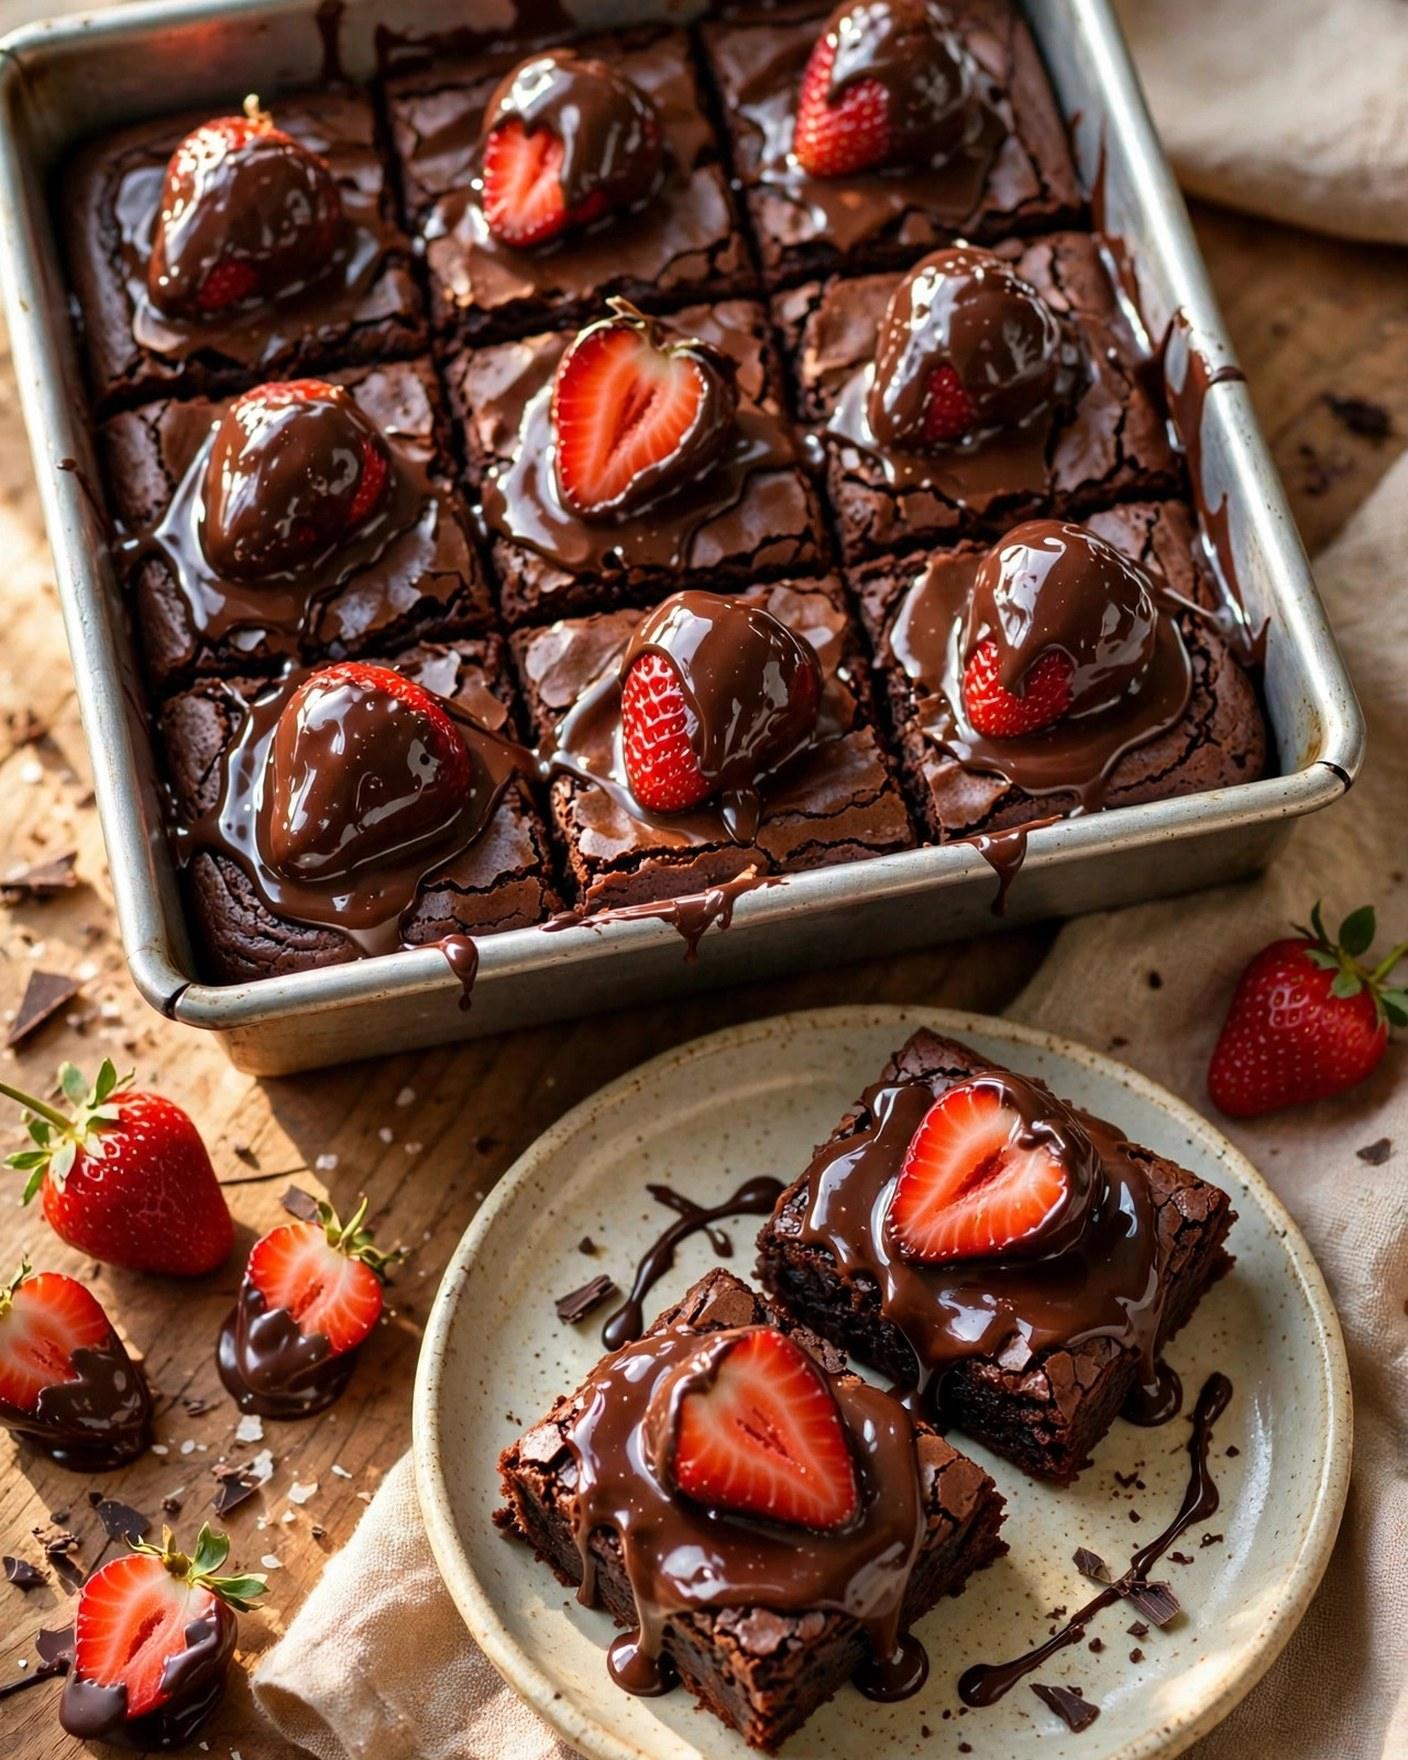
A chocolate-covered strawberry is already a small celebration: bright, juicy fruit wrapped in chocolate. These chocolate-covered strawberry brownies take that same idea and give it a soft, fudgy foundation. Underneath the berries is a dense, deeply chocolate brownie with crackly edges and a tender center. On top sits a neat layer of fresh strawberry halves, and over everything pours a glossy chocolate ganache that settles around the fruit, holds it in place, and turns each square into something that looks bakery-made while staying very doable at home.
The order of the layers matters. The brownies bake first, on their own, so they set with that fudgy texture. They cool before anything fresh goes on top, because warm brownies would wilt the berries and thin the ganache. Once cool, the strawberries go on cut-side down in tidy rows, and warm ganache is spooned gently over and around them, so the berries stay in place and shine through in places.
This is a dessert that fits more occasions than it might first seem. It is an obvious choice for Valentine’s Day and date nights, but it is just as welcome at a spring gathering, a birthday table, or a quiet weekend when good strawberries show up at the market. The pan cuts into nine generous squares, and the contrast in every bite — fudgy underneath, fresh and bright in the middle, smooth and glossy on top — is what keeps people going back for a second square.
There is no special equipment here. One bowl for the batter, one small bowl for the ganache, an 8-inch (20 cm) square pan, and a little patience while the layers cool and set. Melt chocolate gently, do not overbake the brownies, dry the strawberries well, and give the finished pan a short chill so the ganache firms enough to slice cleanly.
Why You’ll Love This Recipe
- Two favorites in one pan. All the flavor of chocolate-covered strawberries — fresh fruit and glossy chocolate — layered over fudgy brownies, so every square delivers fruit, ganache, and brownie together instead of asking you to choose.
- Truly fudgy brownie base. Melted butter and real chocolate, two kinds of sugar, and just enough flour for structure give a dense, moist crumb with set edges and a soft center that holds up under the topping.
- Fresh strawberry flavor, not jammy sweetness. Using fresh berries on top keeps the strawberry layer bright and juicy, a real contrast to the rich chocolate instead of another sweet layer competing with it.
- A ganache that does the decorating for you. Warm ganache spread over the berries settles into a smooth, shiny finish with no piping or special tools.
- Make-ahead friendly in stages. The brownie base can bake a day ahead, and the finished brownies keep well in the refrigerator, so the dessert can be ready and waiting when you want to serve it.
- Simple, familiar ingredients. Butter, chocolate, eggs, sugar, flour, cocoa, cream, and fresh strawberries — nothing hard to find, and the method is all mixing by hand in a couple of bowls.

Ingredients
For the fudgy brownies
- 1/2 cup (113 g) unsalted butter, plus more for the pan if needed
- 4 ounces (115 g) semisweet chocolate (about 60 percent), finely chopped
- 3/4 cup (150 g) granulated sugar
- 1/4 cup (50 g) packed light brown sugar
- 2 large eggs, at room temperature
- 1 teaspoon vanilla extract
- 2/3 cup (84 g) all-purpose flour, spooned and leveled
- 1/4 cup (21 g) unsweetened cocoa powder
- 1/4 teaspoon fine sea salt
For the strawberry and ganache topping
- 1 1/2 cups (about 225 g) fresh strawberries, hulled and halved lengthwise (about 12 to 14 medium berries)
- 4 ounces (115 g) semisweet chocolate (about 60 percent), finely chopped
- 1/2 cup (120 ml) heavy cream
- 1 tablespoon (14 g) unsalted butter
- Pinch of fine sea salt
- 1/2 teaspoon vanilla extract
Why these ingredients matter
Semisweet chocolate. Chocolate is the backbone of both the brownie and the ganache. Around 60 percent cacao tastes deep and chocolatey against the sweet brownie and bright berries without turning bitter. In the brownie it melts with the butter for that dense, fudgy texture, and in the ganache it sets into a smooth, sliceable gloss. Chop bar chocolate fine so it melts evenly; chips hold their shape by design and can melt unevenly.
Unsalted butter. Butter gives the brownie its richness and tender, moist crumb, and helps the top form that thin, delicate sheen. A tablespoon in the ganache adds gloss and a softer set, so the topping slices cleanly instead of cracking. Unsalted butter keeps the salt level in your control. Melt it gently with the chocolate and let the mixture cool slightly before the eggs go in, so nothing scrambles.
Granulated sugar and brown sugar. The two sugars work as a team. Granulated sugar sweetens cleanly and helps the edges set, while brown sugar brings moisture and a faint caramel depth that keeps the crumb fudgy a day later. Whisking both thoroughly with the eggs helps dissolve them and encourages that fine, papery top. Reducing the sugar would change the texture as well as the sweetness, so keep the amounts as written.
Eggs. Two whole eggs give the brownies structure and body, since there is no leavening beyond what the eggs provide. They bind the chocolate and butter into a batter that bakes up dense rather than cakey. Room-temperature eggs blend more smoothly into warm chocolate and are less likely to seize it. If your eggs are cold, a short soak in warm tap water brings them around while you prepare the pan.
Vanilla extract. Vanilla appears in both the brownie and the ganache because it quietly rounds out chocolate wherever it goes. It will not make the dessert taste like vanilla; it makes the chocolate taste more complete and bakery-like. That small half teaspoon in the ganache ties the topping’s flavor back to the base underneath it.
All-purpose flour. Two-thirds of a cup is deliberately modest. Flour is the frame, not the main event: enough to let the brownies set and slice, not so much that they turn cakey. Too much flour is a common reason a fudgy brownie disappoints, so spoon and level instead of scooping from the bag. Fold it in just until streaks disappear, since overmixing develops gluten and toughens the crumb.
Cocoa powder. A quarter cup of unsweetened cocoa deepens the chocolate flavor and darkens the crumb beyond what melted chocolate alone gives. It also balances the sweetness of the two sugars. Regular unsweetened cocoa is reliable; Dutch-processed also works for a slightly smoother, darker result. Sift it with the flour if lumpy, because cocoa lumps do not break down in a thick batter.
Fine sea salt. Salt shows up in the brownie and as a pinch in the ganache, and in both places its job is the same: sharpen the chocolate and balance sweetness. Chocolate without salt tastes flat, especially next to fresh fruit. Fine sea salt dissolves evenly in a batter with little liquid. Do not skip the pinch in the ganache — it is the difference between a topping that tastes sweet and one that tastes like chocolate.
Fresh strawberries. The berries are not a garnish; they are a full layer, and their freshness is the point. Choose berries that are ripe, red through, and fragrant, but still firm — soft berries leak juice and make the topping watery. Halving them lengthwise gives each piece a flat cut side that sits steady on the brownie and a rounded top that shows through the ganache. Dry them very well after washing, because surface water is the enemy of neat ganache and clean slices.
Heavy cream. Cream turns chopped chocolate into ganache: heated and poured over the chocolate, it melts it into a sauce that is pourable while warm and firms into a smooth, glossy layer as it cools. The ratio here — a half cup of cream to four ounces of chocolate — spreads easily and sets soft enough to bite through cleanly. Milk cannot do this job; it makes a thin sauce that never sets. Heat the cream only until steaming.
Instructions
- Prepare the pan and oven. Place a rack in the center of the oven and preheat to 350 degrees F (175 degrees C). Line an 8-inch (20 cm) square baking pan with parchment paper, leaving an overhang on two sides to use as handles, and lightly butter any exposed surface. The parchment matters here: lifting the whole topped slab out cleanly is far neater than cutting every square inside the pan.
- Melt the butter and chocolate. Combine the butter and chopped chocolate for the brownies in a medium heatproof bowl set over a saucepan of barely simmering water, making sure the bowl does not touch the water. Stir occasionally until melted, smooth, and glossy, then let it cool for about 5 minutes, until warm rather than hot. A microwave also works: heat in 20-second bursts, stirring between each. Gentle heat protects the chocolate from scorching.
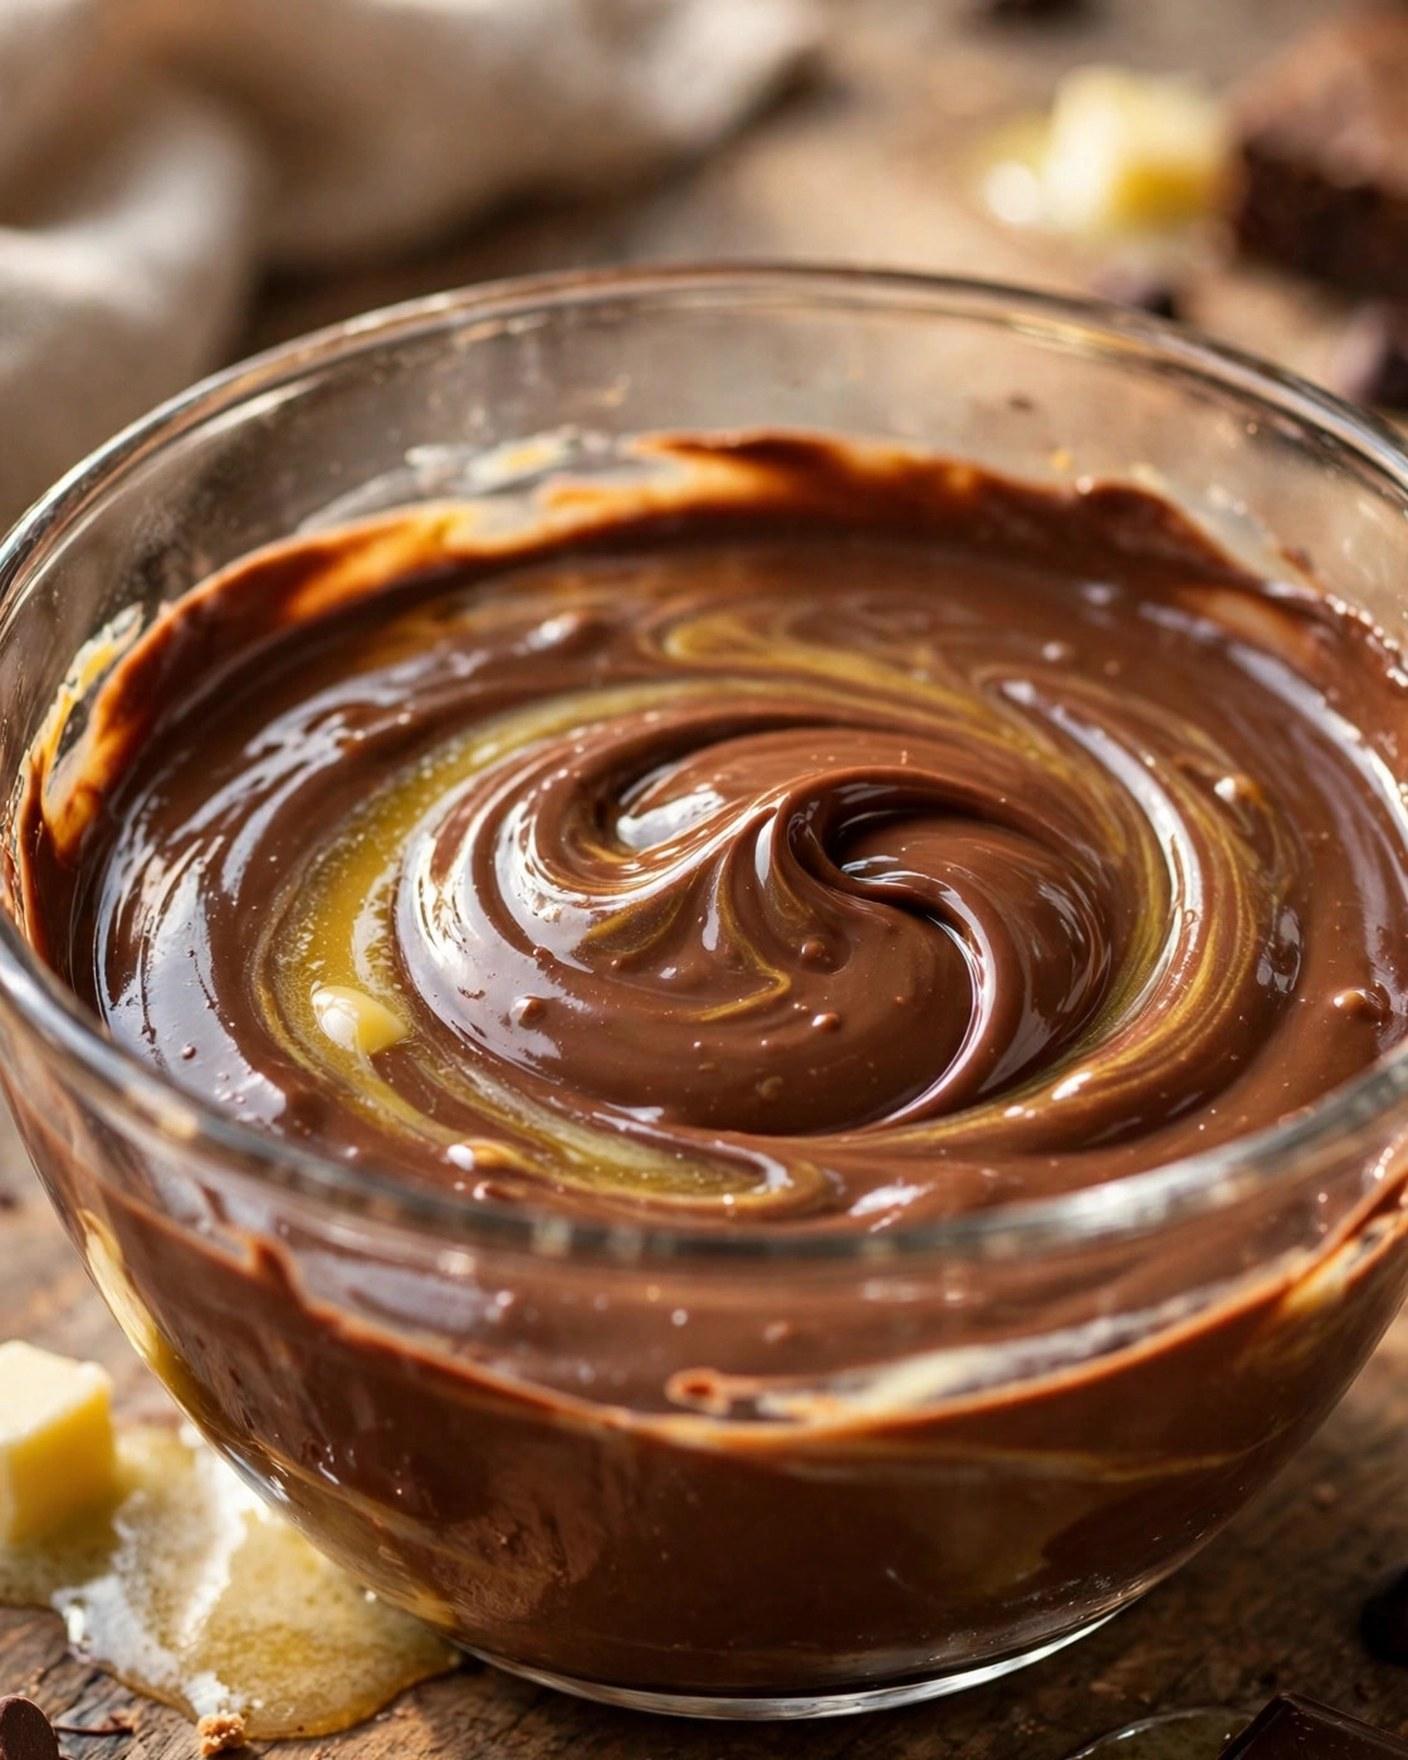
- Whisk in the sugars, eggs, and vanilla. Whisk both sugars into the warm chocolate mixture until combined and slightly glossy. Add the eggs one at a time, whisking well after each, then whisk in the vanilla. Take about a full minute: the mixture should look smooth, thick, and shiny. This whisking builds the batter’s body and encourages the thin, crackly top. If the chocolate was too hot, the eggs can scramble, which is why the cooling rest matters.
- Fold in the dry ingredients. Sprinkle the flour, cocoa powder, and fine sea salt evenly over the batter — sift them together first if the cocoa is lumpy — and fold with a spatula just until no dry streaks remain. Stop the moment the batter comes together into a thick, glossy, uniform mixture. Overmixing at this stage develops the flour’s gluten and pushes the texture from fudgy toward tough and cakey. The finished batter will be noticeably thick, closer to a soft fudge than a cake batter, and it should fall from the spatula in heavy ribbons.
- Spread the batter and bake. Scrape the batter into the prepared pan and spread it evenly into the corners. Bake at 350 degrees F (175 degrees C) for 24 to 28 minutes. The brownies are done when the edges look set, the center looks matte rather than wet, and a toothpick in the center comes out with a few fudgy crumbs — not clean, and not coated in raw batter. Slight underbaking is safer here; a dry base cannot be rescued by the topping.
- Cool the brownies completely. Set the pan on a wire rack and let the brownies cool for at least 45 minutes, until they reach room temperature. This wait is part of the recipe, not a suggestion. Warm brownies would soften the strawberries and melt the ganache into a thin puddle that slides off the fruit. If you baked the base a day ahead, this step is already done.
- Prepare and arrange the strawberries. While the brownies cool, wash the strawberries, pat them completely dry with paper towels or a clean kitchen towel, hull them, and halve them lengthwise. Lay the halves cut-side down over the cooled brownie in tidy rows, fitting them close together in a single layer and trimming any very large halves so the layer sits fairly level. Press each berry very lightly so it settles onto the surface. Take your time drying them: any water left on the fruit will bead under the ganache, dull its shine, and weep into the brownie as the finished dessert sits.
- Make the ganache. Place the chopped chocolate for the topping in a small heatproof bowl. Heat the heavy cream in a small saucepan over medium heat until steaming with small bubbles at the edges, about 2 to 3 minutes — do not let it boil. Pour the hot cream over the chocolate, let it sit undisturbed for 1 minute, then stir slowly from the center outward until smooth and glossy. Stir in the butter, salt, and vanilla. Let the ganache stand for 3 to 5 minutes, until it thickens to the consistency of warm honey; too-hot ganache runs off the berries.
- Top the brownies with ganache. Spoon the warm ganache over and around the strawberries rather than pouring it in one stream, then spread it gently with the back of the spoon so it fills the gaps and coats the berries in a thin, glossy layer. Let some red fruit peek through — aim for coated and shiny, with the shapes still visible. Work quickly and with a light hand, since dragging the spatula can shift the berries.

- Chill until the ganache is set. Refrigerate the topped pan, uncovered, for 30 to 45 minutes, until the ganache looks set, feels firm but not hard, and has kept its shine. This short chill makes clean slicing possible: at room temperature the ganache is still soft enough to drag and smear. If the pan does get thoroughly chilled, let it sit at room temperature for 10 minutes before cutting, so cold ganache does not crack.
- Slice with a warm, clean knife. Use the parchment handles to lift the slab onto a cutting board. Dip a long, sharp knife in hot water, wipe it dry, and cut into 9 squares — two cuts each way — wiping and re-warming the blade between cuts. The blade glides through the ganache instead of dragging it, each square keeps its berries in place, and the cut sides show the three layers clearly.

- Serve. Serve at cool room temperature for the best balance — the brownie fudgy, the berries fresh, the ganache soft and glossy rather than fridge-hard. If the squares have been refrigerated longer, let them stand for 15 to 20 minutes before serving so the brownie softens and the strawberry flavor comes forward. A dollop of whipped cream on the side is welcome but optional.
Tips for Success
- Do not overbake the brownie base. Fudgy brownies finish in the pan as they cool, so pull them when the center toothpick still carries moist, fudgy crumbs. Even 3 or 4 extra minutes will dry the edges and make the base cakey, and no amount of glossy ganache on top can give that texture back. If your oven runs hot, start checking at 22 minutes and judge by the crumbs and the matte center, not by the clock alone.
- Dry the strawberries like it matters — because it does. Water beads under ganache, dulls the shine, and seeps into the brownie as the dessert sits. Pat every half dry and let them sit cut-side down on a paper towel while the ganache is made. Dry fruit, glossy ganache, clean slices: the three go together.
- Choose firm, ripe berries and even sizes. Soft, overripe strawberries leak juice and collapse under the warm ganache, while underripe ones stay pale, tart, and hard against the soft brownie. Look for berries that are red all the way to the top, fragrant, and firm to a gentle squeeze. Halves of similar size make a level layer that the ganache coats evenly, and they make every square look like it belongs to the same pan.
- Let the ganache cool for a few minutes before topping. Ganache straight off the heat is thin and will run off the berries, pool at the edges of the pan, and cook the surface of the fresh fruit just enough to dull it. Three to five minutes of standing thickens it to a slow, honey-like pour that clings where you put it. If it ever gets too thick to spread, a few seconds of gentle warmth or a teaspoon of warm cream brings it back.
- Slice with heat, patience, and a clean blade. Ganache sticks to a cold, coated blade and tears, and berry halves get dragged out of place. Re-warm and wipe between every cut. Chill the pan as directed, slice, then let the cut squares stand at room temperature before serving, so you get clean edges and a soft bite.
- Keep the layers in their order and their temperatures. Cool brownie, dry fresh berries, warm — not hot — ganache, then a chill. Every step protects the next one. The base must be cool so the fruit stays fresh, and the ganache must be warm so it spreads, then cold so it sets. Rushing a layer temperature is where most versions go sideways.
Variations
- Dark chocolate and sea salt. Build the ganache with dark chocolate at about 70 percent instead of semisweet, and finish each square with the tiniest pinch of flaky sea salt after the ganache sets. The topping tastes deeper and less sweet, which suits anyone who finds the classic version rich, and the salt makes both the chocolate and the strawberry flavor stand out more sharply.
- White chocolate drizzle finish. Melt 2 ounces (57 g) white chocolate with 1 teaspoon neutral oil or cream, let it cool slightly, and drizzle it in thin lines over the set ganache before slicing. The pale drizzle against the dark glossy top and red berries makes the pan especially striking for a celebration table, and the small amount adds sweetness without covering the fruit.
- Raspberry version. Swap the strawberries for fresh raspberries, using about 1 1/2 cups (about 180 g), set whole in close rows cut-side — their natural hollow side — down. Raspberries are more delicate and more tart than strawberries, so handle them even more gently, dry them without pressing, and expect a brighter, sharper fruit layer that chocolate lovers tend to adore. Slice a little more carefully, as the berries are softer.
- Nutty brownie base. Fold 1/2 cup (60 g) finely chopped toasted walnuts or pecans into the brownie batter with the dry ingredients, or scatter them over the batter before baking. The nuts add crunch inside an otherwise soft, layered dessert and sit comfortably under the berries and ganache. Chop them fine rather than coarse so the finished squares still slice neatly through the base.
- Gluten-free brownies. Replace the all-purpose flour with the same amount (84 g) of a measure-for-measure gluten-free flour blend and keep everything else, including the bake time and doneness cues, the same. The base is flour-light and chocolate-heavy, so the swap is barely noticeable in the finished texture. Check that your chocolate and other packaged ingredients are certified gluten-free if that matters for the people you are serving.
Storage
These brownies keep best in the refrigerator, because of the fresh fruit on top. Once the ganache has set and the brownies are sliced — or even unsliced, if you prefer — cover the pan or transfer the squares to an airtight container, with parchment between layers if you stack them, and refrigerate for up to 3 days. The brownie stays fudgy, the ganache stays glossy, and the strawberries hold up well for the first couple of days before they begin to soften and release more juice, which is why day three is a sensible limit rather than a challenge to push further.
For the best texture, take refrigerated squares out 15 to 20 minutes before eating. That rest softens the ganache back to glossy and lets the strawberry flavor come forward; eaten stone-cold, the base tastes firmer and the fruit muted.
Freezing needs care. The brownie base alone freezes beautifully — wrap the cooled, untopped slab tightly and freeze for up to 2 months, then thaw overnight in the refrigerator and add fresh berries and ganache the day you serve. Finished brownies can be frozen for up to 1 month, but the strawberries will soften and weep as they thaw. If presentation matters, freeze the base and finish fresh.
FAQ
Can I use frozen strawberries for the topping? Fresh strawberries are strongly recommended for the topping layer. Frozen berries release a lot of juice as they thaw, and that liquid thins the ganache, makes the berry layer watery, and seeps into the brownie, so the finished squares look wet and slice messily. Thawed berries are also much softer, and they collapse instead of holding their pretty halved shape under the chocolate. If frozen berries are all you have, save them for another use — a sauce, a smoothie, or baking into something — and buy fresh for this recipe. The fresh layer is the defining feature of the dessert, and it is worth doing with fruit that can hold its own.
How do I keep the ganache shiny and smooth instead of dull or grainy? Heat the cream only until it is steaming with small bubbles at the edges, never to a rolling boil, and pour it over finely chopped chocolate so it melts evenly. Let the bowl sit for a full minute before stirring, then stir slowly from the center outward; vigorous whisking beats in air and can dull the finish. Stir the butter in at the end for extra gloss. Dull ganache usually comes from overheated chocolate or water getting into the bowl, and grainy ganache usually comes from chocolate that was scorched or stirred before it had melted through. Gentle heat, a dry bowl, and patience fix nearly every case.
Can I make chocolate-covered strawberry brownies ahead of time? Yes, and they are well suited to it, as long as you assemble them in the right order. The brownie base can be baked, cooled, covered, and kept at room temperature for up to 1 day, or refrigerated for up to 2 days, before topping. The ganache can be made a day ahead, refrigerated, and gently rewarmed until pourable. Add the fresh strawberries and the ganache the day you plan to serve — ideally within about 6 hours — so the berries stay bright and firm and the top looks freshly made. Fully assembled brownies keep for up to 3 days in the refrigerator, but they look and taste their best on the first day.
What size pan should I use if I do not have an 8-inch square pan? An 8-inch (20 cm) square pan gives the thickness this recipe is written for. A 9-inch (23 cm) square pan also works, but the brownie layer will be thinner, so start checking for doneness about 4 minutes early and expect a slightly lower fruit-and-ganache-to-brownie profile in each bite. A 9-inch (23 cm) round pan holds a similar volume and works as well, with wedges instead of squares. Avoid a much larger pan such as a 9-by-13-inch pan for a single batch — the base spreads too thin and bakes dry before it can stay fudgy. For that size, double the recipe and watch the bake time closely.

Recipe Card
Chocolate-Covered Strawberry Brownies
- Prep Time: 25 minutes (PT25M)
- Cook Time: 28 minutes (PT28M)
- Total Time: 1 hour 25 minutes (PT1H25M)
- Servings: 9 servings (9 squares)
- Calories: 420 kcal per serving (estimated)
Fudgy chocolate brownies baked in an 8-inch pan, cooled, topped with halved fresh strawberries, and finished with a glossy semisweet chocolate ganache. Chilled briefly so the topping sets, then sliced into clean squares.
Nutrition (estimated): 420 kcal per serving (estimated), 54 g carbohydrates, 5 g protein, 22 g fat, 4 g fiber, 38 g sugar, 95 mg sodium. Nutrition is estimated and will vary with the chocolate used, the size and ripeness of the strawberries, and any variations or substitutions.
Can I use frozen strawberries for the topping?
Fresh strawberries are strongly recommended for the topping layer. Frozen berries release a lot of juice as they thaw, and that liquid thins the ganache, makes the berry layer watery, and seeps into the brownie, so the finished squares look wet and slice messily. Thawed berries are also much softer, and they collapse instead of holding their pretty halved shape under the chocolate. If frozen berries are all you have, save them for another use — a sauce, a smoothie, or baking into something — and buy fresh for this recipe. The fresh layer is the defining feature of the dessert, and it is worth doing with fruit that can hold its own.
How do I keep the ganache shiny and smooth instead of dull or grainy?
Heat the cream only until it is steaming with small bubbles at the edges, never to a rolling boil, and pour it over finely chopped chocolate so it melts evenly. Let the bowl sit for a full minute before stirring, then stir slowly from the center outward; vigorous whisking beats in air and can dull the finish. Stir the butter in at the end for extra gloss. Dull ganache usually comes from overheated chocolate or water getting into the bowl, and grainy ganache usually comes from chocolate that was scorched or stirred before it had melted through. Gentle heat, a dry bowl, and patience fix nearly every case.
Can I make chocolate-covered strawberry brownies ahead of time?
Yes, and they are well suited to it, as long as you assemble them in the right order. The brownie base can be baked, cooled, covered, and kept at room temperature for up to 1 day, or refrigerated for up to 2 days, before topping. The ganache can be made a day ahead, refrigerated, and gently rewarmed until pourable. Add the fresh strawberries and the ganache the day you plan to serve — ideally within about 6 hours — so the berries stay bright and firm and the top looks freshly made. Fully assembled brownies keep for up to 3 days in the refrigerator, but they look and taste their best on the first day.
What size pan should I use if I do not have an 8-inch square pan?
An 8-inch (20 cm) square pan gives the thickness this recipe is written for. A 9-inch (23 cm) square pan also works, but the brownie layer will be thinner, so start checking for doneness about 4 minutes early and expect a slightly lower fruit-and-ganache-to-brownie profile in each bite. A 9-inch (23 cm) round pan holds a similar volume and works as well, with wedges instead of squares. Avoid a much larger pan such as a 9-by-13-inch pan for a single batch — the base spreads too thin and bakes dry before it can stay fudgy. For that size, double the recipe and watch the bake time closely.
Hi, I’m Emma! I’m the cook and recipe developer behind Sizzle & Sage. From my sunny home kitchen, I share easy, flavor-packed recipes for real life — quick breakfasts, cozy weeknight dinners, and simple bakes anyone can make. Pull up a chair and stay a while!