3-Ingredient Nutella Brownies
There are days when only a warm, chocolatey brownie will do, and there are also days when a long ingredient list is the last thing anyone wants to deal with. These 3-Ingredient Nutella Brownies were made for exactly that overlap. One jar of chocolate-hazelnut spread, two eggs, and a small measure of flour come together into a batter that bakes up dense, fudgy, and deeply chocolatey, with those shiny, delicate crackly tops that make a brownie look like it came from a really good bakery case. No cocoa powder to measure, no butter to melt, no mixer to pull out and wash afterward — just a bowl, a whisk, and a square pan.
The secret is that the spread itself does so much of the work. A good chocolate-hazelnut spread already brings together the chocolate, the sugar, and the fat that a traditional brownie recipe measures out separately, plus that unmistakable toasted hazelnut flavor woven all through it. The eggs bind everything and help the batter set into that tender, almost truffle-like middle, and the flour — just enough of it — gives the brownies their structure so they slice cleanly instead of slumping. It is a short list, but every item on it is pulling real weight, and nothing about the finished pan tastes like a shortcut.
This is also a genuinely small, manageable bake. Everything goes into one 8×8-inch (20 cm) pan and comes out as nine generous brownies, which is a lovely size for a family dessert, a small gathering, or a weekend treat that does not leave a mountain of leftovers sitting on the counter all week. From the moment you set the oven to preheat to the moment the pan comes out, you are looking at about 35 minutes, and most of that is hands-off baking time. The hardest part, honestly, is the wait at the end: these brownies need at least 30 minutes to cool and settle before slicing, because that resting time is what turns a soft, fragile center into neat, fudgy squares.
Serve them just as they are, still faintly warm, and they need nothing else at all. Dress them up with a scoop of vanilla ice cream or a handful of fresh berries when company is coming, pack them into lunchboxes, or wrap a few to share with a neighbor — they travel well and keep well, and they taste just as good on day two as they do on day one. If you have ever wished brownies could be as easy as they are satisfying, this little three-ingredient pan is about to become a regular in your kitchen.
Why You'll Love This Recipe
- Only three ingredients, all easy to find. Chocolate-hazelnut spread, eggs, and flour — that is the whole shopping list, and there is a good chance all three are already in your kitchen right now. No specialty items, no extra trip to the store, and no half-used bags of cocoa or chocolate chips left behind afterward.
- Fudgy centers with crackly tops. The high proportion of spread to flour keeps the middle dense, moist, and almost truffle-like, while the eggs help form that thin, shiny, crackled crust on top that brownie lovers look for. Every square gives you both textures in a single bite.
- One bowl and no mixer. Everything stirs together by hand in a single mixing bowl, which means very little washing up and no equipment to haul out. It is an ideal recipe for small kitchens, dorm-adjacent baking, or any evening when you want dessert without a sink full of dishes.
- Ready in about 35 minutes. Ten minutes of simple prep and 22 to 25 minutes in the oven, and the brownies are done. Even counting the cooling time, this is a dessert that fits comfortably into a weeknight, a last-minute invitation, or a sudden chocolate craving.
- A friendly size for real life. Nine brownies from an 8×8-inch (20 cm) pan is enough to share without being overwhelming. The batch is easy to enjoy over a couple of days, easy to freeze, and easy to make again whenever the mood strikes — no giant tray tempting you all week long.
- Easy to customize once you know the base. The plain brownie is wonderful on its own, but the batter also welcomes swirls, toppings, and mix-ins when you want to play. A few simple variations, covered below, turn this one little recipe into a whole handful of different desserts.

Ingredients
For the brownies
- 1 1/4 cups (370 g) Nutella chocolate-hazelnut spread
- 2 large eggs, at room temperature
- 1/2 cup (65 g) all-purpose flour
Why these ingredients matter
Nutella chocolate-hazelnut spread. This is the engine of the whole recipe, and it is doing the job of several ingredients at once. In a conventional brownie, you would measure out chocolate or cocoa for flavor, sugar for sweetness, and butter or oil for richness and moisture — the spread supplies all three in a single, smooth, ready-to-stir form, along with its signature roasted hazelnut depth that plain chocolate brownies simply do not have. Because the spread is so rich and dense, the finished brownies bake up fudgy rather than cakey, with a concentrated chocolate flavor in every bite. Use the full 1 1/4 cups (370 g) and scrape the jar and the measuring cup well; the batter needs that richness to set properly. If the spread has been sitting in a cool pantry and feels very stiff, a few seconds of stirring, or letting the jar stand in warm water for a few minutes, makes it much easier to whisk smoothly into the eggs. Other chocolate-hazelnut spreads can work in the same amount, though the flavor and sweetness will shift slightly with the brand, and spreads that are noticeably runnier or oilier may give a softer set, so the classic, thick style of spread is the most reliable choice here.
Large eggs, at room temperature. Eggs are the structure and the lift in a recipe with no baking powder or baking soda, so their role is bigger than their size suggests. Beaten well, they emulsify with the fatty spread into a glossy, unified batter instead of a streaky one, and as the pan bakes, the egg proteins set and hold the brownies together so they slice into clean squares rather than crumbling or slumping. Eggs also contribute to that prized crackly top: a thoroughly whisked egg-and-spread mixture bakes into a thin, shiny crust that shatters delicately over the soft center. Room-temperature eggs matter because cold eggs straight from the refrigerator can stiffen the spread on contact and make the batter thick, lumpy, and harder to mix evenly. If you forgot to set the eggs out ahead, place them, still in their shells, in a bowl of warm — not hot — water for about 10 minutes, and they will be ready to use. Use large eggs as written; smaller eggs give noticeably less structure, and extra-large eggs can make the brownies a touch puffier and less dense.
All-purpose flour. Flour is the quiet balancer in this recipe, and the small amount is very deliberate. A half cup (65 g) is just enough to absorb moisture, give the batter body, and let the brownies set into sliceable squares with tender edges, while staying well short of the amount that would push them toward cake. Add much more and the centers lose their fudginess; use much less and the pan may never quite set in the middle. Measure it the gentle way: spoon the flour lightly into the measuring cup and level it off with a knife, rather than scooping directly from the bag, which packs the flour down and can sneak in an extra tablespoon or more — in a recipe with only a half cup total, that small difference genuinely changes the texture. Stir the flour in just until no dry streaks remain, because overmixing after the flour goes in develops gluten and can make the brownies tough and bready instead of tender and dense. Plain all-purpose flour is the right choice here; self-rising flour is not recommended, since its added leavening works against the dense, fudgy result this recipe is built for.
Instructions
- Preheat the oven and prepare the pan. Set the oven to 350°F (175°C) and let it come fully to temperature while you mix the batter, because a properly heated oven helps the brownies bake evenly and develop their crackly tops. Line an 8×8-inch (20 cm) square baking pan with parchment paper, leaving a little overhang on two opposite sides so the paper forms a sling. That sling is your insurance policy later: once the brownies have cooled, you can lift the whole slab straight out of the pan and slice it neatly on a cutting board. If you do not have parchment, grease the pan well, but parchment is strongly recommended for a batter this rich and sticky.
- Whisk the eggs until light and frothy. Crack the 2 large room-temperature eggs into a medium mixing bowl and whisk them vigorously for about 1 full minute, until they look paler, slightly thickened, and frothy on the surface. This step is worth the small effort. Well-beaten eggs blend far more smoothly with the thick spread, help the batter bake up with that shiny, crackled crust, and give the finished brownies a more even, tender crumb. A fork can do the job in a pinch, but a whisk makes it noticeably easier to get the eggs properly airy.
- Add the spread and whisk until glossy. Spoon the 1 1/4 cups (370 g) of chocolate-hazelnut spread into the bowl with the eggs. Whisk slowly at first, because the spread is thick and the eggs are loose, then more briskly as the two come together, until the mixture is completely smooth, glossy, and a uniform deep chocolate color with no pale streaks or lumps of spread remaining. Take a moment to scrape down the sides and bottom of the bowl with a spatula and whisk once more — pockets of unmixed spread like to hide along the edges, and catching them now means every brownie bakes up the same.
- Fold in the flour gently. Sprinkle the 1/2 cup (65 g) of all-purpose flour evenly over the surface of the batter. Using a spatula, fold the flour in with broad, gentle strokes, turning the bowl as you go, just until the last dry streaks disappear and the batter looks thick, smooth, and evenly chocolatey throughout. Stop as soon as the flour is incorporated. Overmixing at this stage develops the flour's gluten and works air out of the eggs, and both of those things push the texture away from dense and fudgy and toward tough and cakey — the opposite of what this recipe promises.

- Spread the batter in the pan. Scrape all of the batter into the parchment-lined pan, then use the spatula or the back of a spoon to nudge it into an even layer that reaches into every corner. The batter will be thick and will not level itself out in the oven the way a thinner cake batter does, so take a few extra seconds here to make the surface as even as you can. An even layer means even baking: no overly dark, crisp edges on one side and an underdone patch on the other.
- Bake until the edges are set and the center barely jiggles. Bake at 350°F (175°C) for 22 to 25 minutes. The brownies are done when the edges look set and slightly puffed, the top is shiny and crackled and looks dry across the surface, and the very center still has the faintest jiggle when you gently nudge the pan. A toothpick inserted near the center should come out with moist, fudgy crumbs clinging to it — that is exactly right. A completely clean toothpick means the brownies have gone a little too far and will be firmer and more cake-like once cooled, so start checking at 22 minutes, especially if your oven runs warm.

- Cool in the pan for at least 30 minutes. Set the pan on a wire rack and leave the brownies alone for at least 30 minutes. This rest is not optional decoration; the center finishes setting as it cools, the fudgy texture firms up into something sliceable, and the flavors settle and deepen. Brownies cut while still hot and fragile will smear, tear, and slump, no matter how good they taste. If you have the patience for a full hour, the squares will be even neater, but 30 minutes is the honest minimum for clean slices.
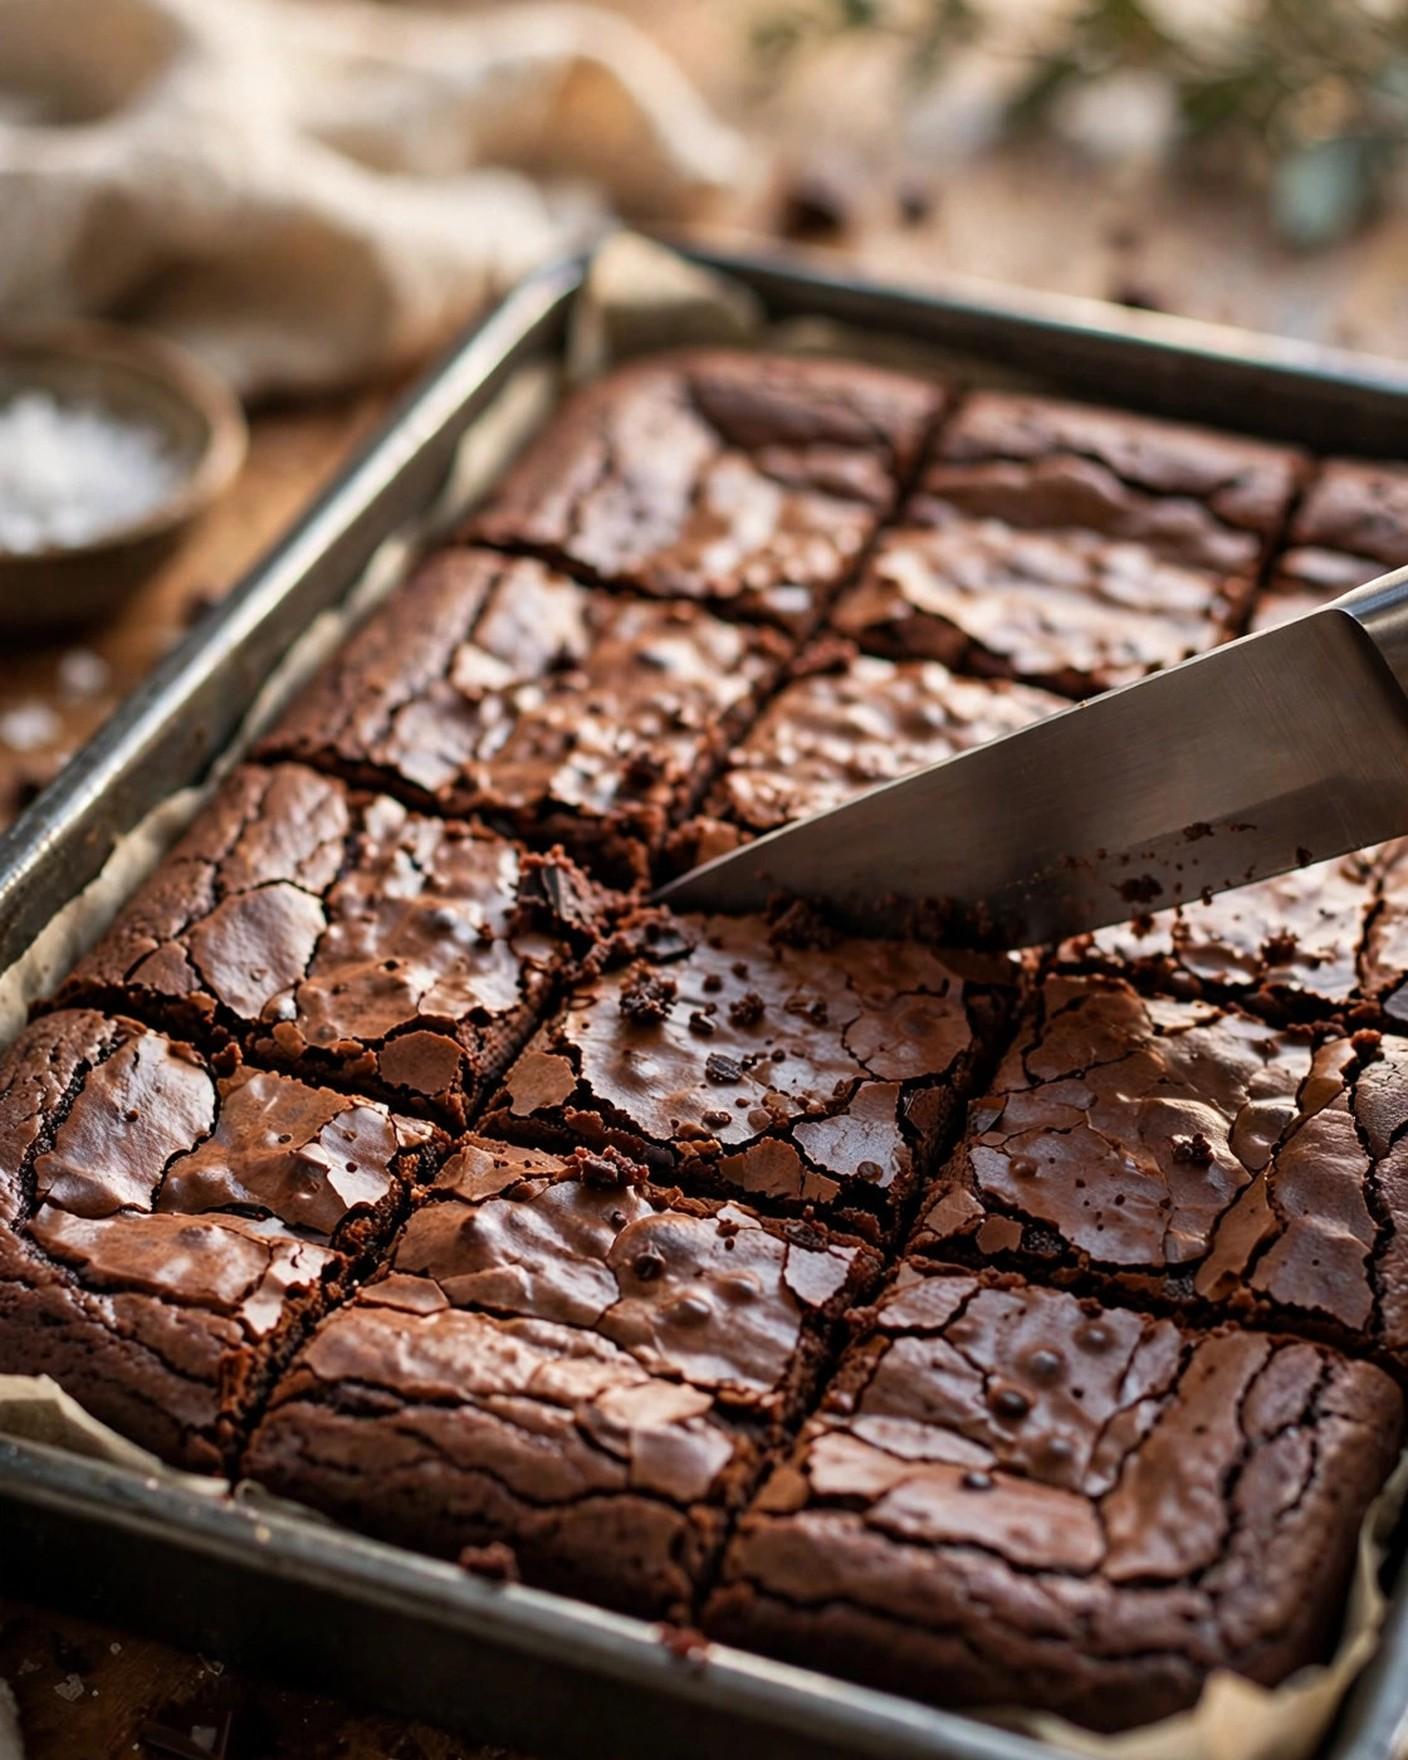
- Lift out and slice into 9 brownies. Run a thin knife around any edges where the brownies meet the pan, then use the parchment overhang to lift the whole slab out onto a cutting board. Slice with a large, sharp knife into 9 squares — two cuts in each direction. For the cleanest edges, wipe the blade clean with a warm, damp cloth between cuts, because fudgy crumbs love to drag. Serve the brownies slightly warm or at room temperature, exactly as they are, or with one of the simple serving ideas in the Variations below.
Tips for Success
- Weigh or measure the spread generously and accurately. The spread is the chocolate, sugar, and fat of this recipe all at once, so skimping on it throws off the whole balance. If you have a kitchen scale, 370 g is the most reliable measure. If you are using cups, lightly oil the measuring cup first — the spread will slide out cleanly instead of leaving a thick layer behind in the cup, which quietly shortchanges the batter.
- Bring the eggs to room temperature. Cold eggs stiffen chocolate-hazelnut spread on contact and make the batter stubborn and streaky. Warm eggs whisk in smoothly and help the top bake up shiny and crackled. Ten minutes in a bowl of warm water is all it takes if the eggs are coming straight from the refrigerator.
- Whisk the eggs well before the spread goes in. That minute of whisking at the start is the closest thing this recipe has to a secret step. Frothy, pale eggs emulsify better, distribute more evenly through the batter, and are a big part of why the tops crackle instead of baking up dull and flat. Do not skip it or rush it.
- Measure the flour lightly. Spoon flour into the cup and level it off instead of scooping from the bag. Scooping packs the flour and can add a tablespoon or more, and in a recipe built on just 1/2 cup (65 g), that extra flour is the difference between fudgy and cakey. When in doubt, the scale weight — 65 g — settles the question.
- Fold, do not stir, once the flour is in. Gentle folding keeps the texture dense and tender. Vigorous stirring or whisking after the flour is added develops gluten and can turn a fudgy brownie bready. Mix only until you cannot see dry flour anymore, then stop, even if the batter looks like it could use one more stir — it does not.
- Watch the jiggle, not just the clock. Ovens vary enough that 22 minutes in one kitchen is 25 in another. Learn the visual cues: set, puffed edges, a dry-looking shiny top, moist crumbs on the toothpick, and just the slightest wobble in the very center. Pulling the pan at that moment is what keeps the middle fudgy after cooling.
- Respect the cooling time. Slicing too early is the most common way this simple recipe disappoints. The brownies continue to set as they cool, and a full 30 minutes — longer if you can manage it — rewards you with clean squares and a center that is dense and moist rather than runny or smeared.
Variations
- A pinch of sea salt on top. If you keep fine sea salt in the pantry, a small pinch sprinkled over the batter just before baking, or over the warm brownies as they come out of the oven, sharpens the chocolate flavor and balances the sweetness beautifully. It is an optional pantry extra, not a fourth ingredient in the batter itself — the recipe stays a true three-ingredient bake, with the salt acting purely as a finishing touch for anyone who loves that sweet-salty contrast. Flaky salt, if you have it, adds a delicate crunch as well.
- Peanut butter or extra spread swirl. Warm 2 to 3 tablespoons of peanut butter, or a little extra chocolate-hazelnut spread, until it is loose and pourable, then dollop it over the batter in the pan and drag a knife through it a few times to make a simple marbled swirl. Bake exactly as written. The peanut butter version tastes like a candy-bar brownie, while the extra spread swirl deepens the hazelnut flavor and keeps the tops looking bakery-pretty with almost no effort.
- Chopped hazelnuts or walnuts on top. Scatter about 1/4 cup (30 g) of roughly chopped toasted hazelnuts or walnuts over the batter before baking for crunch against all that fudginess. Hazelnuts echo the flavor already in the spread and feel especially at home here, while walnuts bring a slightly bittersweet, classic brownie character. Keep the nuts on top rather than stirred through if you want them to stay crisp and visible.
- Espresso-kissed brownies. Stir 1 teaspoon of instant espresso powder into the batter along with the flour. The coffee does not make the brownies taste like coffee; instead, it quietly intensifies the chocolate, the way a good pinch of salt does, and gives the flavor a deeper, darker edge. This is a lovely variation for serving to adults after dinner, especially alongside an actual cup of coffee.
- Brownie sundaes and warm dessert plates. Serve a brownie slightly warm — 10 to 15 seconds in the microwave is plenty — with a scoop of vanilla or coffee ice cream, a spoonful of whipped cream, or a handful of fresh raspberries or sliced strawberries. The contrast of warm, fudgy brownie and cold, creamy topping turns this humble three-ingredient bake into a dinner-party dessert, and a drizzle of warm spread thinned with a splash of milk makes a quick sauce to finish the plate.
- Mini brownies and gifting squares. For bite-size treats, divide the batter among the cups of a well-greased or lined mini muffin pan and bake at the same temperature for about 12 to 15 minutes, until the tops look set and crackled — check early, since small brownies bake fast. Alternatively, bake the pan as written, cool it completely, and wrap individual squares in parchment and twine for bake-sale trays, lunchboxes, and neighborly drop-offs; the fudgy texture holds up beautifully to traveling.
Storage
These brownies keep remarkably well for such a simple bake, which makes them a practical make-ahead dessert as well as an impulse one. Once the slab has cooled completely and been sliced, arrange the squares in an airtight container, with a small sheet of parchment between layers if you stack them, so the crackly tops do not stick to the brownie above. Stored at room temperature, away from direct sunlight and the heat of the stove, they stay moist and fudgy for up to 3 days. In fact, many bakers find the texture on the second day especially good: the crumb settles, the chocolate-hazelnut flavor deepens, and the centers stay dense and tender rather than drying out — as long as the container is genuinely airtight, because exposed edges are where brownies lose their moisture first.
For longer storage, refrigerate the container for up to 1 week. Cold brownies turn quite firm and almost fudge-like straight from the refrigerator, which some people love exactly as they are; if you prefer the softer, just-baked texture, let a square sit at room temperature for 15 to 20 minutes, or warm it gently in the microwave for 10 to 15 seconds, until it is just softened and fragrant again. That brief warming also revives the crackly top's delicate contrast with the center, so it is worth doing whenever you have the extra minute.
The brownies also freeze beautifully for up to 2 months. Wrap each square individually in plastic wrap or parchment, then tuck the wrapped squares into a freezer-safe bag or container with as much air pressed out as you can manage. Freezing them individually means you can pull out a single brownie whenever a craving strikes instead of thawing the whole batch. Thaw a wrapped square at room temperature for about 30 to 45 minutes, or unwrap it and microwave it in short bursts until just warm. After thawing, the tops may be slightly less crisp than they were on day one, but the fudgy centers — the whole point of this recipe — come through freezing and thawing almost unchanged.
FAQ
Can I double these 3-Ingredient Nutella Brownies for a bigger pan? Yes, the recipe doubles cleanly. Use 2 1/2 cups (740 g) of chocolate-hazelnut spread, 4 large eggs, and 1 cup (130 g) of all-purpose flour, and bake the batter in a 9×13-inch (23×33 cm) pan lined with parchment. Start checking for doneness at about 25 minutes and expect the pan to need roughly 28 to 32 minutes, since the thicker layer takes a little longer to set in the center. Judge it by the same cues as the smaller batch: set edges, a shiny crackled top, moist crumbs on the toothpick, and just a faint jiggle in the middle. The doubled batch slices into 18 squares of the same size, or 12 larger ones.
Why did my brownies turn out cakey instead of fudgy? A cakey result almost always traces back to one of three things: too much flour, too much mixing, or too much time in the oven. Scooping flour directly from the bag packs it down and can add a tablespoon or more beyond the intended 1/2 cup (65 g), so spoon and level it, or weigh it. Stirring vigorously after the flour goes in develops gluten and puffs the batter up like cake, so fold gently and stop the moment the dry streaks disappear. And an extra few minutes of baking firms the center considerably — pull the pan when the toothpick still shows moist crumbs and the center barely jiggles, not when the toothpick comes out clean.
Can I use a different chocolate-hazelnut spread or a gluten-free flour? Yes to both, with small expectations adjusted. Another brand of chocolate-hazelnut spread can replace the Nutella in the same 1 1/4 cups (370 g), though the flavor, sweetness, and set will shift a little with the brand, and very runny or oily spreads may bake up softer — if your spread pours easily at room temperature, check the pan a minute or two early and give the brownies extra cooling time before slicing. For a gluten-free batch, a standard 1-to-1 gluten-free baking flour blend, the kind that includes xanthan gum, swaps in at the same 1/2 cup (65 g) measure and gives a very similar fudgy result. Plain single flours like almond flour or oat flour behave quite differently and are not a straight one-for-one substitute here.
How do I know the brownies are done if the center still jiggles? That faint jiggle is exactly what you are looking for, and learning to trust it is the key to the whole recipe. The brownies are done when the edges look set and slightly puffed, the top appears dry, shiny, and crackled all the way across, and only the very center — the middle inch or two — wobbles slightly when you gently nudge the pan. A toothpick near the center should carry moist, fudgy crumbs, not wet, liquid batter; wet batter means the pan needs another 2 to 3 minutes, while a perfectly clean toothpick means the brownies are already a touch overbaked and will set up firmer and more cake-like as they cool. Remember that the center continues to set during the 30-minute cooling time, so the texture you slice is always firmer than the texture you see coming out of the oven.

Recipe Card
3-Ingredient Nutella Brownies
- Prep Time: 10 minutes (PT10M)
- Cook Time: 25 minutes (PT25M)
- Total Time: 35 minutes (PT35M)
- Servings: 9 servings
- Calories: 290 kcal per serving (estimated)
Dense, fudgy brownies made with just chocolate-hazelnut spread, eggs, and flour, baked in an 8×8-inch (20 cm) pan until the edges are set and the center just barely jiggles, then cooled at least 30 minutes and sliced into 9 squares. Cook time reflects the top of the 22 to 25 minute baking range; start checking at 22 minutes for moist crumbs on the toothpick.
Nutrition (estimated): 290 kcal per serving (estimated), 32 g carbohydrates, 5 g protein, 16 g fat, 2 g fiber, 27 g sugar, 45 mg sodium. Nutrition is estimated and will vary with the exact brand of chocolate-hazelnut spread used and how the batch is sliced.
Can I double these 3-Ingredient Nutella Brownies for a bigger pan?
Yes, the recipe doubles cleanly. Use 2 1/2 cups (740 g) of chocolate-hazelnut spread, 4 large eggs, and 1 cup (130 g) of all-purpose flour, and bake the batter in a 9×13-inch (23×33 cm) pan lined with parchment. Start checking for doneness at about 25 minutes and expect the pan to need roughly 28 to 32 minutes, since the thicker layer takes a little longer to set in the center. Judge it by the same cues as the smaller batch: set edges, a shiny crackled top, moist crumbs on the toothpick, and just a faint jiggle in the middle. The doubled batch slices into 18 squares of the same size, or 12 larger ones.
Why did my brownies turn out cakey instead of fudgy?
A cakey result almost always traces back to one of three things: too much flour, too much mixing, or too much time in the oven. Scooping flour directly from the bag packs it down and can add a tablespoon or more beyond the intended 1/2 cup (65 g), so spoon and level it, or weigh it. Stirring vigorously after the flour goes in develops gluten and puffs the batter up like cake, so fold gently and stop the moment the dry streaks disappear. And an extra few minutes of baking firms the center considerably — pull the pan when the toothpick still shows moist crumbs and the center barely jiggles, not when the toothpick comes out clean.
Can I use a different chocolate-hazelnut spread or a gluten-free flour?
Yes to both, with small expectations adjusted. Another brand of chocolate-hazelnut spread can replace the Nutella in the same 1 1/4 cups (370 g), though the flavor, sweetness, and set will shift a little with the brand, and very runny or oily spreads may bake up softer — if your spread pours easily at room temperature, check the pan a minute or two early and give the brownies extra cooling time before slicing. For a gluten-free batch, a standard 1-to-1 gluten-free baking flour blend, the kind that includes xanthan gum, swaps in at the same 1/2 cup (65 g) measure and gives a very similar fudgy result. Plain single flours like almond flour or oat flour behave quite differently and are not a straight one-for-one substitute here.
How do I know the brownies are done if the center still jiggles?
That faint jiggle is exactly what you are looking for, and learning to trust it is the key to the whole recipe. The brownies are done when the edges look set and slightly puffed, the top appears dry, shiny, and crackled all the way across, and only the very center — the middle inch or two — wobbles slightly when you gently nudge the pan. A toothpick near the center should carry moist, fudgy crumbs, not wet, liquid batter; wet batter means the pan needs another 2 to 3 minutes, while a perfectly clean toothpick means the brownies are already a touch overbaked and will set up firmer and more cake-like as they cool. Remember that the center continues to set during the 30-minute cooling time, so the texture you slice is always firmer than the texture you see coming out of the oven.

Hi, I’m Emma! I’m the cook and recipe developer behind Sizzle & Sage. From my sunny home kitchen, I share easy, flavor-packed recipes for real life — quick breakfasts, cozy weeknight dinners, and simple bakes anyone can make. Pull up a chair and stay a while!