Air Fryer Stuffing Balls (Crispy, Sage-Scented, Make-Ahead)
Stuffing is the side dish people go back for, but a big baking dish of it has one flaw: only the top and the corners ever get truly crisp. These air fryer stuffing balls fix that by giving every single serving its own golden crust. You take a classic, sage-scented stuffing — day-old bread cubes, celery and onion softened in butter, warm broth, and an egg to bind it — roll it into neat balls, and let the air fryer's fast, circulating heat crisp them on all sides. The outside turns deeply golden and crunchy, the inside stays soft and savory, and each ball is a perfect, portioned bite of the best part of Thanksgiving.
They are also a wonderfully practical recipe. The mixture can be shaped a day ahead and kept covered in the refrigerator, so on the holiday itself you are simply loading baskets and serving them hot. They are just as useful after the holiday, because leftover stuffing from the big day can be re-rolled, chilled, and air fried into something that tastes freshly made rather than reheated. And because they cook in about twelve minutes per batch at 375 degrees F (190 degrees C), they free the oven for the turkey, the rolls, and everything else competing for space.
Serve them straight from the basket with gravy for spooning over, tuck them alongside turkey and mashed potatoes, or set out a warm platter as a snack while dinner finishes. However they reach the table, they disappear quickly — crisp, herby, buttery, and sized so that having one more always feels like a reasonable decision.
Why You'll Love This Recipe
- Crisp on every side. Rolling stuffing into balls gives each portion maximum surface area, so the air fryer can brown the whole exterior instead of just the top of a casserole.
- Tender, savory centers. Broth moistens the bread and an egg binds it gently, so the inside stays soft and flavorful rather than dry or crumbly.
- Made for make-ahead. Shape the balls up to a day in advance, refrigerate them, and air fry them straight from the fridge when guests are ready to eat.
- The best use for leftovers. Leftover stuffing gets a second life here — re-roll, chill briefly, and air fry until the edges crisp again.
- Oven-free on a busy day. A countertop batch takes about twelve minutes, leaving the oven open for turkey, pies, and casseroles.
- Easy to portion and serve. No scooping from a dish or arguing over corner pieces. Each ball is a tidy, generous serving that plates beautifully.

Ingredients
- 8 cups (about 300 g) day-old bread cubes, from a sturdy white or French loaf, cut into 1/2-inch cubes
- 4 tablespoons (57 g) unsalted butter, plus more for greasing hands if needed
- 1 medium yellow onion (about 150 g), finely diced
- 3 celery stalks (about 150 g), finely diced
- 2 garlic cloves, minced
- 1 1/2 tablespoons chopped fresh sage, or 1 1/2 teaspoons dried rubbed sage
- 1 teaspoon chopped fresh thyme leaves, or 1/2 teaspoon dried thyme
- 1 teaspoon kosher salt
- 1/2 teaspoon freshly ground black pepper
- 1/2 teaspoon poultry seasoning (optional)
- 1 large egg, lightly beaten
- 3/4 to 1 cup (180 to 240 ml) low-sodium chicken or turkey broth, warmed
- 2 tablespoons chopped fresh parsley (optional)
- Olive oil spray or 1 teaspoon olive oil, for the basket
Why these ingredients matter
Day-old bread cubes. Sturdy, slightly dry bread is the foundation. Fresh, soft bread turns gummy when the broth hits it, while day-old cubes drink up the liquid and still hold their shape when you roll them. A white sandwich loaf, French bread, or a mix of white and wheat all work well. If your bread is fresh, spread the cubes on a baking sheet and dry them in a 300 degree F (150 degree C) oven for about ten minutes before you start.
Butter, onion, and celery. This trio is the aromatic base of classic stuffing. Cooking the onion and celery in butter until soft — not browned — sweetens them and removes their raw bite, so they melt into the balls rather than crunching in the center. Take the full five to six minutes here; undercooked celery stays fibrous even after air frying.
Garlic. Just two cloves, added at the end of the sauté so it does not scorch, give the mixture a quiet savory depth. It should support the sage, not compete with it.
Fresh sage. Sage is the signature herb of Thanksgiving stuffing, warm and slightly peppery. Fresh sage, chopped fine, distributes evenly and tastes brighter than dried. If you use dried rubbed sage, use the smaller amount listed, because dried sage is concentrated and can turn medicinal if you overdo it.
Thyme and poultry seasoning. Thyme adds an earthy, floral note that rounds out the sage. Poultry seasoning — usually a blend of sage, thyme, marjoram, and rosemary — is optional, but a half teaspoon deepens the classic flavor, especially if your broth is mild. If you use it, you can reduce the extra thyme slightly.
Egg as the binder. One large egg is what turns loose stuffing into balls that hold together in the basket. It sets as it cooks, gently firming the interior without making it dense. Do not skip it, and mix it in after the broth so it coats the cubes evenly rather than pooling in one spot.
Warm broth, added gradually. Broth provides both moisture and savory flavor. Warm broth absorbs more evenly than cold. The exact amount depends on how dry your bread is, which is why the recipe gives a range: start with three-quarters of a cup (180 ml), mix, and add more a splash at a time until the mixture holds together when squeezed but is not wet or soupy. Too little and the balls crumble; too much and they slump and steam instead of crisping.
Salt, pepper, and parsley. Season the mixture itself, not just the vegetables, so every bite tastes balanced. Parsley is optional and mostly for color, but its fresh green flecks make the finished balls look as good as they taste.
Instructions
- Dry the bread if needed. If your bread cubes feel soft or fresh, spread them on a rimmed baking sheet and bake at 300 degrees F (150 degrees C) for 8 to 10 minutes, until dry to the touch but not toasted brown. Transfer to a large mixing bowl. Day-old bread that already feels firm and dry can go straight into the bowl.
- Soften the vegetables. Melt the butter in a large skillet over medium heat. Add the onion and celery with a pinch of the salt and cook, stirring occasionally, for 5 to 6 minutes, until softened and translucent. Stir in the garlic, sage, and thyme and cook for 30 seconds more, just until fragrant. Scrape the whole mixture, butter included, over the bread cubes.
- Season and moisten. Sprinkle the remaining salt, the black pepper, and the poultry seasoning (if using) over the bowl. Pour in the beaten egg and 3/4 cup (180 ml) of the warm broth. Toss gently with a large spoon or your hands until everything is evenly combined. Let it rest for 5 minutes so the bread absorbs the liquid, then squeeze a small handful: it should hold together firmly. If it crumbles, add more broth one tablespoon at a time.
- Chill the mixture briefly. Cover the bowl and refrigerate for 20 to 30 minutes. This short chill firms the butter and hydrates the bread fully, which makes the balls much easier to shape and helps them keep a round shape in the hot basket. Do not skip it if your mixture feels soft.
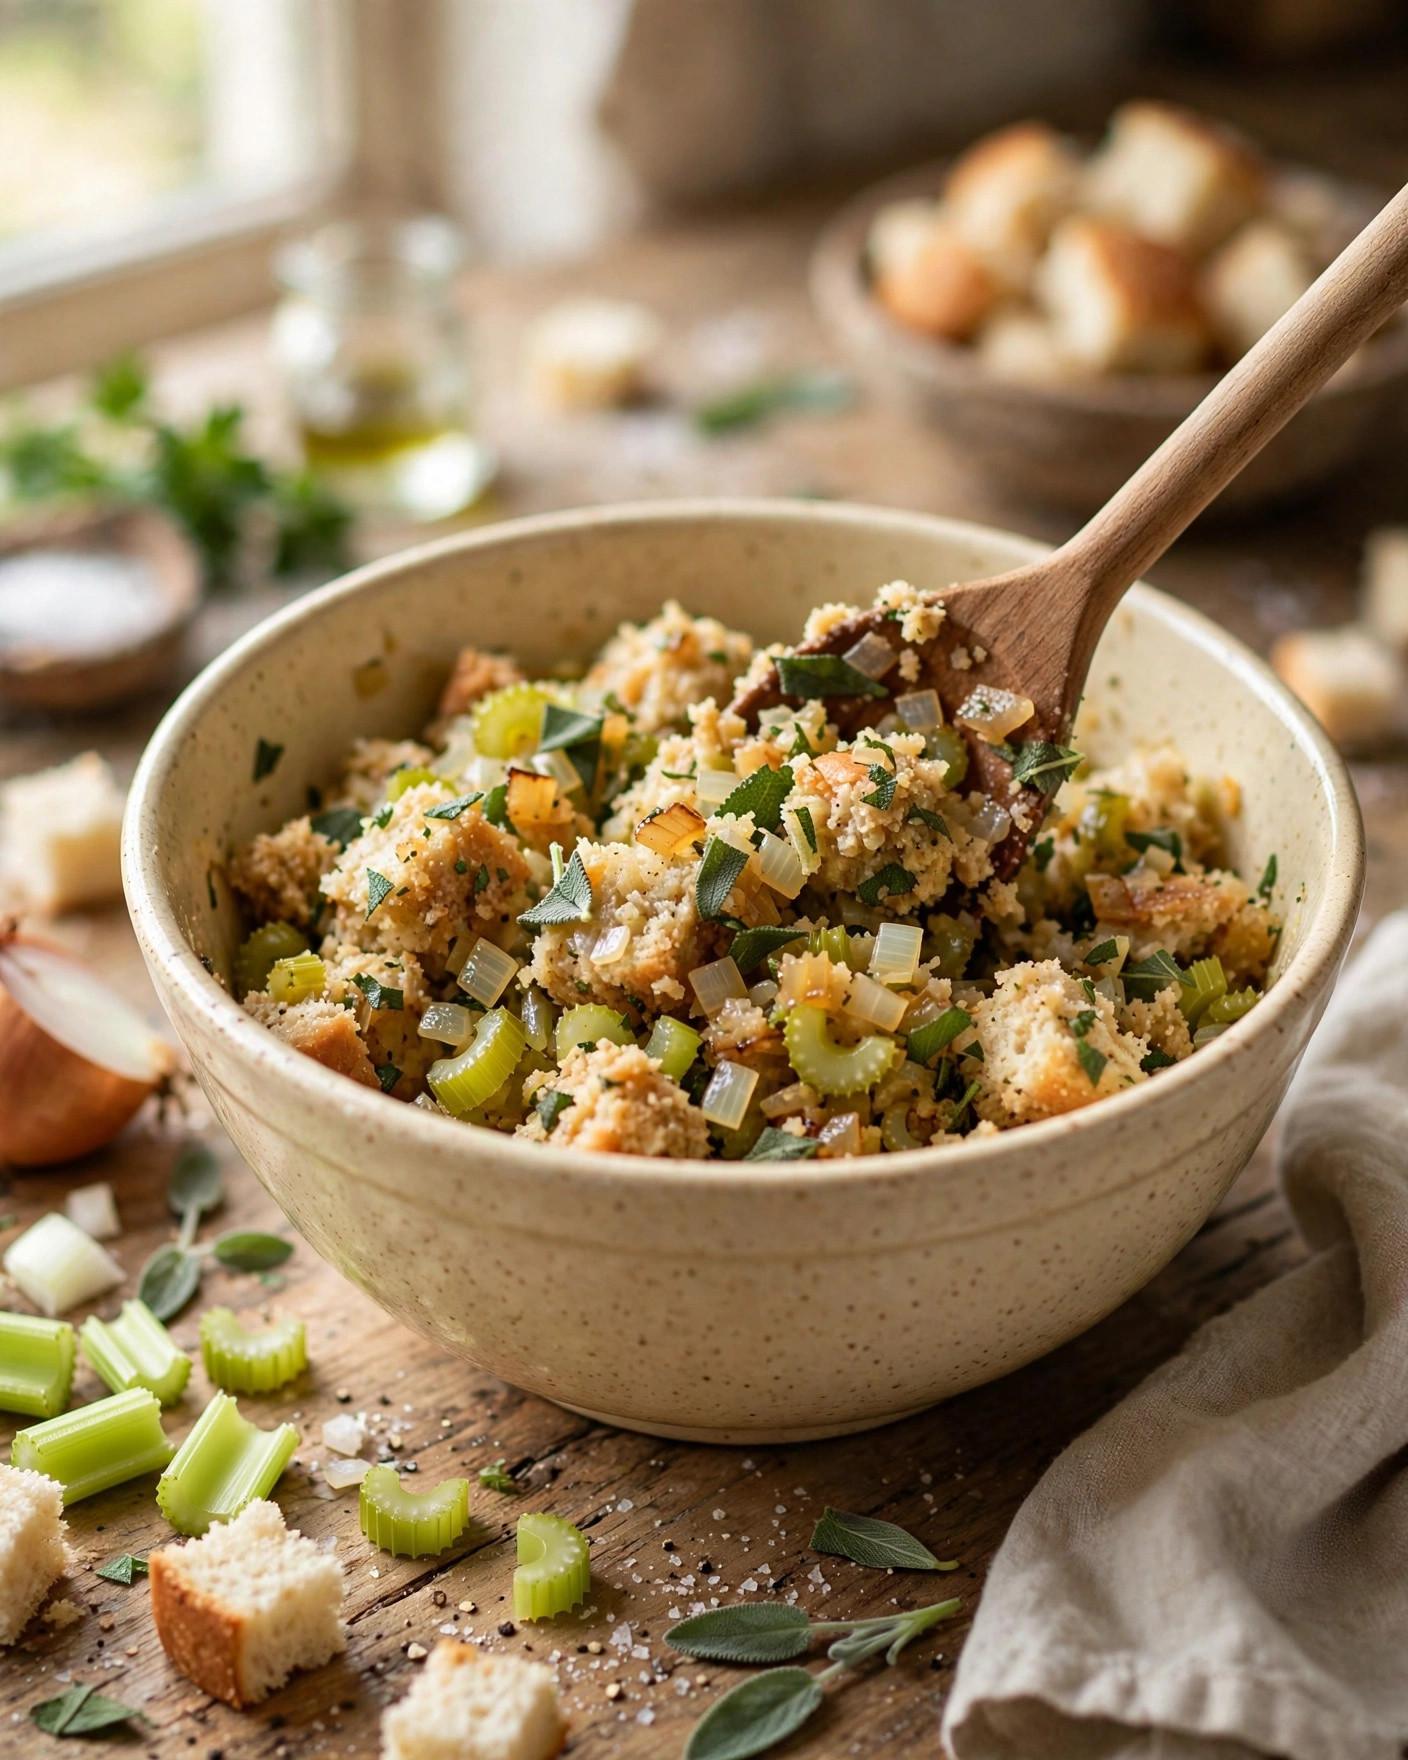
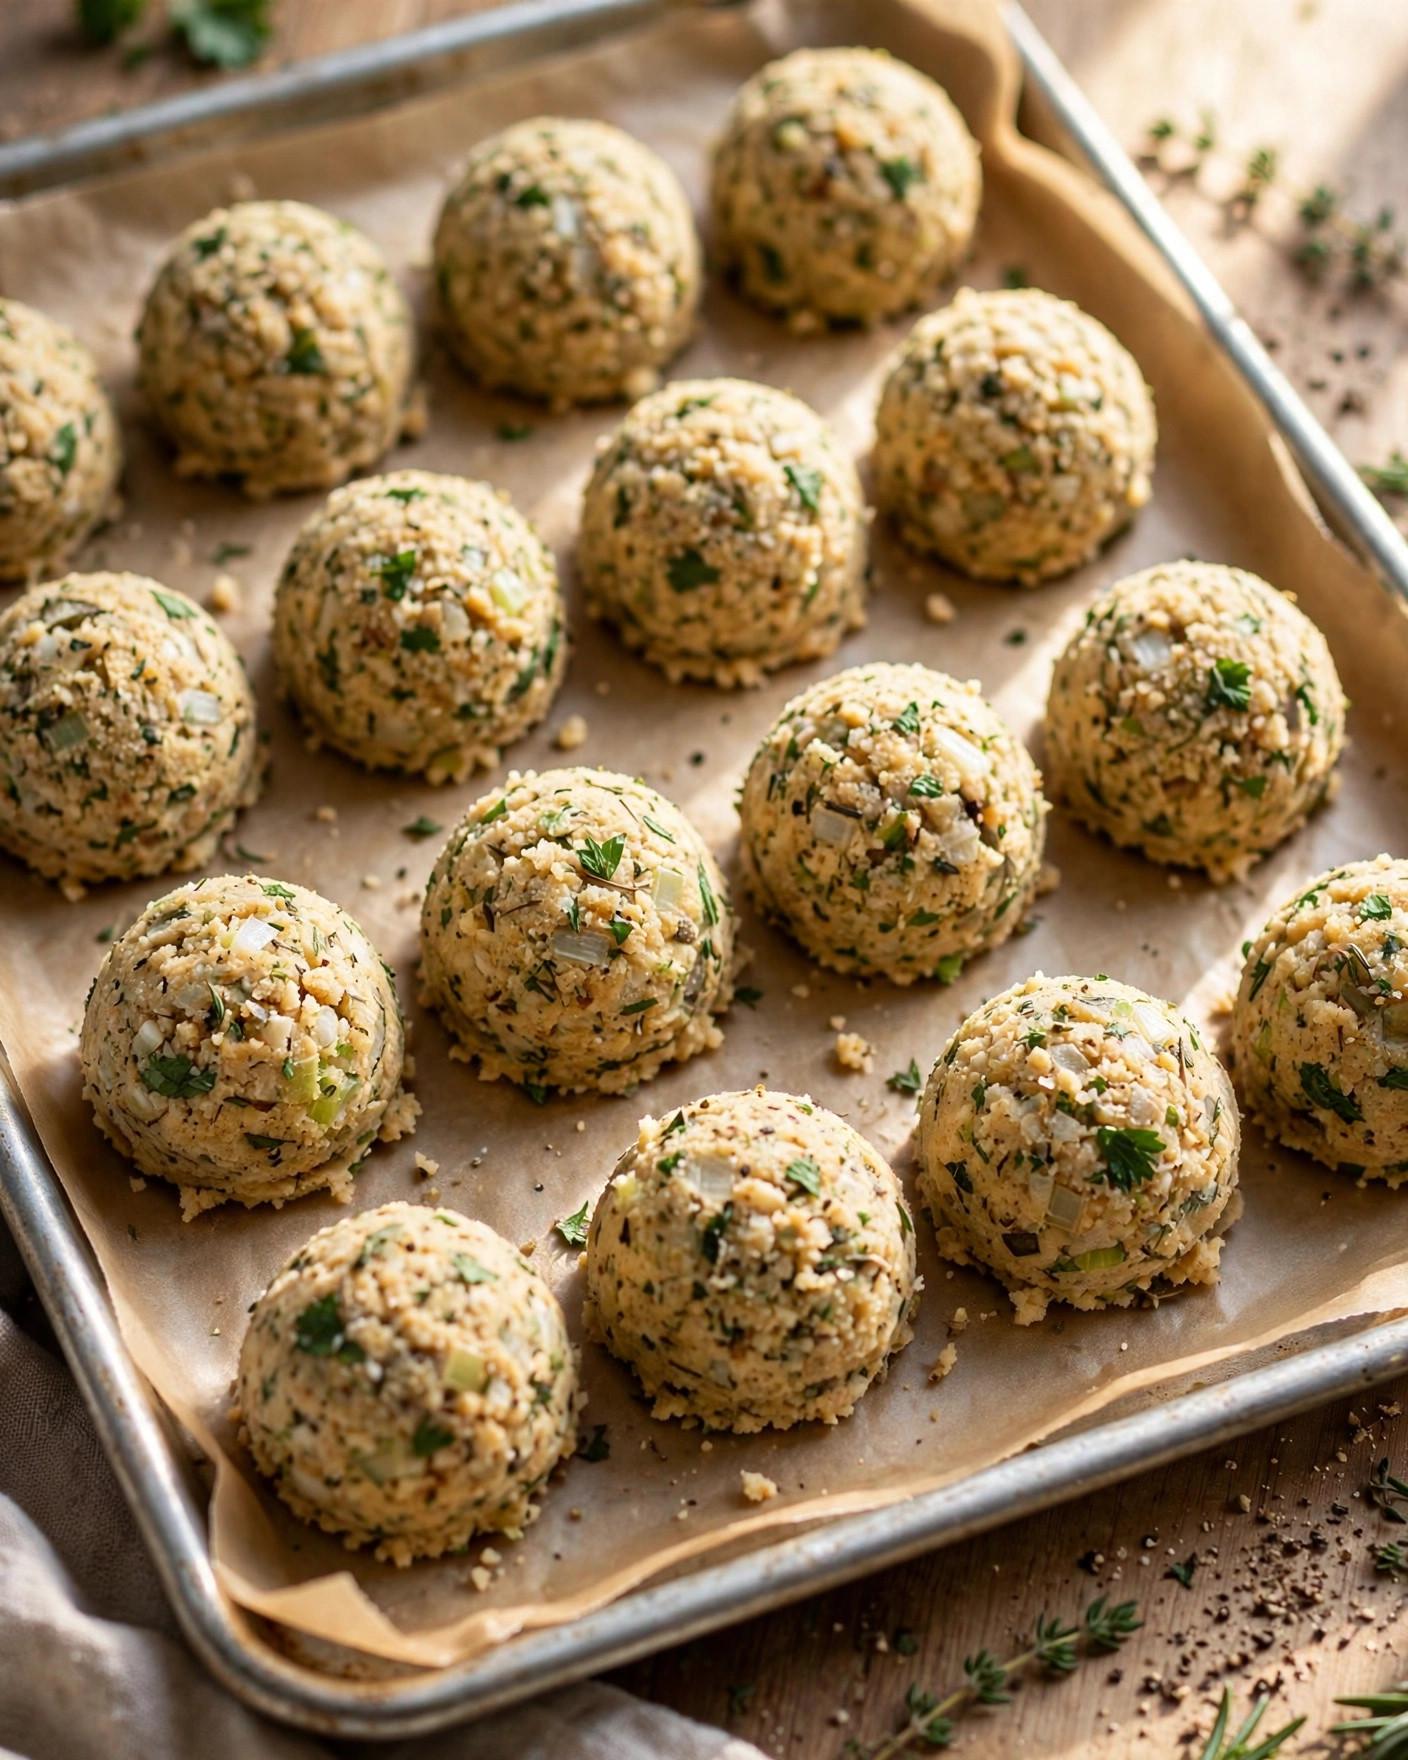
- Shape the balls. Scoop the mixture with a 1/4-cup measure or a large cookie scoop and roll each portion between your palms into a compact ball about 2 inches across — roughly the size of a golf ball, only a little larger. Press firmly enough that no loose edges remain. You should get about 16 balls. Set them on a parchment-lined tray as you go.
- Preheat and load the basket. Preheat the air fryer to 375 degrees F (190 degrees C) for 3 to 5 minutes. Lightly spray or brush the basket with oil. Arrange the balls in a single layer with a little space between them for airflow, working in batches if needed — crowding is the enemy of crisp edges.
- Air fry until deeply golden. Cook at 375 degrees F (190 degrees C) for 10 to 12 minutes, turning the balls gently halfway through with tongs or by shaking the basket, until they are deeply golden brown and crisp on all sides and hot in the center. An instant-read thermometer should read at least 160 degrees F (71 degrees C) in the middle of the largest ball.
- Rest and repeat. Transfer the finished balls to a warm platter and tent loosely with foil while you cook the remaining batches, adding a minute or two if the basket has cooled between loads. A short rest of 2 to 3 minutes lets the crust set so it stays crisp when gravy goes over it.
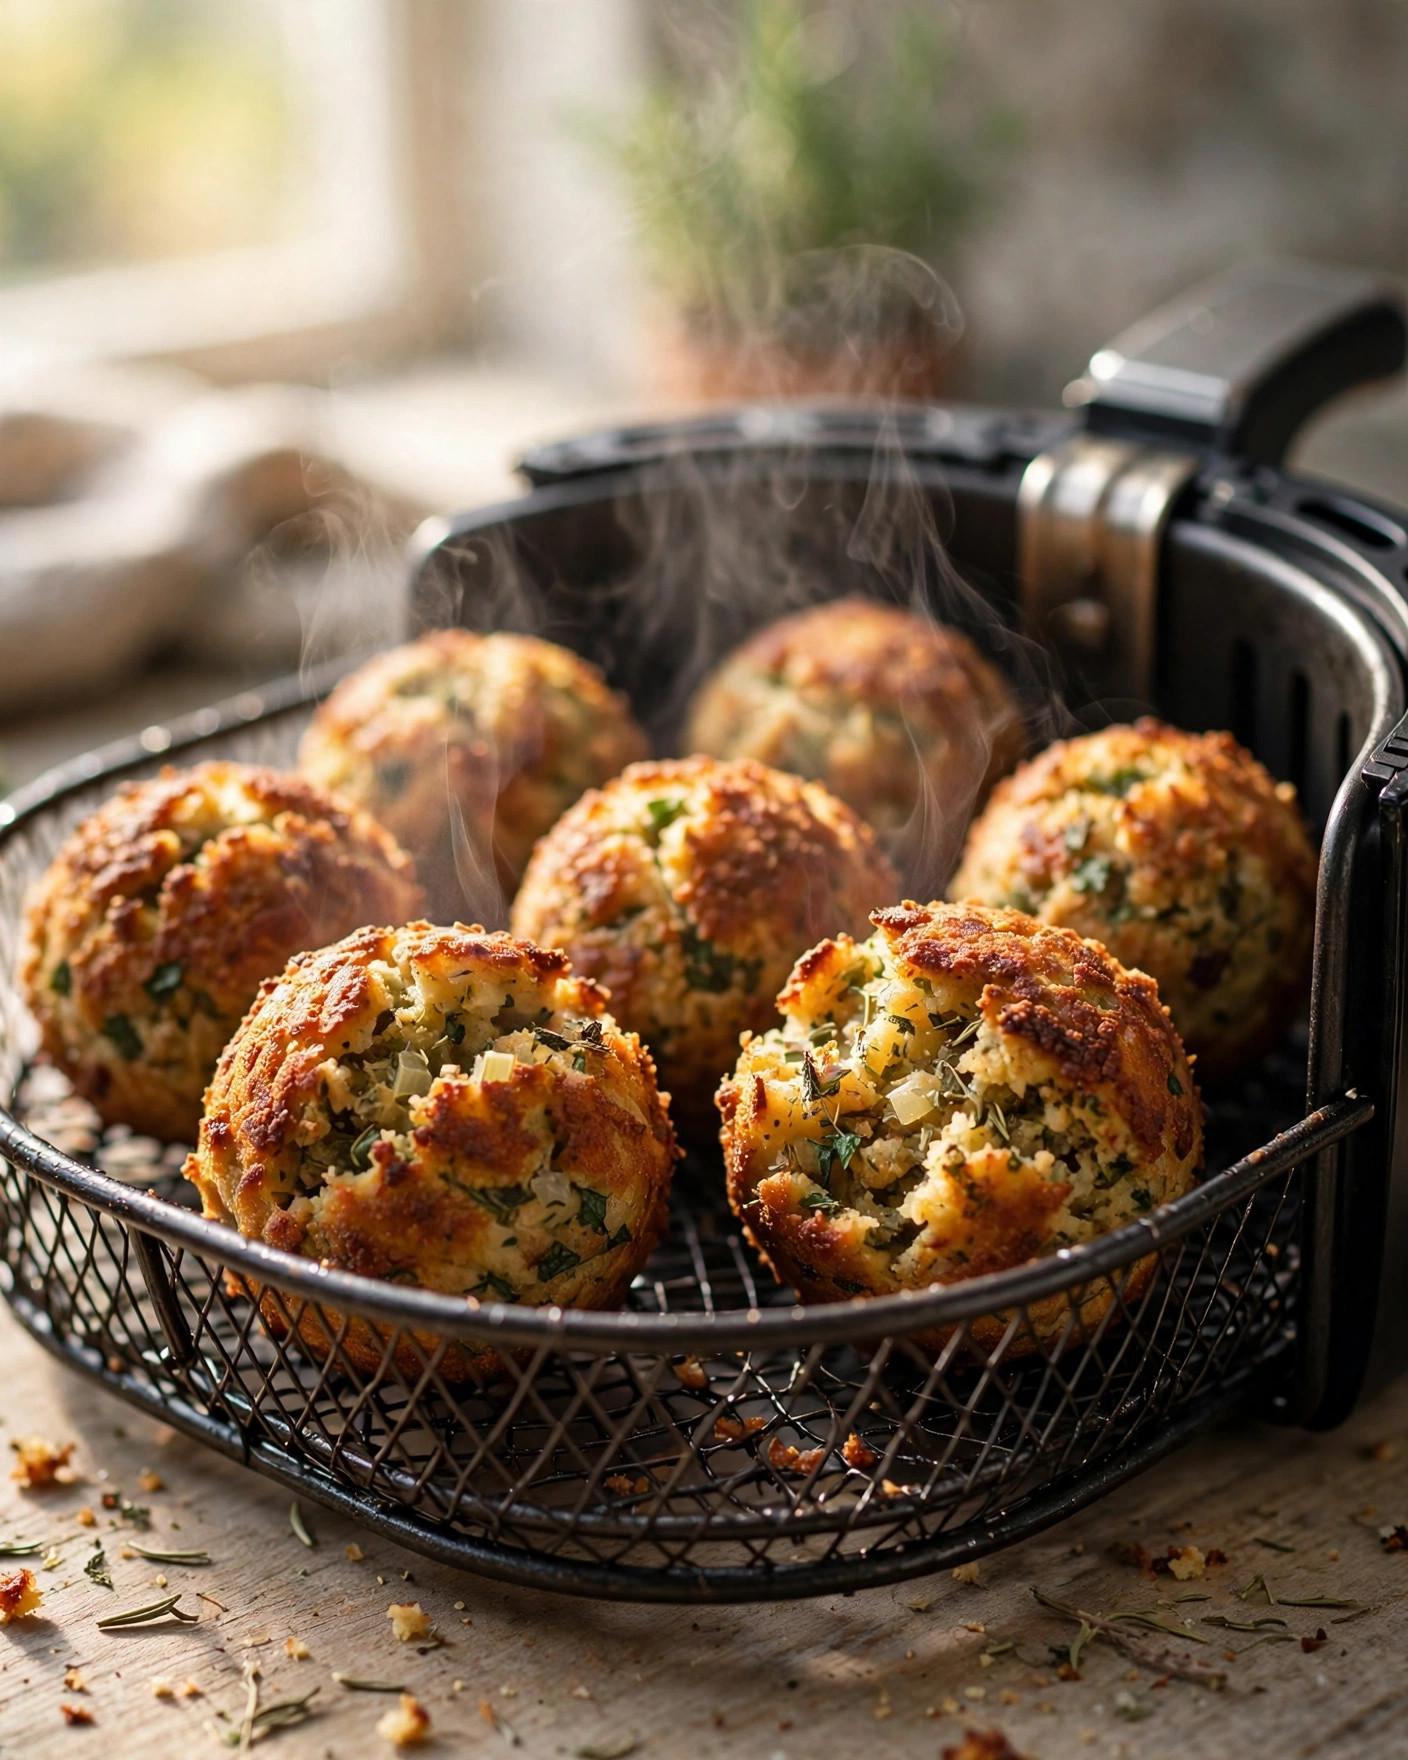
- Serve warm. Pile the balls on a platter, scatter a little extra chopped parsley or a few small sage leaves over the top if you like, and serve right away with warm gravy for spooning over. They are at their crispiest within about fifteen minutes of leaving the basket.
Tips for Success
- Judge moisture by the squeeze test. The mixture should clump and hold its shape when you squeeze a handful, then break apart with a poke. If it feels wet and heavy, fold in a handful of extra dry bread cubes; if it crumbles, add broth a spoonful at a time.
- Pack the balls firmly. Loose rolling leaves air pockets and ragged edges that crumble in the basket. A firm, smooth ball crisps evenly and holds together when you turn it.
- Leave space in the basket. Hot air needs to circulate. Cook in batches rather than stacking, and keep finished balls warm in a low oven at 200 degrees F (95 degrees C) if you are making a double batch.
- Turn them once, gently. Flipping halfway is what gives you an evenly browned crust instead of a pale band around the middle. Use tongs and a light grip so you do not crack the crust.
- Chill shaped balls for the cleanest shape. If you have time, refrigerate the shaped balls for 30 minutes before cooking. Cold, firm balls hold a neat round shape and brown more evenly.
- Adjust for your air fryer. Basket models run hotter and crisp faster than oven-style models. Check the first batch a minute early, and use that timing for the rest.
Variations
- Sausage stuffing balls. Brown 8 ounces (225 g) of bulk breakfast or Italian sausage, crumble it finely, and fold it in with the vegetables, reducing the salt to 3/4 teaspoon. Cook to the same temperature and expect an extra minute in the basket.
- Cornbread stuffing balls. Replace half the bread cubes with day-old cornbread cubes, keeping the total at 8 cups (about 300 g). Cornbread is more tender, so chill the shaped balls for a full 30 minutes before air frying.
- Apple and sage. Fold in 1/2 cup (about 75 g) of finely diced tart apple with the vegetables for little pockets of sweetness that pair beautifully with the sage and with pork as well as turkey.
- Cheesy stuffing balls. Add 1/2 cup (50 g) of finely grated Parmesan or sharp white cheddar to the mixture. The cheese melts into the crust and adds a savory, lacy edge.
- Leftover stuffing balls. Skip the mixing bowl entirely: take about 6 cups of leftover stuffing, and if it feels dry, stir in a beaten egg and 2 to 3 tablespoons of broth. Roll, chill for 20 minutes, and air fry as directed until crisp and heated through.
- Gluten-free. Use a sturdy gluten-free loaf, dried well, and check that your broth and poultry seasoning are certified gluten-free. Gluten-free bread absorbs broth quickly, so add it more slowly.
Storage
Leftover stuffing balls keep well in the refrigerator for up to 4 days. Let them cool completely, then store them in an airtight container. To reheat and bring the crust back, air fry at 350 degrees F (175 degrees C) for 4 to 5 minutes, until crisp outside and hot in the center. The oven works too — 10 minutes at 375 degrees F (190 degrees C) on a baking sheet — but the microwave will soften the crust, so save it only for a quick, soft reheat.
For the freezer, freeze the balls either cooked or uncooked. For uncooked balls, shape them, set the tray in the freezer until the balls are solid, then transfer them to a freezer bag and freeze for up to 3 months; air fry from frozen at 350 degrees F (175 degrees C) for 14 to 16 minutes, turning halfway. For cooked balls, cool, freeze the same way, and reheat from frozen at 350 degrees F (175 degrees C) for 8 to 10 minutes.
Make-ahead is where this recipe really shines for a holiday. The mixture can be made and shaped a full day ahead: arrange the balls on a parchment-lined tray, cover tightly, and refrigerate for up to 24 hours. Air fry them straight from the refrigerator, adding about a minute to the cooking time. That means the messiest part of the job is done the day before, and on the day itself you are serving hot, crisp stuffing in batches while everything else finishes.
FAQ
Can I make air fryer stuffing balls from leftover stuffing? Yes, and it is one of the best ways to use leftovers. Leftover stuffing is already seasoned and cooked, so simply roll it into firm balls about 2 inches across. If the mixture feels dry or crumbly, stir in a lightly beaten egg and a tablespoon or two of broth before rolling. Chill the balls for 20 minutes, then air fry at 375 degrees F (190 degrees C) for 8 to 10 minutes, until the outside is crisp and the center is hot.
Why are my stuffing balls falling apart? The two usual causes are moisture and packing. If the mixture is too dry, the bread cannot bind, so add broth a tablespoon at a time until a squeezed handful holds together. If it is too wet, the balls slump and break as they cook, so fold in extra dry bread cubes. Packing firmly and chilling the shaped balls for at least 20 minutes also makes a real difference — cold, compact balls hold their shape far better in the basket.
Can I bake these in the oven instead of the air fryer? Yes. Arrange the shaped balls on a parchment-lined baking sheet with space between them, spray or brush them lightly with oil or melted butter, and bake at 400 degrees F (200 degrees C) for 20 to 25 minutes, turning once halfway, until deeply golden and crisp. The crust will be a little less all-over crunchy than the air fryer version, because the air fryer circulates heat more intensely, but they will still be delicious.
How far ahead can I shape the balls before cooking? You can shape them up to 24 hours ahead. Arrange them in a single layer on a parchment-lined tray or plate, cover tightly with plastic wrap so the surfaces do not dry out, and refrigerate. Cook them straight from the refrigerator at 375 degrees F (190 degrees C), adding about 1 minute to the time. For longer storage, freeze the shaped, uncooked balls on the tray, bag them once solid, and keep them frozen for up to 3 months.

Recipe Card
Air Fryer Stuffing Balls (Crispy, Sage-Scented, Make-Ahead)
- Prep Time: 25 minutes (PT25M)
- Cook Time: 12 minutes (PT12M)
- Total Time: 65 minutes (PT65M)
- Servings: 8 (about 16 balls)
- Calories: 185 kcal per serving (estimated)
Day-old bread cubes tossed with butter-softened celery, onion, sage, warm broth, and an egg binder, rolled into firm balls and air fried at 375 degrees F until crisp and golden on all sides with tender, savory centers — a make-ahead Thanksgiving side that also brings leftover stuffing back to life.

Hi, I’m Emma! I’m the cook and recipe developer behind Sizzle & Sage. From my sunny home kitchen, I share easy, flavor-packed recipes for real life — quick breakfasts, cozy weeknight dinners, and simple bakes anyone can make. Pull up a chair and stay a while!