Red Velvet Lava Cakes with Molten Chocolate Centers
Some desserts are made for sharing a spoon across the table, and a warm lava cake is right at the top of that list. These red velvet lava cakes take the classic molten-center cake — a tender little cake with a center that flows like warm fudge when you cut into it — and dress it in red velvet: deep red crumb, a gentle cocoa flavor, a hint of vanilla, and that faint, familiar tang. Each one bakes in its own ramekin, so everyone at the table gets a whole cake, a spoon, and that first-cut moment when the chocolate center spills out.
The molten center here is not left to chance. Instead of relying only on careful underbaking, each cake hides a frozen chocolate ganache truffle in the middle. The batter sets around it in a hot oven at 425 degrees F (220 degrees C) while the truffle warms back into a thick, flowing sauce. It is the most reliable way to get a real lava flow at home: the edges bake into cake, the center stays liquid, and the window between underdone and overdone gets noticeably wider and friendlier.
There is a little planning involved, and it is the pleasant kind. The ganache needs about an hour in the freezer to firm up, and it can be made a day ahead, which makes the cakes themselves feel easy on the night. Once the truffles are frozen, the batter comes together in about 15 minutes and the cakes bake in 11 to 13 minutes. It is a natural fit for Valentine’s Day and date nights at home, but it works just as well for any evening that deserves a small, warm, chocolate-centered occasion. A spoonful of cream cheese whipped cream on the side nods to classic red velvet frosting, and a scoop of vanilla ice cream is never a mistake.
Why You’ll Love This Recipe
- A guaranteed molten center. A frozen ganache truffle tucked into every cake melts into a thick chocolate flow as the cake bakes, so the lava moment does not depend on shaving 30 seconds off the bake time.
- Individual cakes, no slicing or sharing required. Baked in 6-ounce ramekins, each cake turns out as its own serving — pretty enough for a special dinner, simple enough for a weeknight treat.
- Classic red velvet flavor. A gentle cocoa base, real vanilla, red gel coloring for that deep red crumb, and a small splash of vinegar for the traditional tang that sets red velvet apart from plain chocolate cake.
- Mostly make-ahead. The ganache centers keep for days in the freezer, and the filled ramekins can wait in the refrigerator for a few hours, so dessert can go into the oven as you sit down to dinner.
- Short bake, big payoff. Eleven to 13 minutes in a hot oven is all the cooking there is. The cakes are mixed by hand in two bowls, with no mixer needed for the batter itself.
- Cream cheese whipped cream on the side. A quick, not-too-sweet topping that echoes red velvet’s signature frosting and cools each warm, chocolatey bite.

Ingredients
For the chocolate ganache centers
- 3 ounces (85 g) semisweet chocolate (about 60 percent), finely chopped
- 1/4 cup (60 ml) heavy cream
- 1 tablespoon (14 g) unsalted butter
- Pinch of fine sea salt
For the red velvet cakes
- 1/2 cup (113 g) unsalted butter, plus more for the ramekins
- Cocoa powder, for dusting the ramekins
- 4 ounces (115 g) semisweet chocolate (about 60 percent), finely chopped
- 2 large eggs, at room temperature
- 2 large egg yolks, at room temperature
- 1/3 cup (67 g) granulated sugar
- 1 teaspoon vanilla extract
- 1 1/2 teaspoons red gel food coloring (see Tips for liquid coloring)
- 1/2 teaspoon white vinegar or apple cider vinegar
- 1/3 cup (42 g) all-purpose flour, spooned and leveled
- 2 tablespoons (10 g) unsweetened cocoa powder
- 1/4 teaspoon fine sea salt
For the cream cheese whipped cream (recommended)
- 4 ounces (115 g) cream cheese, softened
- 2 tablespoons (15 g) powdered sugar
- 1/2 teaspoon vanilla extract
- 1/2 cup (120 ml) heavy cream, cold
- Vanilla ice cream, for serving (optional)
Why these ingredients matter
Semisweet chocolate. Chocolate does double duty here: it builds the ganache centers and forms the base of the batter. Around 60 percent cacao tastes deep and chocolatey against the sweet red cake without turning bitter. Chop it fine so it melts evenly — bar chocolate melts more smoothly than chips, which are made to hold their shape.
Heavy cream. In the ganache, cream turns chopped chocolate into a truffle that freezes firm and then melts back into a pourable sauce. It also whips into the cream cheese topping. Milk is no substitute here; it makes a center too thin to flow properly.
Unsalted butter. Butter enriches the batter, keeps the crumb tender, and gives the cake’s surface its delicate set. It also goes into the ganache for gloss and into the ramekins as the release layer. Unsalted butter keeps the salt level in your hands, which matters in a small recipe like this one.
Eggs and extra yolks. Two whole eggs plus two yolks give the cakes structure and richness. The whites help the batter set into cake at the edges, while the extra yolks keep the center soft and custardy. Room-temperature eggs whisk up with more volume and blend into warm chocolate without seizing it.
Granulated sugar. A third of a cup is a measured amount: enough to sweeten and help the edges set with a fine crust, not so much that the cake turns candy-sweet and masks the cocoa. Whisking it thoroughly with the eggs until pale gives the batter body, since there is no creaming step here.
Cocoa powder. Red velvet is a cocoa cake at heart, but a light-handed one — two tablespoons is enough for flavor and for deepening the red toward burgundy rather than scarlet. Use regular unsweetened cocoa; Dutch-processed cocoa works too and gives a slightly darker, smoother crumb.
Red gel food coloring. Gel coloring is concentrated, so a teaspoon and a half delivers a deep red without watering down a batter that has very little liquid to spare. Liquid coloring can work (see the FAQ), but it takes far more and can thin the batter. The color deepens a shade as the cakes bake.
White vinegar. Half a teaspoon is the traditional red velvet tang — you will not taste vinegar in the finished cake, but you would notice its absence as a flatness. It also reacts very gently with the cocoa, the old-fashioned reason red velvet batter leaned reddish in the first place.
Vanilla extract. Vanilla rounds out the cocoa and keeps the flavor reading as bakery cake rather than candy. It appears in the batter and again in the whipped cream, tying the warm cake and the cool topping together.
All-purpose flour. Just a third of a cup — lava cake is mostly chocolate, butter, and eggs, with flour as a light frame rather than the main event. Too much flour is the fastest route to a cake with no flow, so spoon and level rather than scooping from the bag.
Fine sea salt. Salt appears in the ganache and the batter because chocolate without salt tastes muted. A quarter teaspoon in the batter sharpens the cocoa and balances the sweetness in every layer.
Cream cheese. Softened cream cheese whipped with cream gives the topping the gentle tang of red velvet frosting in a spoonable form. Cold cream cheese will stay lumpy no matter how long you whip it, so let it sit out while the ganache freezes.
Instructions
- Make the ganache. Put the finely chopped semisweet chocolate for the centers in a small heatproof bowl. Heat the heavy cream in a small saucepan over medium heat until it is steaming with small bubbles at the edges, about 2 to 3 minutes — do not let it boil. Pour the hot cream over the chocolate, let it sit undisturbed for 1 minute, then stir slowly from the center outward until completely smooth and glossy. Stir in the butter and salt until melted and combined.
- Freeze the ganache truffles. Pour the ganache into a small shallow dish or a container lined with plastic wrap and freeze for 45 to 60 minutes, until firm enough to scoop cleanly. Scoop out 4 level tablespoons of ganache and roll each quickly between your palms into a ball about 1 inch (2.5 cm) across — work fast, as the warmth of your hands softens them. Set the truffles on a parchment-lined plate and return them to the freezer for at least 15 minutes, or until you are ready to fill the ramekins. They can stay frozen, covered, for up to 1 week.
- Prepare the ramekins. Place a rack in the center of the oven and preheat to 425 degrees F (220 degrees C). Generously butter the insides of four 6-ounce ramekins, getting into every corner, then dust each with cocoa powder, tapping and turning so the bottom and sides are coated and shaking out the excess. Cocoa, not flour, keeps the coating invisible against the red crumb. Set the ramekins on a rimmed baking sheet — it makes them easy to move and catches any drips.
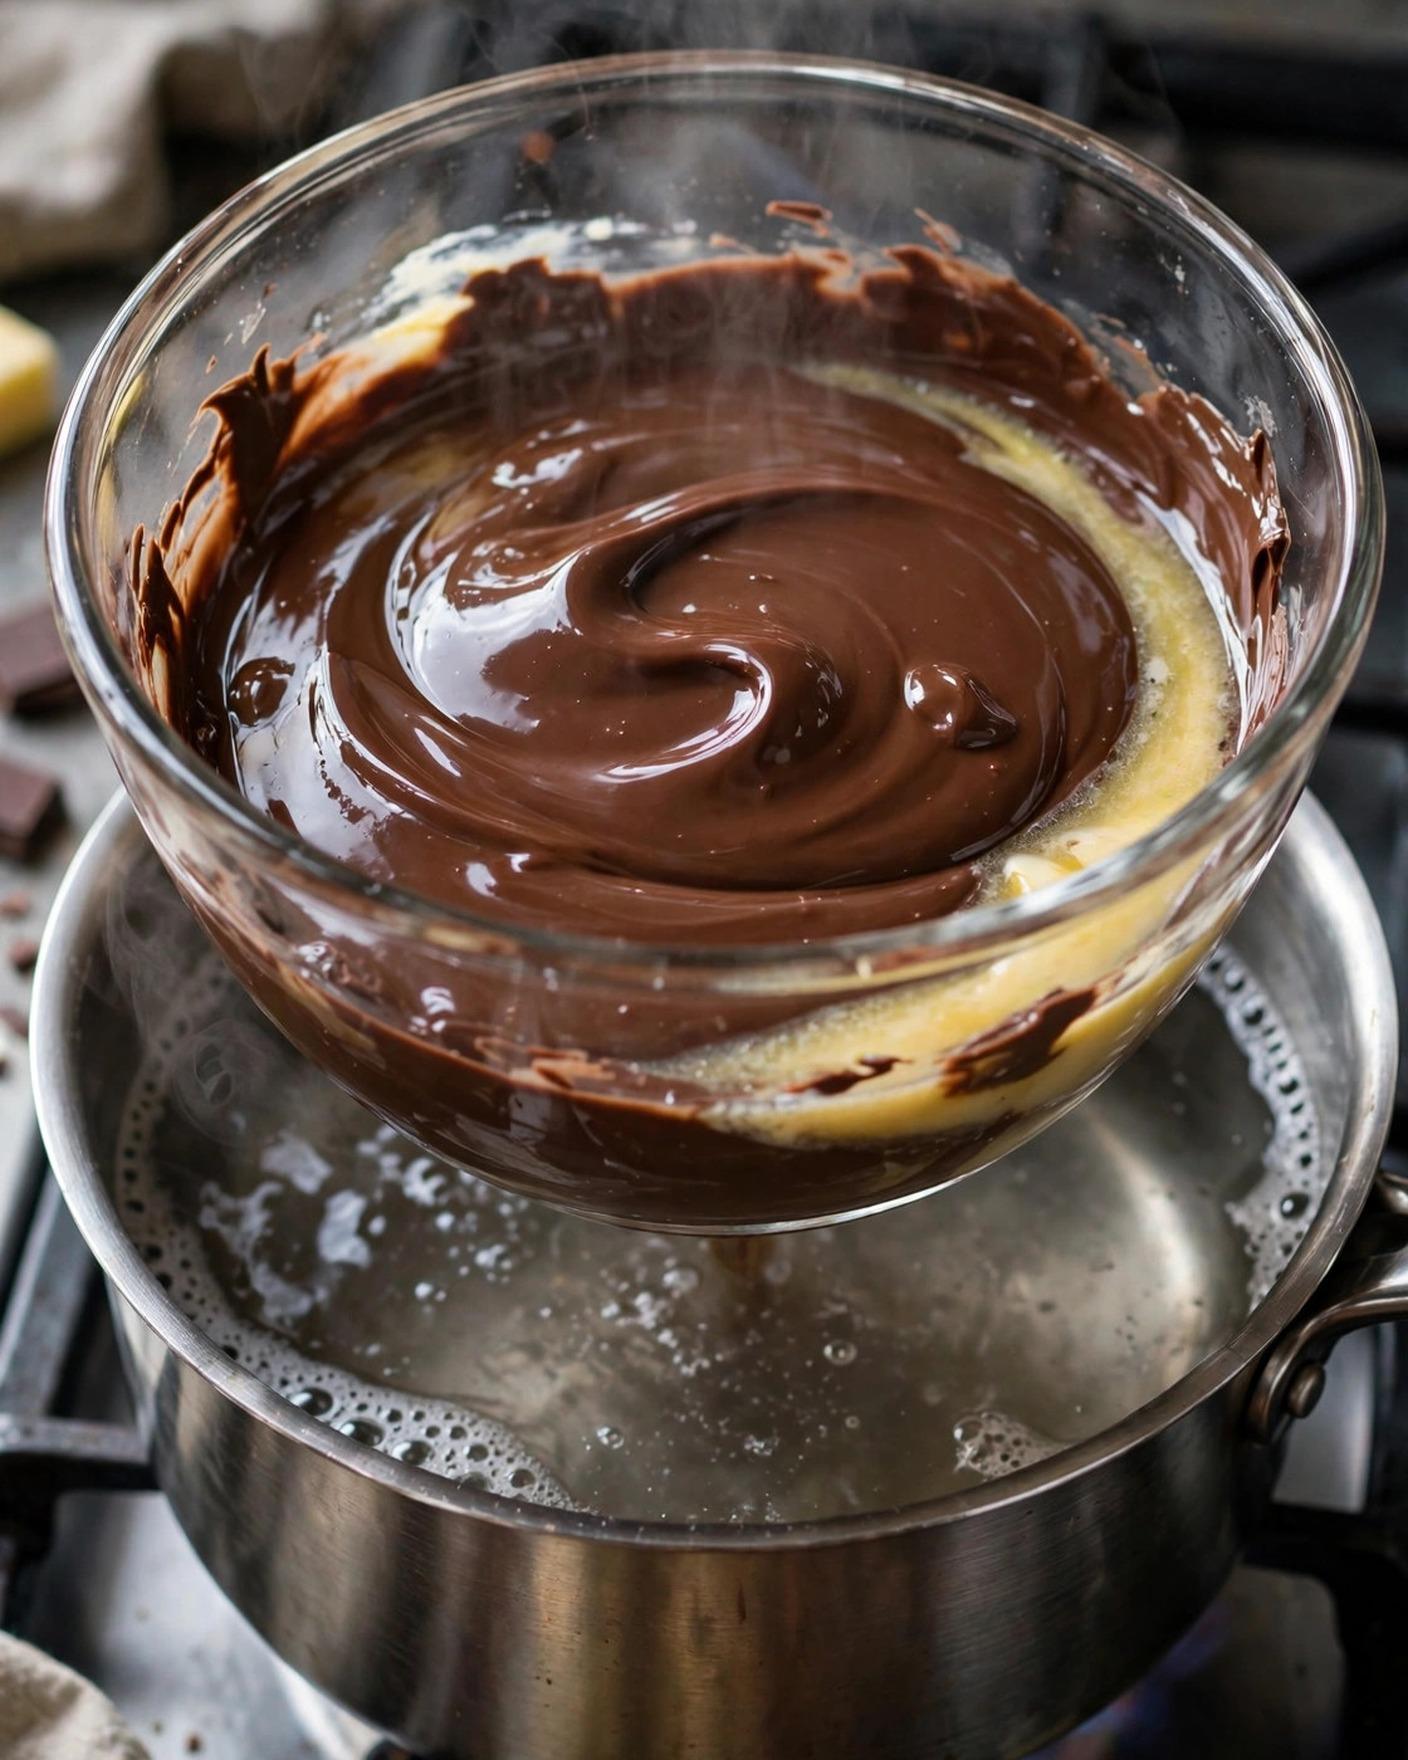
- Melt the butter and chocolate. Combine the butter and the chopped chocolate for the cakes in a medium heatproof bowl set over a saucepan of barely simmering water, making sure the bowl does not touch the water. Stir occasionally until melted, smooth, and glossy, then take the bowl off the heat and let it cool for about 5 minutes. It should feel warm, not hot, before the eggs go in — hot chocolate can scramble eggs on contact. (A microwave works too: heat in 20-second bursts, stirring between each, until just melted.)
- Whisk the eggs and sugar. In a separate medium bowl, whisk the eggs, egg yolks, and granulated sugar together for 1 to 2 minutes, until the mixture is pale, slightly thickened, and falls from the whisk in a ribbon. This step builds the batter’s body and helps the tops set with a delicate sheen, so do not rush it into a quick stir.
- Combine and color the batter. Pour the warm chocolate mixture into the eggs and whisk gently until fully combined and uniform. Whisk in the vanilla, red gel coloring, and vinegar. The batter will look strikingly red at this stage — that is right; it deepens and darkens a shade in the oven toward classic red velvet burgundy.
- Fold in the dry ingredients. Sift or sprinkle the flour, cocoa powder, and salt over the batter and fold with a spatula just until no dry streaks remain. Stop as soon as the batter comes together: overmixing develops the little flour that is here and can toughen the set edges. The finished batter should be thick, glossy, and pourable, similar to a brownie batter.
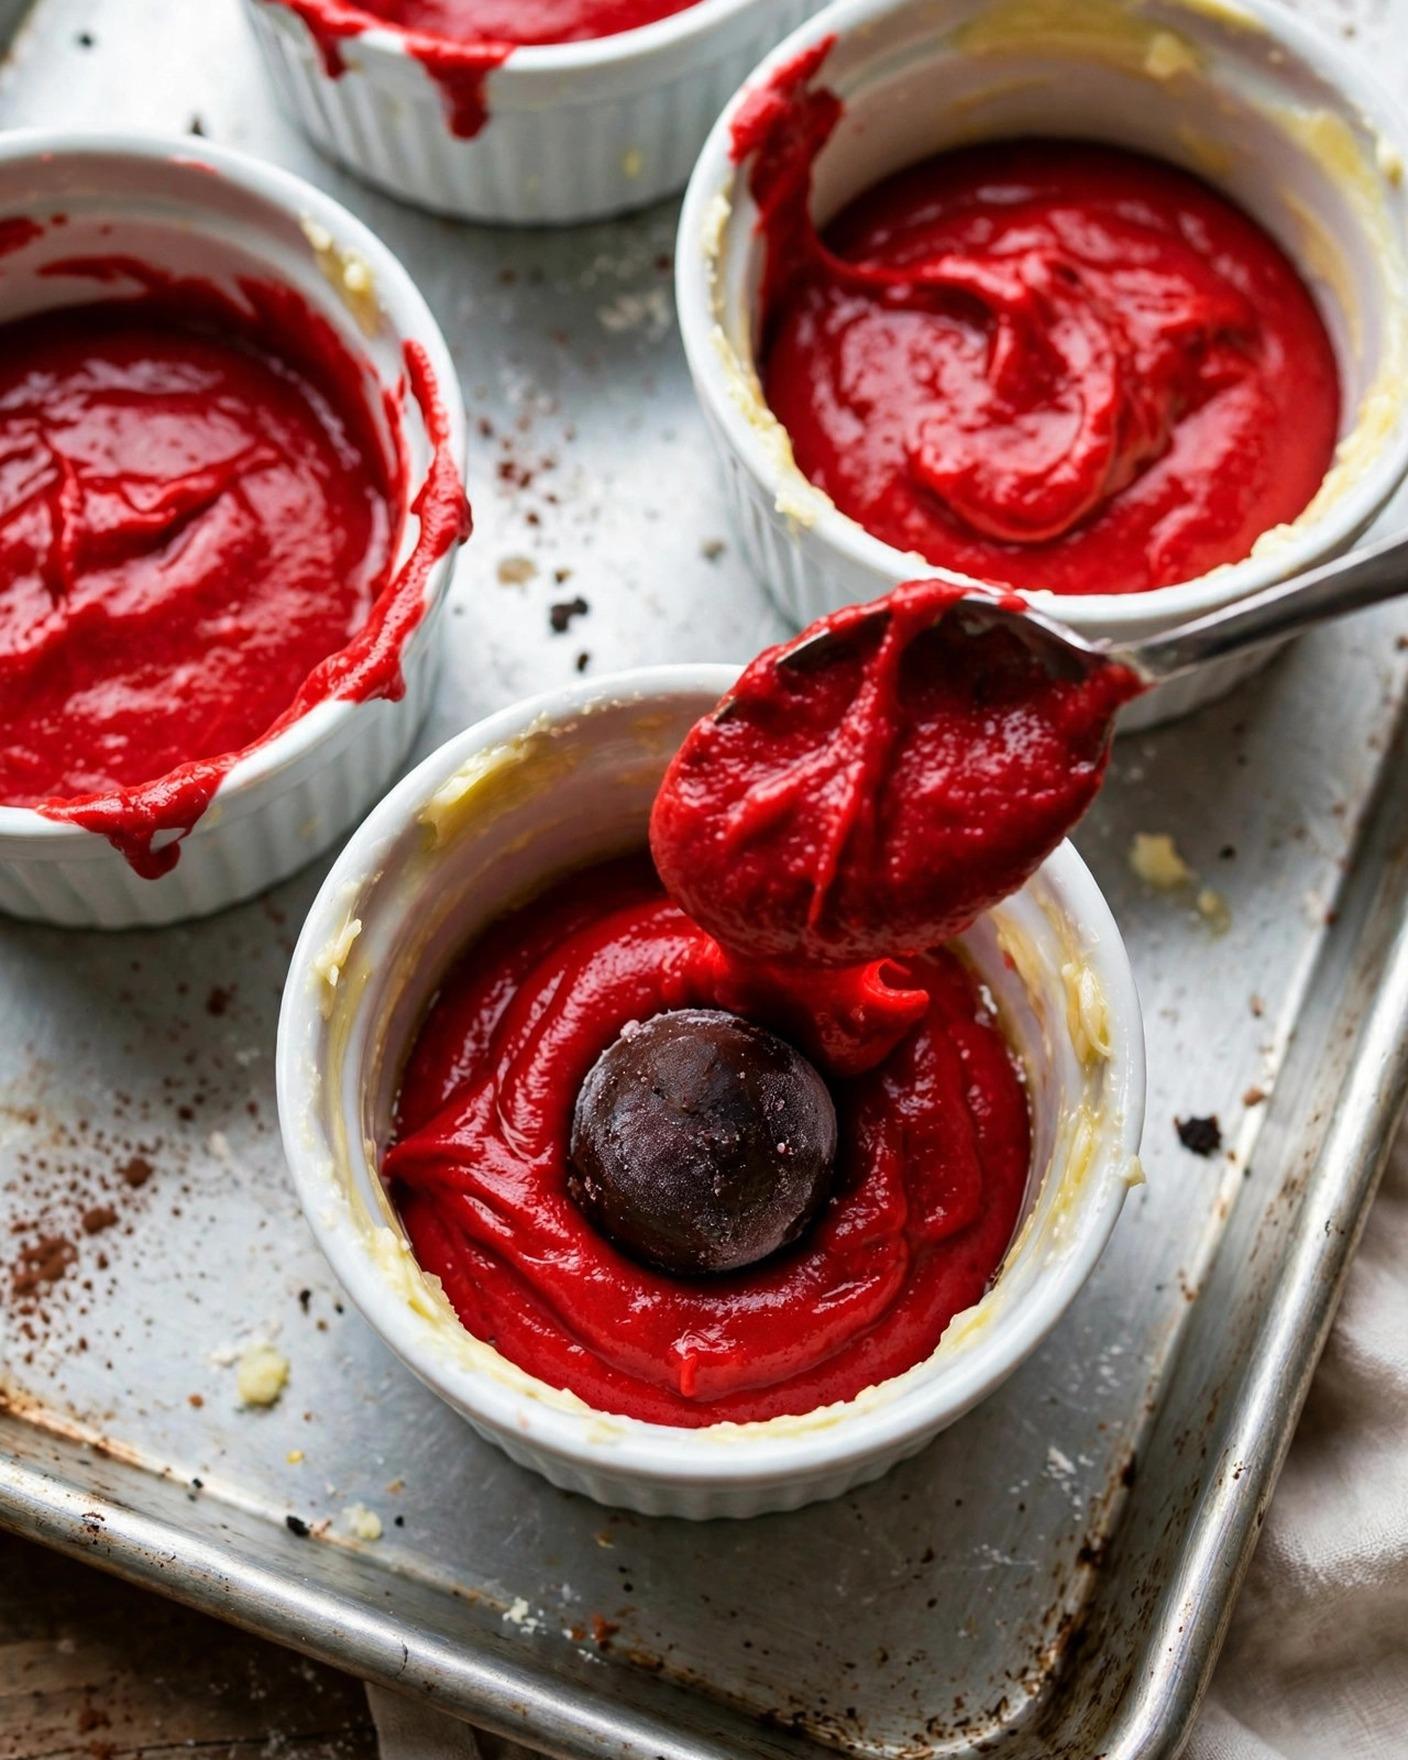
- Fill the ramekins and add the centers. Spoon or pour about 1/4 cup of batter into each prepared ramekin. Set one frozen ganache truffle in the center of each and press it down very lightly — just enough that it stays put. Divide the remaining batter evenly over the tops so each truffle is completely covered; the ramekins should be about three-quarters full. If any truffle peeks through, spoon a small dollop of batter over it, since exposed ganache will melt out over the top instead of staying in the center.
- Give the filled ramekins a short rest. Set the baking sheet aside at room temperature for 10 minutes. This brief rest lets the batter settle around the truffles, and baking from room temperature keeps the timing predictable. If you need to hold them longer, cover and refrigerate for up to 4 hours and add 1 minute to the bake time.
- Bake until the edges are set. Bake at 425 degrees F (220 degrees C) for 11 to 13 minutes. The cakes are done when the edges are set and just pulling slightly from the sides, the tops look dry and matte, and the center 1 inch (2.5 cm) still looks soft and jiggles gently when you nudge the baking sheet — like set jelly, not liquid batter. If the whole top jiggles, give them 1 more minute and check again; if the center looks firm and puffed high, they have gone a little far and will be more cake than lava, though still delicious.
- Make the cream cheese whipped cream while the cakes rest. Beat the softened cream cheese, powdered sugar, and vanilla in a medium bowl until smooth. Pour in the cold heavy cream and whip until soft peaks form, 1 to 2 minutes — stop there, as overwhipped cream turns grainy. Keep it refrigerated until serving. Set the baked cakes aside for exactly 1 minute before unmolding; this lets the edges firm just enough to hold their shape on the plate.
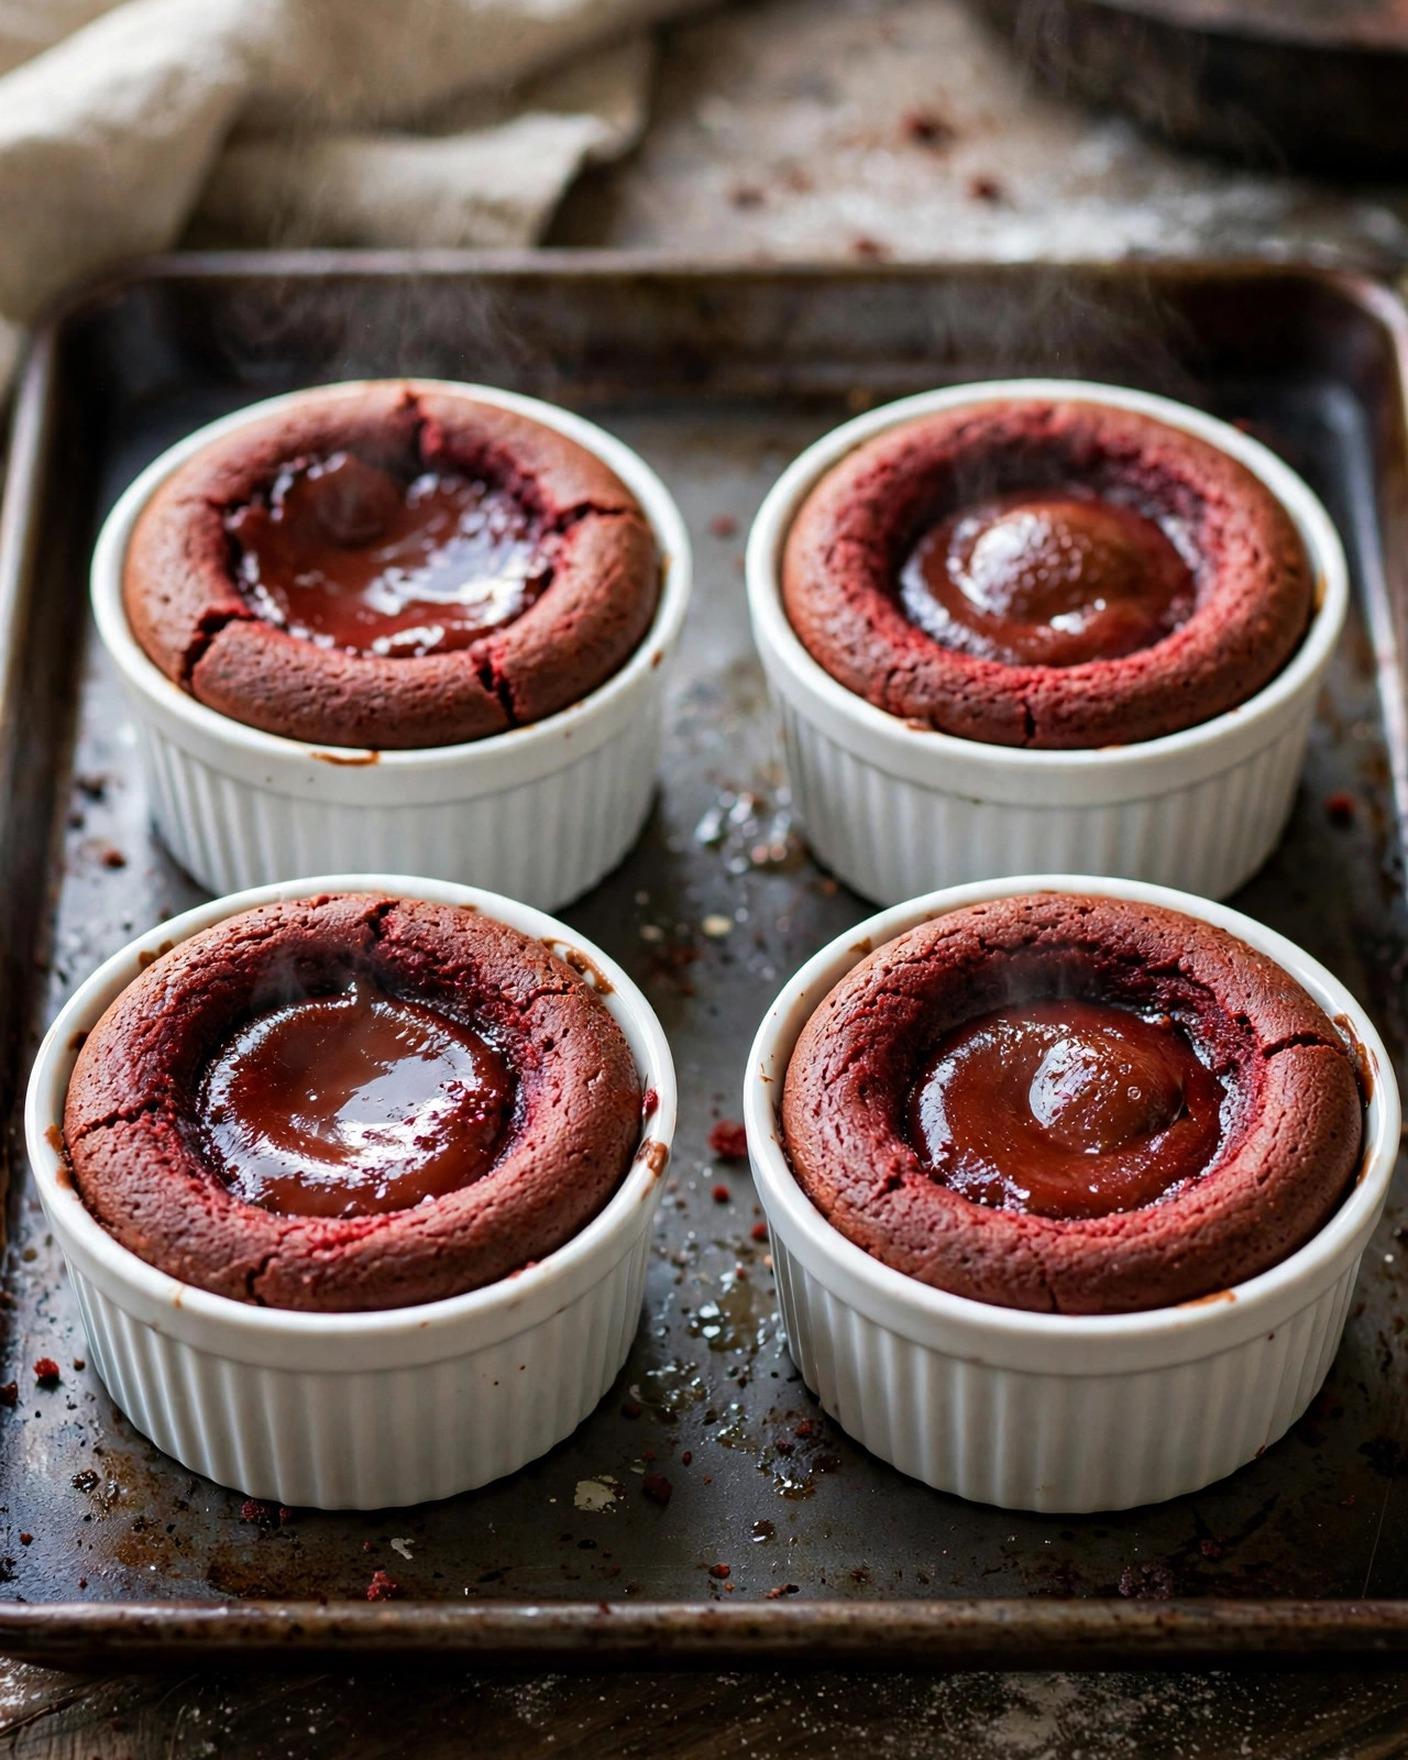
- Unmold and serve warm. Run a thin knife or small offset spatula around the inside edge of each ramekin. Place a small dessert plate upside down over the ramekin, hold them together, and flip in one confident motion. Wait 10 seconds, then lift the ramekin straight up — the cake should release cleanly onto the plate. If you prefer, serve the cakes straight from their ramekins with no flipping at all. Spoon cream cheese whipped cream alongside, or add a small scoop of vanilla ice cream, and serve immediately, while the center is still warm enough to flow when the cake is cut.
Tips for Success
- Freeze the truffles until truly firm. A soft ganache ball melts into the batter while you work and disappears into the crumb instead of pooling in the center. Frozen solid is what buys you a distinct, flowing core. If your kitchen is warm, return the rolled truffles to the freezer for a full 15 minutes before filling.
- Timing is the whole technique. The difference between a molten center and a fully baked cake is about 2 minutes. Set a timer for 11 minutes and judge by the jiggle: set edges, soft center. Ovens vary, so the first time you make these, consider baking one test cake to learn your oven’s exact window.
- Butter and cocoa the ramekins generously. Lava cakes are unmolded warm, and a missed patch of butter is exactly where a cake will stick and tear. An even cocoa dusting releases cleanly and, unlike flour, leaves no pale residue on the red crumb.
- Use gel coloring for the deepest red. Liquid food coloring takes 1 to 2 tablespoons to approach the same color and adds liquid the batter was not built for. If liquid is all you have, reduce it to the deepest shade you can get with about 1 tablespoon and accept a slightly softer red.
- Keep the batter warm-side of room temperature. If the melted chocolate cools too much before mixing, the batter thickens and bakes up denser. Combine everything while the chocolate is still warm and fluid, and get the cakes into the oven without long delays once filled.
- Serve within minutes. The center starts thickening as the cake cools, and within 15 to 20 minutes the flow slows to a soft fudge. Have plates, spoons, and topping ready before the cakes come out of the oven — this dessert does not wait, and it is worth it.
Variations
- White chocolate centers. Make the truffles with 3 ounces (85 g) white chocolate and 3 tablespoons heavy cream instead — white chocolate ganache is softer, so freeze it a full hour. The sweet, pale center against the red crumb is especially pretty when the cake is cut.
- Cream cheese centers. Skip the ganache and beat 4 ounces (115 g) softened cream cheese with 2 tablespoons powdered sugar and 1/2 teaspoon vanilla. Freeze tablespoon-sized scoops the same way for a center that tastes like red velvet frosting and stays thick and tangy when warm.
- Mini lava cakes. Bake the batter in a well-buttered, cocoa-dusted muffin tin using half-size truffles, at 425 degrees F (220 degrees C) for 8 to 10 minutes. You will get about 8 minis — lovely for a party spread where everyone takes one or two.
- Espresso red velvet. Whisk 1 teaspoon instant espresso powder into the melted chocolate. It will not make the cakes taste like coffee; it deepens the cocoa and makes the chocolate center taste more intense.
- Gluten-free lava cakes. Replace the all-purpose flour with the same amount (42 g) of a measure-for-measure gluten-free flour blend. The cakes are so flour-light that the swap is barely noticeable; keep the bake time the same and judge by the jiggle.
Storage
Lava cakes are a serve-now dessert — the molten center is the point, and it sets as the cakes cool. If you have leftovers, let them cool in their ramekins, cover, and refrigerate for up to 2 days. A reheated cake will not flow like a fresh one, but 20 to 30 seconds in the microwave warms the center back to a soft, fudgy consistency. They are also genuinely good cold, where the center firms into something like a chocolate truffle inside red velvet cake.
The smart make-ahead storage is before baking. Frozen ganache truffles keep in the freezer for up to 1 month. Filled, unbaked ramekins can be covered and refrigerated for up to 24 hours; bake them straight from the refrigerator, adding 1 to 2 minutes and judging by the usual jiggle test. The cream cheese whipped cream keeps, covered and refrigerated, for up to 2 days; give it a few quick whisks before serving if it has relaxed.
FAQ
How do I know when the lava cakes are done without cutting one open? Watch the top and trust the jiggle. At 11 to 13 minutes at 425 degrees F (220 degrees C), the outer ring of the cake should look set, dry, and matte, while a circle about 1 inch (2.5 cm) wide in the very center still looks soft and trembles gently when you nudge the baking sheet. If the whole surface ripples, the cakes need another minute; if the center has puffed up firm and high, they are past lava and into regular cake territory. The frozen ganache center widens your window considerably, so a cake that looks right on top will almost always flow inside.
Can I make red velvet lava cakes ahead of time? Yes — in stages, which is the easiest way to serve them at a dinner. The ganache truffles can be rolled and frozen up to a month ahead. The ramekins can be filled, covered, and refrigerated for up to 24 hours, then baked straight from the refrigerator with 1 to 2 extra minutes. What does not work is baking the cakes ahead and reheating them later: the center firms as it cools, and reheating gives a warm, fudgy middle rather than a flowing one. Assemble ahead, bake at the last minute, and the cakes behave exactly as if made start to finish that evening.
Why didn’t my lava cake have a molten center? The usual cause is simply time — even 2 extra minutes in the oven will set the middle, especially in a hot-running oven. The other common cause is a truffle that was not frozen firm, or one left peeking out of the batter, so the ganache melted into the crumb and baked along with it instead of staying in the center as its own pool. Make sure each truffle is frozen solid, fully covered with batter, and bake in a fully preheated oven so the edges set quickly around it. A test cake on your first batch is the surest way to calibrate.
Can I make these without ramekins or without food coloring? Both, with small adjustments. Without ramekins, use a buttered, cocoa-dusted muffin tin and half-size truffles, baking 8 to 10 minutes; the cakes will be smaller and a little fussier to unmold, so let them rest 2 minutes and loosen them gently. Without food coloring, the batter bakes up a reddish-brown chocolate cake — the vinegar and cocoa give a faint rust tone, but not true red velvet red. The flavor is identical, so it becomes a chocolate lava cake, which is hardly a hardship. Beet powder can add a muted natural red, though it reads more pink-brown than classic red.

Recipe Card
Red Velvet Lava Cakes
- Prep Time: 25 minutes (PT25M)
- Cook Time: 12 minutes (PT12M)
- Total Time: 1 hour 35 minutes (PT1H35M)
- Servings: 4 servings (4 individual cakes)
- Calories: 680 kcal per serving (estimated)
Individual red velvet cakes baked in ramekins at 425 degrees F (220 degrees C) around frozen chocolate ganache truffles, so the centers stay molten and flow when cut. Served warm with cream cheese whipped cream.
Nutrition (estimated): 680 kcal per serving (estimated), 72 g carbohydrates, 9 g protein, 42 g fat, 4 g fiber, 48 g sugar, 240 mg sodium. Nutrition is estimated and will vary with the chocolate used, the topping served, and any variations or substitutions.
How do I know when the lava cakes are done without cutting one open?
Watch the top and trust the jiggle. At 11 to 13 minutes at 425 degrees F (220 degrees C), the outer ring of the cake should look set, dry, and matte, while a circle about 1 inch (2.5 cm) wide in the very center still looks soft and trembles gently when you nudge the baking sheet. If the whole surface ripples, the cakes need another minute; if the center has puffed up firm and high, they are past lava and into regular cake territory. The frozen ganache center widens your window considerably, so a cake that looks right on top will almost always flow inside.
Can I make red velvet lava cakes ahead of time?
Yes — in stages, which is the easiest way to serve them at a dinner. The ganache truffles can be rolled and frozen up to a month ahead. The ramekins can be filled, covered, and refrigerated for up to 24 hours, then baked straight from the refrigerator with 1 to 2 extra minutes. What does not work is baking the cakes ahead and reheating them later: the center firms as it cools, and reheating gives a warm, fudgy middle rather than a flowing one. Assemble ahead, bake at the last minute, and the cakes behave exactly as if made start to finish that evening.
Why didn’t my lava cake have a molten center?
The usual cause is simply time — even 2 extra minutes in the oven will set the middle, especially in a hot-running oven. The other common cause is a truffle that was not frozen firm, or one left peeking out of the batter, so the ganache melted into the crumb and baked along with it instead of staying in the center as its own pool. Make sure each truffle is frozen solid, fully covered with batter, and bake in a fully preheated oven so the edges set quickly around it. A test cake on your first batch is the surest way to calibrate.
Can I make these without ramekins or without food coloring?
Both, with small adjustments. Without ramekins, use a buttered, cocoa-dusted muffin tin and half-size truffles, baking 8 to 10 minutes; the cakes will be smaller and a little fussier to unmold, so let them rest 2 minutes and loosen them gently. Without food coloring, the batter bakes up a reddish-brown chocolate cake — the vinegar and cocoa give a faint rust tone, but not true red velvet red. The flavor is identical, so it becomes a chocolate lava cake, which is hardly a hardship. Beet powder can add a muted natural red, though it reads more pink-brown than classic red.

Hi, I’m Emma! I’m the cook and recipe developer behind Sizzle & Sage. From my sunny home kitchen, I share easy, flavor-packed recipes for real life — quick breakfasts, cozy weeknight dinners, and simple bakes anyone can make. Pull up a chair and stay a while!