Nashville Hot Chicken Tenders
Nashville hot chicken has a very clear promise: shatteringly crisp fried chicken, a fiery red oil brushed over every craggy edge, soft white bread underneath to catch the drips, and cool pickle chips on top to cut through the heat. These Nashville Hot Chicken Tenders bring that whole experience home in a size that is easier to fry, easier to share, and quicker to cook than bone-in pieces. Tenders are naturally portioned, they brine fast, and they fry up in minutes with a thick, crunchy coating on all sides.
The method here is the classic build, kept in the order that makes it work. First, the tenders soak in a seasoned buttermilk brine with hot sauce and a splash of pickle brine, which seasons the chicken all the way through and keeps it juicy under the crust. Next comes a seasoned flour dredge, pressed on firmly and rested briefly so the coating clings instead of slipping off in the oil. Then a short fry at 350 degrees F (175 degrees C) until deep golden, and finally the signature finish: hot frying oil whisked with cayenne, brown sugar, paprika, and garlic, brushed generously over the hot chicken so the spice blooms and the crust turns a deep, glossy red.
Heat is part of the point, but it should never be the whole story. The brown sugar in the hot oil paste rounds the cayenne, the paprika adds color and warmth, and the bread and pickles are not decoration — they are built into the serving for a reason. Set the plate down with extra pickles, let everyone choose their own pace, and expect the pile to move fast. This is a dinner that feels like an occasion without asking for anything complicated.
Why You'll Love This Recipe
- Crisp, craggy coating that stays put. A firm press into seasoned flour, a spoonful of brine worked into the dredge for extra texture, and a short rest before frying give you a thick crust with plenty of ridges for the hot oil to settle into.
- Juicy chicken, seasoned all the way through. The buttermilk brine does more than tenderize. Salt, hot sauce, and pickle brine season the tenders themselves, so the flavor is not only in the coating.
- Real Nashville heat, fully adjustable. The cayenne lives in the hot oil paste at the end, which means you control the heat after the chicken is cooked. Use less for a warm glow, more for the full fiery version — the frying stays exactly the same.
- Faster than bone-in hot chicken. Tenders need only 30 minutes of brining to make a difference and about 3 to 4 minutes per side in the oil. No long fry times, no guessing around a bone.
- The classic serving, bread and pickles included. White bread soaks up the spiced oil underneath each tender, and pickle chips bring the bright, cool contrast that makes the next bite taste as good as the first.
- Built for sharing. A platter of tenders is easy to pass, easy to portion, and easy to scale. Double the dredge and hot oil paste and fry in batches for a bigger crowd without changing the method.

Ingredients
For the buttermilk brine
- 1 1/2 pounds (680 g) chicken tenders, white tendon removed if you like
- 1 cup (240 ml) buttermilk, shaken well
- 2 tablespoons pickle brine, from the pickle jar
- 1 tablespoon hot sauce, such as a Louisiana-style cayenne sauce
- 1 teaspoon fine sea salt
- 1/2 teaspoon garlic powder
- 1/2 teaspoon smoked paprika
- 1/2 teaspoon freshly ground black pepper
For the seasoned flour dredge
- 1 1/2 cups (190 g) all-purpose flour, spooned and leveled
- 1/4 cup (30 g) cornstarch
- 1 1/2 teaspoons fine sea salt
- 1 teaspoon paprika
- 1 teaspoon garlic powder
- 1 teaspoon onion powder
- 1/2 teaspoon cayenne pepper
- 1/2 teaspoon freshly ground black pepper
- 1/2 teaspoon dry mustard powder
- 2 tablespoons of the buttermilk brine, for working into the flour
For the hot oil paste
- 1/2 cup (120 ml) hot frying oil, reserved from the skillet
- 2 tablespoons cayenne pepper (see Tips for heat levels)
- 1 tablespoon light brown sugar, packed
- 1 teaspoon paprika
- 1/2 teaspoon garlic powder
- 1/2 teaspoon dry mustard powder
- 1/2 teaspoon fine sea salt
For frying and serving
- 2 to 3 cups (480 to 720 ml) neutral oil with a high smoke point, such as peanut, canola, or vegetable oil, for frying
- 8 slices soft white sandwich bread
- Dill pickle chips, for serving, plus extra for the table
- Coleslaw, ranch dressing, or honey, for serving (optional)
Why these ingredients matter
Chicken tenders. Tenders are the small, naturally tender strip from the breast, and their even shape is exactly why they suit this recipe. They brine quickly, dredge evenly, and fry in a short, predictable time, so a whole batch finishes at the same pace. If your tenders have the tough white tendon showing at one end, pull it out with a paper towel for grip or trim it away — it takes a minute and makes every bite clean.
Buttermilk. Buttermilk is the base of the brine for two reasons: its gentle acidity tenderizes the surface of the chicken, and its thickness clings to the tenders so the flour has something to hold onto. Shake the carton well before measuring, because buttermilk separates as it sits. Full-fat buttermilk coats best, but low-fat works in this recipe as well.
Pickle brine. Two tablespoons of the liquid from the pickle jar is a small amount with a clear job. It adds salt and a bright acidity that echoes the pickles served on top, and it seasons the chicken in a way plain salt alone does not. Use brine from dill pickles rather than sweet pickles, so the flavor stays sharp and savory.
Hot sauce in the brine. The hot sauce starts the heat early and adds vinegar tang underneath the cayenne finish. It will not make the finished tenders overwhelmingly spicy on its own — most of the signature heat comes later — but it keeps the chicken itself from tasting plain beneath a fiery crust.
All-purpose flour. Flour builds the main body of the crust. Pressed onto the brined tenders and rested, it hydrates into a coating that fries up sturdy and crisp. Measure it spooned and leveled if you can; a packed cup makes a heavier, gummier dredge.
Cornstarch. A quarter cup of cornstarch mixed into the flour is the quiet crispness booster. Cornstarch fries up lighter and crisper than flour alone and helps the crust keep its crunch after the hot oil is brushed on. Do not swap it all for flour if you can help it — the texture difference is noticeable.
Cayenne pepper. Cayenne is the heat and much of the color in the hot oil paste. Two tablespoons gives an assertive, classic hot level with real warmth that builds. Because it goes on at the very end, whisked into hot oil with sugar and spices, its flavor blooms instead of tasting raw. Fresh cayenne matters: a jar that has sat open for years will taste dusty and less bright.
Light brown sugar. Brown sugar is what keeps the heat rounded instead of harsh. One tablespoon in the paste adds a gentle sweetness and helps the spice mixture cling in an even, glossy layer. It also encourages the deep red-brown color that makes hot chicken look the way it should. Pack it lightly when you measure.
Paprika. Paprika appears in the brine, the dredge, and the paste, each time for color and low, warm flavor rather than heat. Regular sweet paprika is the right choice here; smoked paprika is used in a smaller amount in the brine only, where its smokiness sits in the background.
Garlic powder, onion powder, and mustard powder. These three fill out the savory middle of the seasoning so the crust tastes seasoned, not just salty and hot. Garlic and onion powders distribute evenly through flour in a way fresh garlic never could, and a little dry mustard adds a subtle tang that sharpens everything around it without reading as mustard.
Fine sea salt. Salt appears in every layer — brine, dredge, and paste — because each layer needs its own seasoning. Fine salt dissolves in the brine and disperses through the flour without gritty pockets. If you use table salt instead, keep the same amounts by volume for the dredge and paste, and expect a slightly sharper saltiness.
Neutral frying oil. The oil has two jobs: frying the chicken and becoming the base of the hot oil paste. Choose a neutral, high-smoke-point oil — peanut, canola, or vegetable — so it fries clean at 350 degrees F (175 degrees C) and carries the cayenne without adding its own strong flavor. You will reserve half a cup of it, hot and seasoned from the fry, which is why the paste tastes like the chicken itself.
White bread and pickle chips. Soft white sandwich bread is the traditional plate liner, and it earns its place: it catches the spiced oil that runs off the tenders, turning the slice underneath into one of the best bites on the plate. Dill pickle chips cool and brighten each bite. Serve extra of both — they run out before the chicken does.
Instructions
- Mix the brine. Whisk the buttermilk, pickle brine, hot sauce, salt, garlic powder, smoked paprika, and black pepper together in a medium bowl until the salt dissolves and the mixture looks evenly speckled. It should smell tangy and savory. Mixing the brine before the chicken goes in means every tender gets the same seasoning instead of a salty patch here and a plain patch there.
- Brine the tenders. Add the chicken tenders to the brine and turn them a few times so each piece is fully coated and submerged as much as the bowl allows. Cover and refrigerate for at least 30 minutes and up to 8 hours. Thirty minutes genuinely makes a difference for tenders this size; much beyond 8 hours, the acidity can start to make the surface texture mushy, so set a limit and stick to it.
- Set up the dredge. While the chicken brines, whisk the flour, cornstarch, salt, paprika, garlic powder, onion powder, cayenne, black pepper, and mustard powder in a wide, shallow dish. Drizzle in 2 tablespoons of brine from the chicken bowl and rub it into the flour with your fingertips until small, rough clumps form throughout. Those clumps are deliberate — they fry into the craggy bits that make the crust interesting and give the hot oil more surface to cling to.
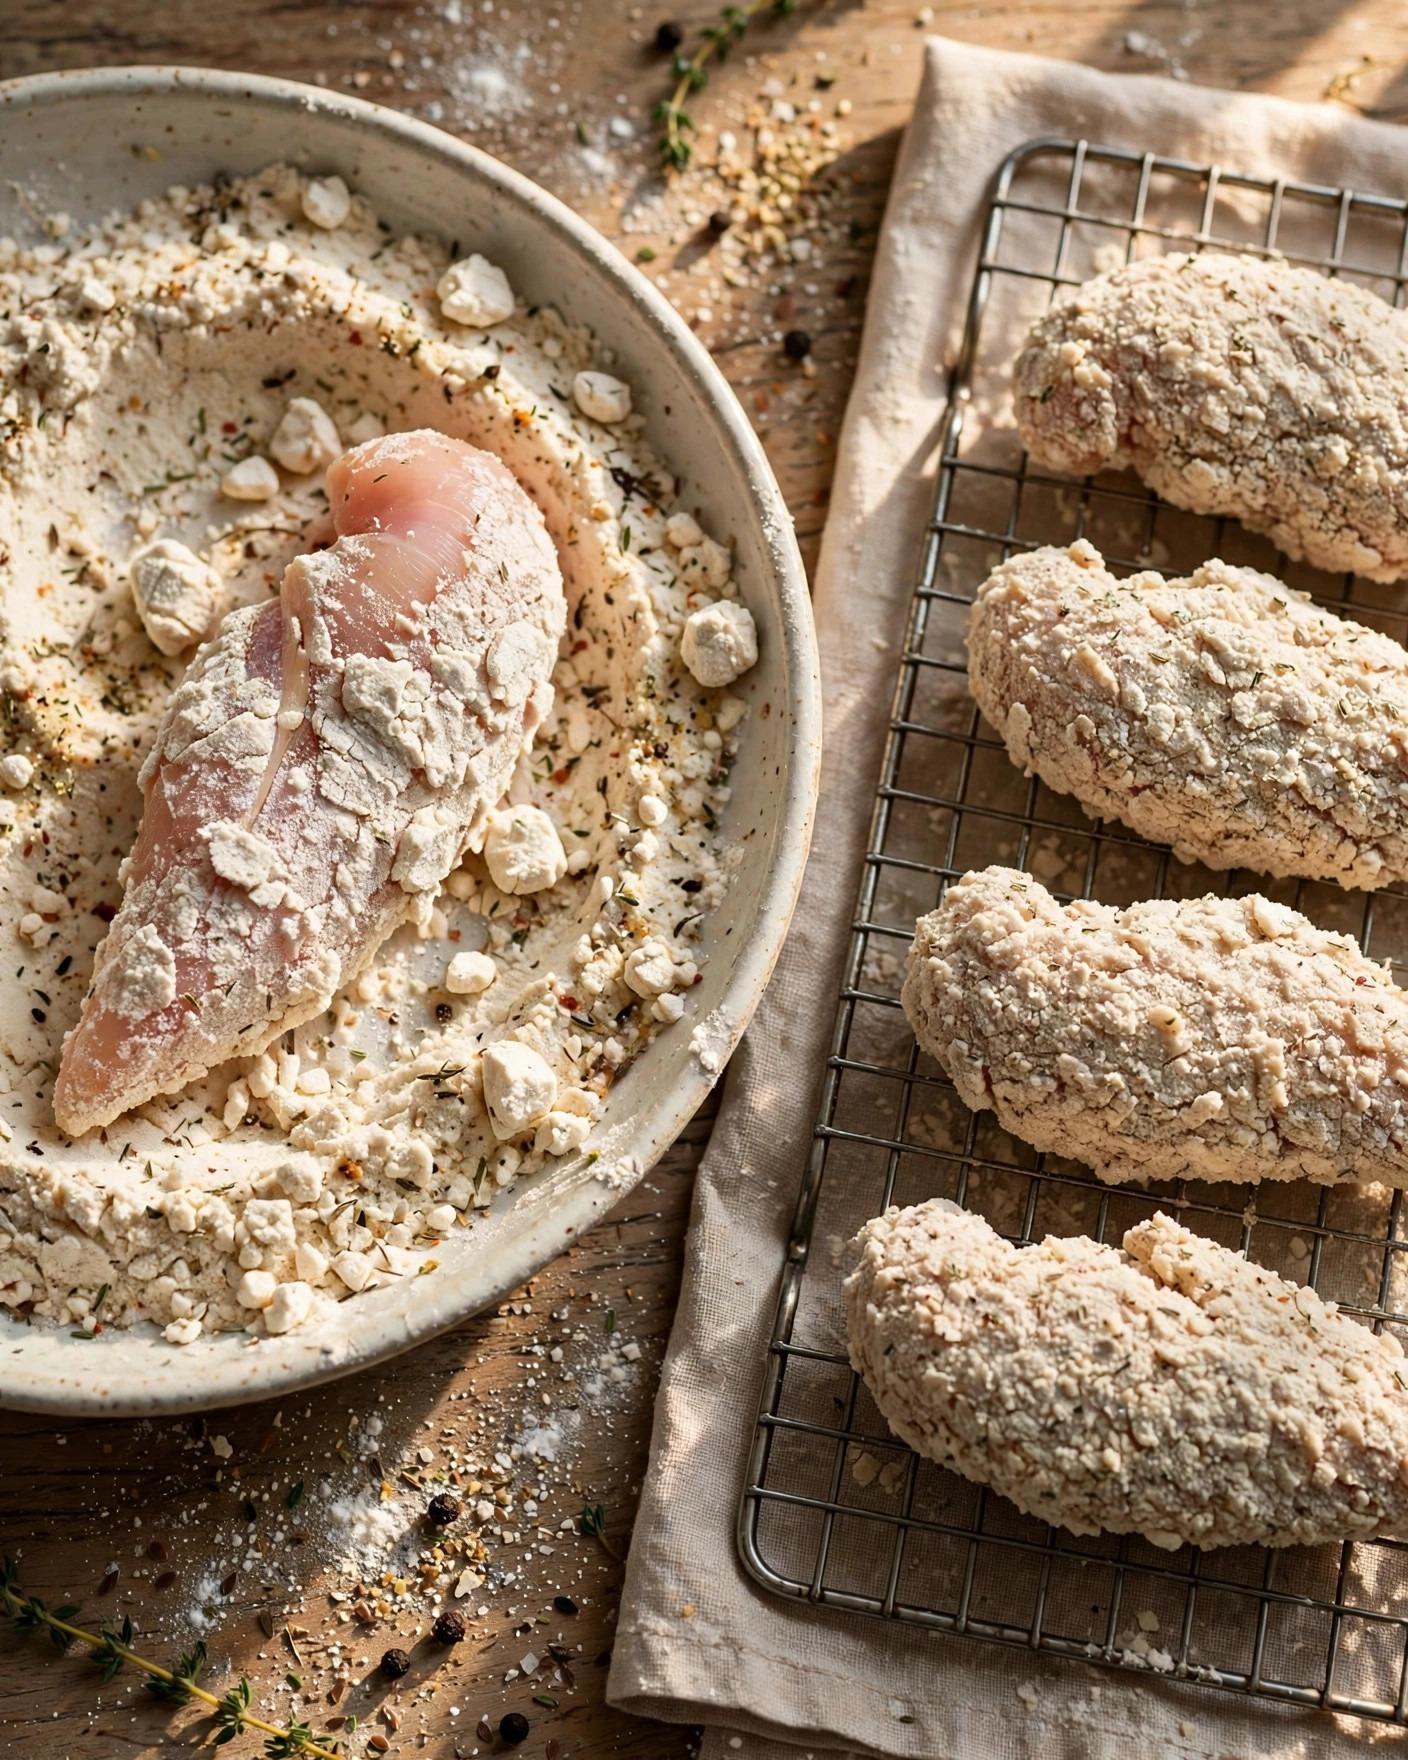
- Dredge the tenders. Lift one tender at a time from the brine, let the excess drip back into the bowl for a few seconds, and lay it in the flour mixture. Scoop flour over the top and press firmly with your palm so the coating packs onto every side, including the edges. Turn and press again. Set each coated tender on a wire rack or a clean plate in a single layer, and work through the whole batch before you heat the oil.
- Rest the coated chicken. Let the dredged tenders rest at room temperature for 10 to 15 minutes while you prepare the oil. This short rest hydrates the flour into a paste-like layer that bonds to the chicken, and it is the simplest protection against coating that slides off in the fryer. The surface should look matte and slightly damp in places when the rest is done.
- Heat the oil safely. Pour neutral oil into a large, heavy cast iron skillet or Dutch oven to a depth of about 1/2 inch (1.3 cm) — enough to come roughly halfway up the tenders. Set it over medium-high heat and heat to 350 degrees F (175 degrees C), checking with a clip-on or instant-read thermometer. Keep the pan handle turned inward, keep a lid nearby, and never leave heating oil unattended. If you do not have a thermometer, the oil is close when a pinch of flour sizzles briskly on contact, but a thermometer removes the guesswork and is strongly recommended.

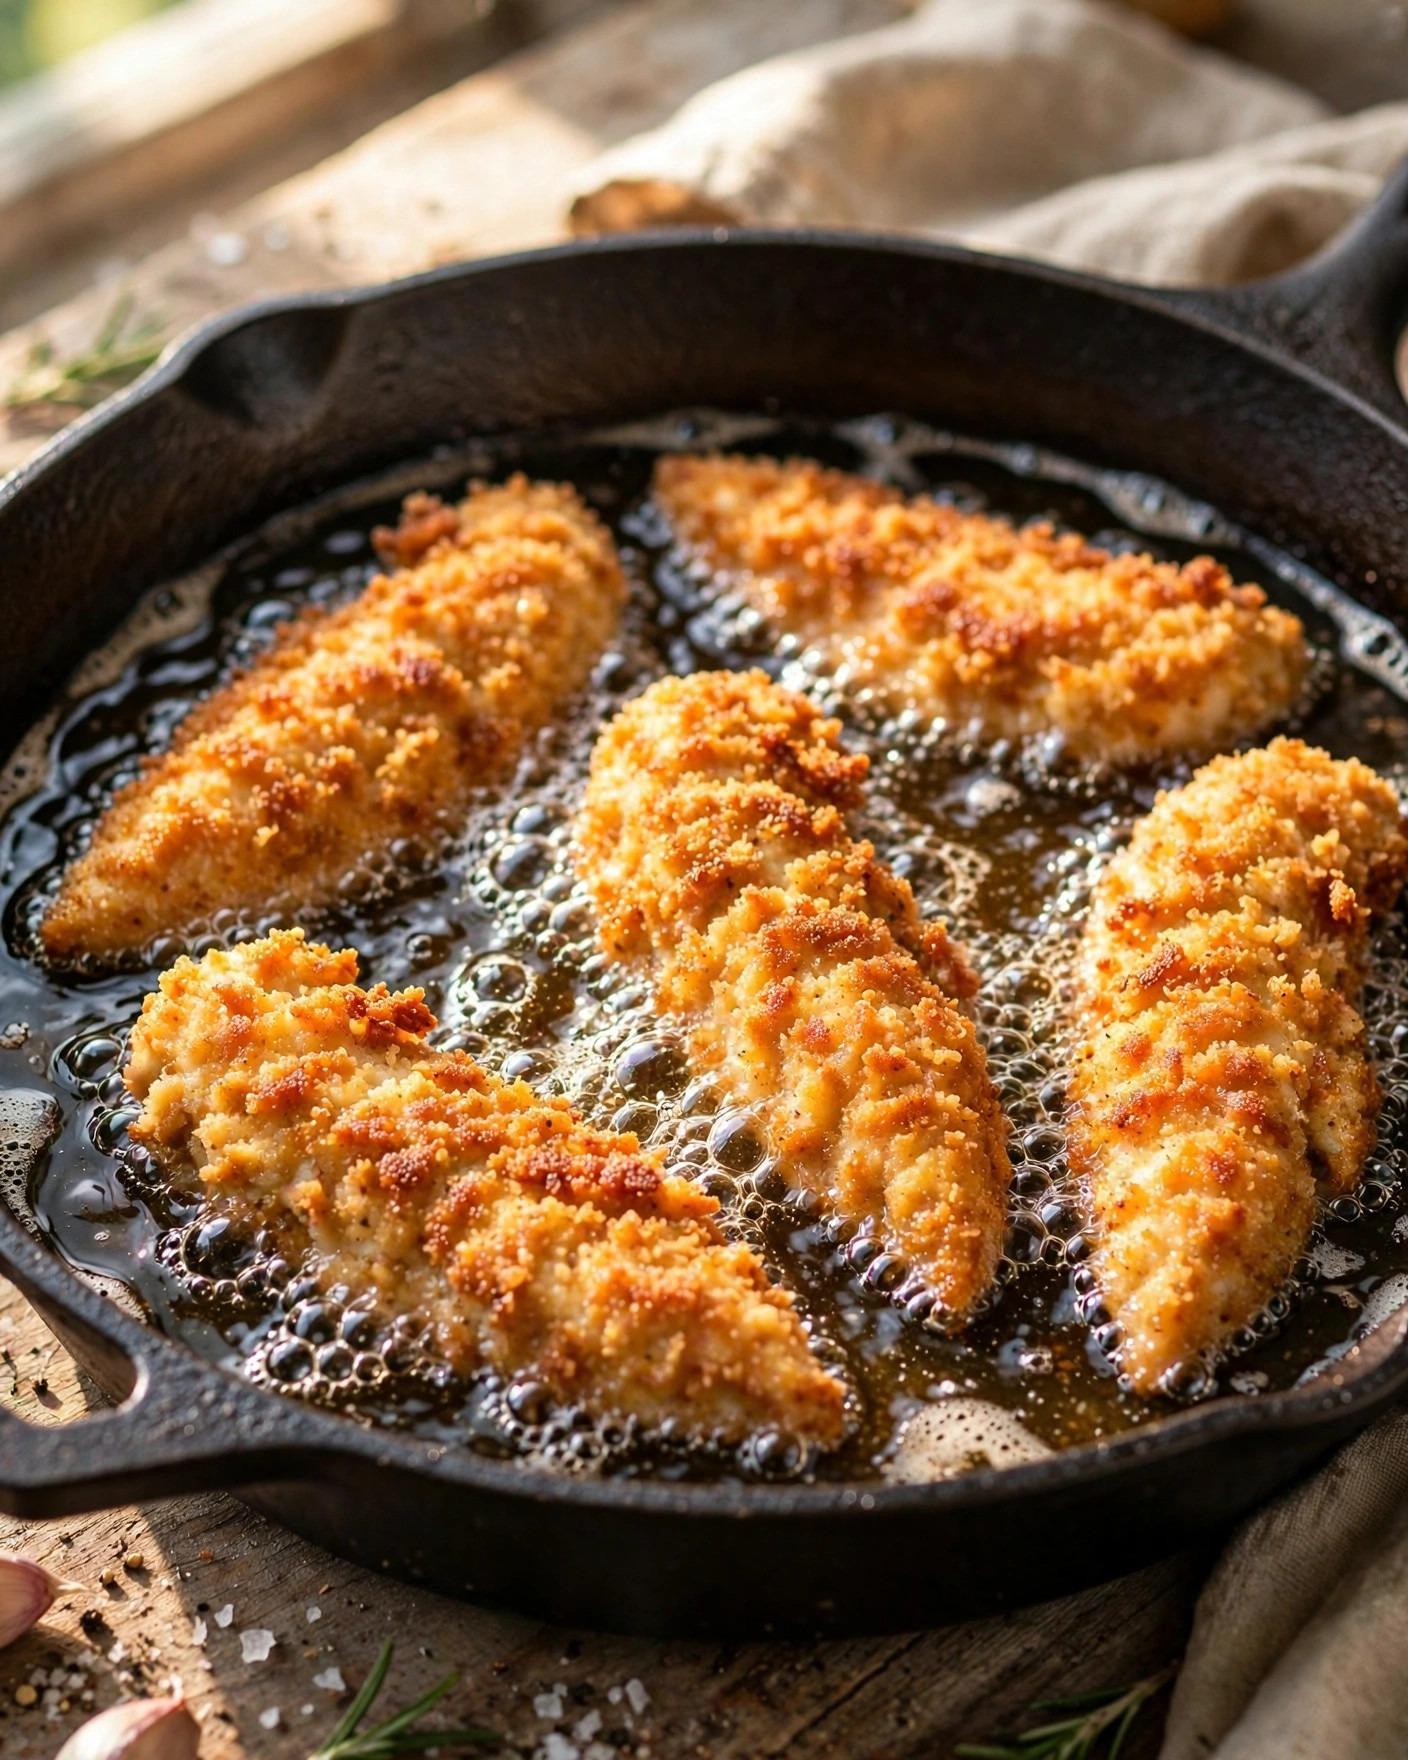
- Fry the first batch. Using tongs, lay 4 to 5 tenders into the hot oil away from you, so any splash falls away from your hand. Do not crowd the pan — the tenders should sit in one layer with a little space between them, or the oil temperature drops and the crust steams instead of crisping. Fry for 3 to 4 minutes on the first side, until the underside is deep golden and the coating looks set and firm.
- Turn, finish, and check the temperature. Turn each tender carefully with tongs and fry for 2 to 3 minutes more, until the second side is equally deep golden and crisp. Transfer one of the thickest tenders to a plate and check that the internal temperature reaches 165 degrees F (74 degrees C) on an instant-read thermometer inserted into the thickest part; the rest of the batch is done when the coating is crisp, the juices run clear, and that temperature is met. Move the finished tenders to a clean wire rack set over a baking sheet — a rack keeps the underside crisp, while a paper-towel-lined plate can trap steam and soften it.
- Fry the remaining batches and reserve the oil. Let the oil return to 350 degrees F (175 degrees C) between batches, skim out any loose dark crumbs with a slotted spoon so they do not burn, and repeat with the remaining tenders, adjusting the heat as needed to hold the temperature. When the last batch is out, carefully ladle 1/2 cup (120 ml) of the hot frying oil into a heatproof measuring cup or bowl. This seasoned oil is the base of the paste, so take it from the pan while it is still hot.
- Whisk the hot oil paste. Add the cayenne, brown sugar, paprika, garlic powder, mustard powder, and salt to the hot oil and whisk immediately until the sugar dissolves and the mixture looks smooth, glossy, and deep red. It will bubble gently on contact — that brief bloom in hot oil is what wakes up the cayenne and takes away any raw spice taste. Work promptly and keep the paste warm; if it cools and thickens while you plate, a quick whisk over the warm pan loosens it again.
- Brush the tenders generously. While the tenders are still hot on the rack, brush the hot oil paste over every piece, top and sides, using a pastry brush and turning once if you want both sides coated. Be thorough in the crags and ridges, where the paste settles best, but work with a light enough hand that the crust stays crisp underneath — a generous brush coat, not a soak. If you prefer, you can spoon the paste over instead, letting the excess drip back through the rack.
- Serve the classic way. Line plates or a platter with the white bread slices and arrange the tenders directly on top so the bread catches the spiced oil. Scatter plenty of pickle chips over and around the chicken, and bring the platter straight to the table with extra pickles, coleslaw, ranch, or a small dish of honey alongside for anyone who wants to tame the heat. Eat promptly, while the crust is at its crispest and the oil is still glossy.
Tips for Success
- Control the heat with the cayenne, not the method. The paste is your heat dial. For a mild version, use 2 teaspoons of cayenne and add an extra teaspoon of paprika for color. For the classic hot level written here, use the full 2 tablespoons. For extra-hot, go to 3 tablespoons and add a pinch more brown sugar to keep it balanced. Taste a drop of the paste on a spoon before brushing and adjust — once it is on the chicken, it does not come off.
- Hold the oil at 350 degrees F (175 degrees C). Oil that is too cool makes a greasy, pale crust that drinks up fat instead of crisping; oil that is too hot darkens the coating before the chicken cooks through. Check the temperature before each batch and give the oil a minute to recover between batches instead of rushing the next round in.
- Press the dredge on, then let it rest. A loose dusting of flour fries off. Pressing firmly and resting the coated tenders for 10 to 15 minutes are the two steps that keep the crust attached through frying and brushing. If a tender looks patchy after resting, press a little more flour onto the bare spot before it goes in the oil.
- Fry in batches and drain on a rack. Crowding drops the oil temperature and steams the coating. A wire rack over a baking sheet keeps air moving under the tenders so both sides stay crisp while you finish the rest of the batch and whisk the paste.
- Brush while everything is hot. The paste needs hot oil to bloom and hot chicken to cling to. If either cools down, the spices can taste gritty and the coating goes on unevenly. Have the paste ingredients measured and waiting beside the stove before the last batch comes out.
- Respect the oil. Fill the pan no more than halfway, add chicken away from you, keep water and wet utensils away from the hot oil, and never carry a pan of hot oil across the kitchen. Let used oil cool completely in the pan before straining it into a sealed container for disposal — never pour it down the drain and never move it while it is still hot.
Variations
- Milder, family-style tenders. Cut the cayenne in the hot oil paste to 2 teaspoons, keep the brown sugar at 1 tablespoon, and add 1 extra teaspoon of paprika so the tenders still finish with good color. The result is warm and flavorful with just a gentle tingle — the same crisp crust and classic serving, at a heat level most kids and heat-shy adults will happily eat.
- Extra-hot, for committed heat lovers. Raise the cayenne in the paste to 3 tablespoons, add 1/4 teaspoon of cayenne to the dredge as written plus a pinch of ground chipotle or a few shakes of a hotter hot sauce whisked into the paste, and keep the extra teaspoon of brown sugar from the Tips in mind to balance it. Warn the table, put out extra pickles and ranch, and keep drinks close.
- Hot honey tenders. Brush the tenders with the classic paste, then drizzle warm honey over the top just before serving, or set a small bowl of honey mixed with a pinch of cayenne on the table for dipping. Sweet against the cayenne heat is the most requested variation for a reason.
- Sandwich style. Serve one or two tenders on a soft bun or between two of the white bread slices with shredded lettuce, pickle chips, and a spoonful of coleslaw or ranch. The sandwich softens the heat slightly and turns a platter dinner into a hand-held one.
- Oven-finished, lighter coating. For a less rich version, use half the dredge, spray the coated tenders lightly with neutral oil, and bake on a rack at 425 degrees F (220 degrees C) for 14 to 18 minutes, turning once, until crisp and 165 degrees F (74 degrees C) inside, then brush with paste made from melted butter whisked with the same spices in place of frying oil. The crust will be thinner than the fried version, but the flavor profile stays true.
Storage
Hot chicken tenders are at their best within minutes of brushing, while the crust is crisp and the paste is still glossy. If you have leftovers, let them cool on the rack until no longer steaming, then refrigerate them in a single layer in an airtight container, with a piece of parchment between layers if you need to stack them, for up to 3 days. The coating will soften in the refrigerator — that is expected with any fried chicken — but the seasoning holds up well and the chicken stays flavorful.
To reheat, place the tenders on a rack over a baking sheet in a 400 degree F (200 degree C) oven for 8 to 10 minutes, or in an air fryer at 375 degrees F (190 degrees C) for 4 to 5 minutes, until hot throughout and crisped at the edges and the internal temperature is back to 165 degrees F (74 degrees C). Avoid the microwave for whole tenders if you can; it steams the crust soft. A short extra brush of warmed paste or a drizzle of hot honey after reheating brings the finish back to life. The white bread and pickles do not store with the chicken — serve fresh slices and chips each time. Cooked tenders can also be frozen, cooled and wrapped well, for up to 2 months; reheat from frozen in a 400 degree F (200 degree C) oven for 14 to 16 minutes, checking the temperature before serving.
FAQ
How spicy are these tenders, and how do I make them milder? As written, with 2 tablespoons of cayenne in the hot oil paste, they land at a firm, classic hot level — a real, building warmth rather than a dare. To make them milder, reduce the cayenne in the paste to 2 teaspoons and add an extra teaspoon of paprika for color, keeping the brown sugar the same. The frying method does not change at all, because the heat is applied at the end. That separation is the friendliest part of the recipe: you can brush half the batch mild and half hot from the same pan of fried tenders.
Can I make Nashville hot chicken tenders without buttermilk? Yes. Stir 1 tablespoon of lemon juice or white vinegar into 1 cup (240 ml) of whole milk and let it stand for 5 to 10 minutes until it thickens slightly and looks curdled at the edges, then use it exactly as the buttermilk, pickle brine and all. The texture will be a touch thinner, so let the excess drip off well before dredging. Plain kefir also works cup for cup. What you want to avoid is plain milk with nothing added — without the acidity, the brine tenderizes less and the coating clings less reliably.
Why did my coating fall off or turn out soggy? Coating usually lets go for one of three reasons: the excess brine was not allowed to drip off, the flour was dusted on instead of pressed, or the rest before frying was skipped. Fix all three and the crust holds. Sogginess has different causes — oil below 350 degrees F (175 degrees C), a crowded pan that steamed the pieces, or tenders drained on paper towels instead of a rack. Check the oil temperature before each batch, fry in a single uncrowded layer, and drain on a wire rack so steam can escape from underneath.
Can I air fry or bake these instead of frying in oil? You can, with a texture trade-off. Spray the dredged, rested tenders thoroughly with neutral oil and air fry at 400 degrees F (200 degrees C) for 10 to 12 minutes, turning once, or bake on a rack at 425 degrees F (220 degrees C) for 14 to 18 minutes, until crisp and 165 degrees F (74 degrees C) inside. For the finish, whisk the paste spices into 1/2 cup (120 ml) of melted butter or hot neutral oil instead of reserved frying oil, and brush as directed. The crust will be a little thinner and less craggy than the skillet version, but the brine, seasoning, and hot finish all carry over.

Recipe Card
Nashville Hot Chicken Tenders
- Prep Time: 25 minutes (PT25M)
- Cook Time: 20 minutes (PT20M)
- Total Time: 1 hour 15 minutes (PT1H15M)
- Servings: 4 servings (about 12 tenders)
- Calories: 520 kcal per serving (estimated)
Buttermilk-brined chicken tenders dredged in seasoned flour, fried at 350 degrees F (175 degrees C) until deep golden and crisp, then brushed with a cayenne and brown sugar hot oil paste and served on white bread with dill pickle chips. Total time includes a 30-minute brine.
Nutrition (estimated): 520 kcal per serving (estimated), 38 g carbohydrates, 36 g protein, 24 g fat, 2 g fiber, 6 g sugar, 980 mg sodium. Nutrition is estimated and will vary with how much coating and hot oil paste cling to each tender, how much oil is absorbed during frying, and any variations or substitutions.
How spicy are these tenders, and how do I make them milder?
As written, with 2 tablespoons of cayenne in the hot oil paste, they land at a firm, classic hot level — a real, building warmth rather than a dare. To make them milder, reduce the cayenne in the paste to 2 teaspoons and add an extra teaspoon of paprika for color, keeping the brown sugar the same. The frying method does not change at all, because the heat is applied at the end. That separation is the friendliest part of the recipe: you can brush half the batch mild and half hot from the same pan of fried tenders.
Can I make Nashville hot chicken tenders without buttermilk?
Yes. Stir 1 tablespoon of lemon juice or white vinegar into 1 cup (240 ml) of whole milk and let it stand for 5 to 10 minutes until it thickens slightly and looks curdled at the edges, then use it exactly as the buttermilk, pickle brine and all. The texture will be a touch thinner, so let the excess drip off well before dredging. Plain kefir also works cup for cup. What you want to avoid is plain milk with nothing added — without the acidity, the brine tenderizes less and the coating clings less reliably.
Why did my coating fall off or turn out soggy?
Coating usually lets go for one of three reasons: the excess brine was not allowed to drip off, the flour was dusted on instead of pressed, or the rest before frying was skipped. Fix all three and the crust holds. Sogginess has different causes — oil below 350 degrees F (175 degrees C), a crowded pan that steamed the pieces, or tenders drained on paper towels instead of a rack. Check the oil temperature before each batch, fry in a single uncrowded layer, and drain on a wire rack so steam can escape from underneath.
Can I air fry or bake these instead of frying in oil?
You can, with a texture trade-off. Spray the dredged, rested tenders thoroughly with neutral oil and air fry at 400 degrees F (200 degrees C) for 10 to 12 minutes, turning once, or bake on a rack at 425 degrees F (220 degrees C) for 14 to 18 minutes, until crisp and 165 degrees F (74 degrees C) inside. For the finish, whisk the paste spices into 1/2 cup (120 ml) of melted butter or hot neutral oil instead of reserved frying oil, and brush as directed. The crust will be a little thinner and less craggy than the skillet version, but the brine, seasoning, and hot finish all carry over.

Hi, I’m Emma! I’m the cook and recipe developer behind Sizzle & Sage. From my sunny home kitchen, I share easy, flavor-packed recipes for real life — quick breakfasts, cozy weeknight dinners, and simple bakes anyone can make. Pull up a chair and stay a while!